March 29, 2022

Fruit Chaat | Desi Style Fruit Salad (Indian street style fruit salad)


Share with friends and family
7 comments:

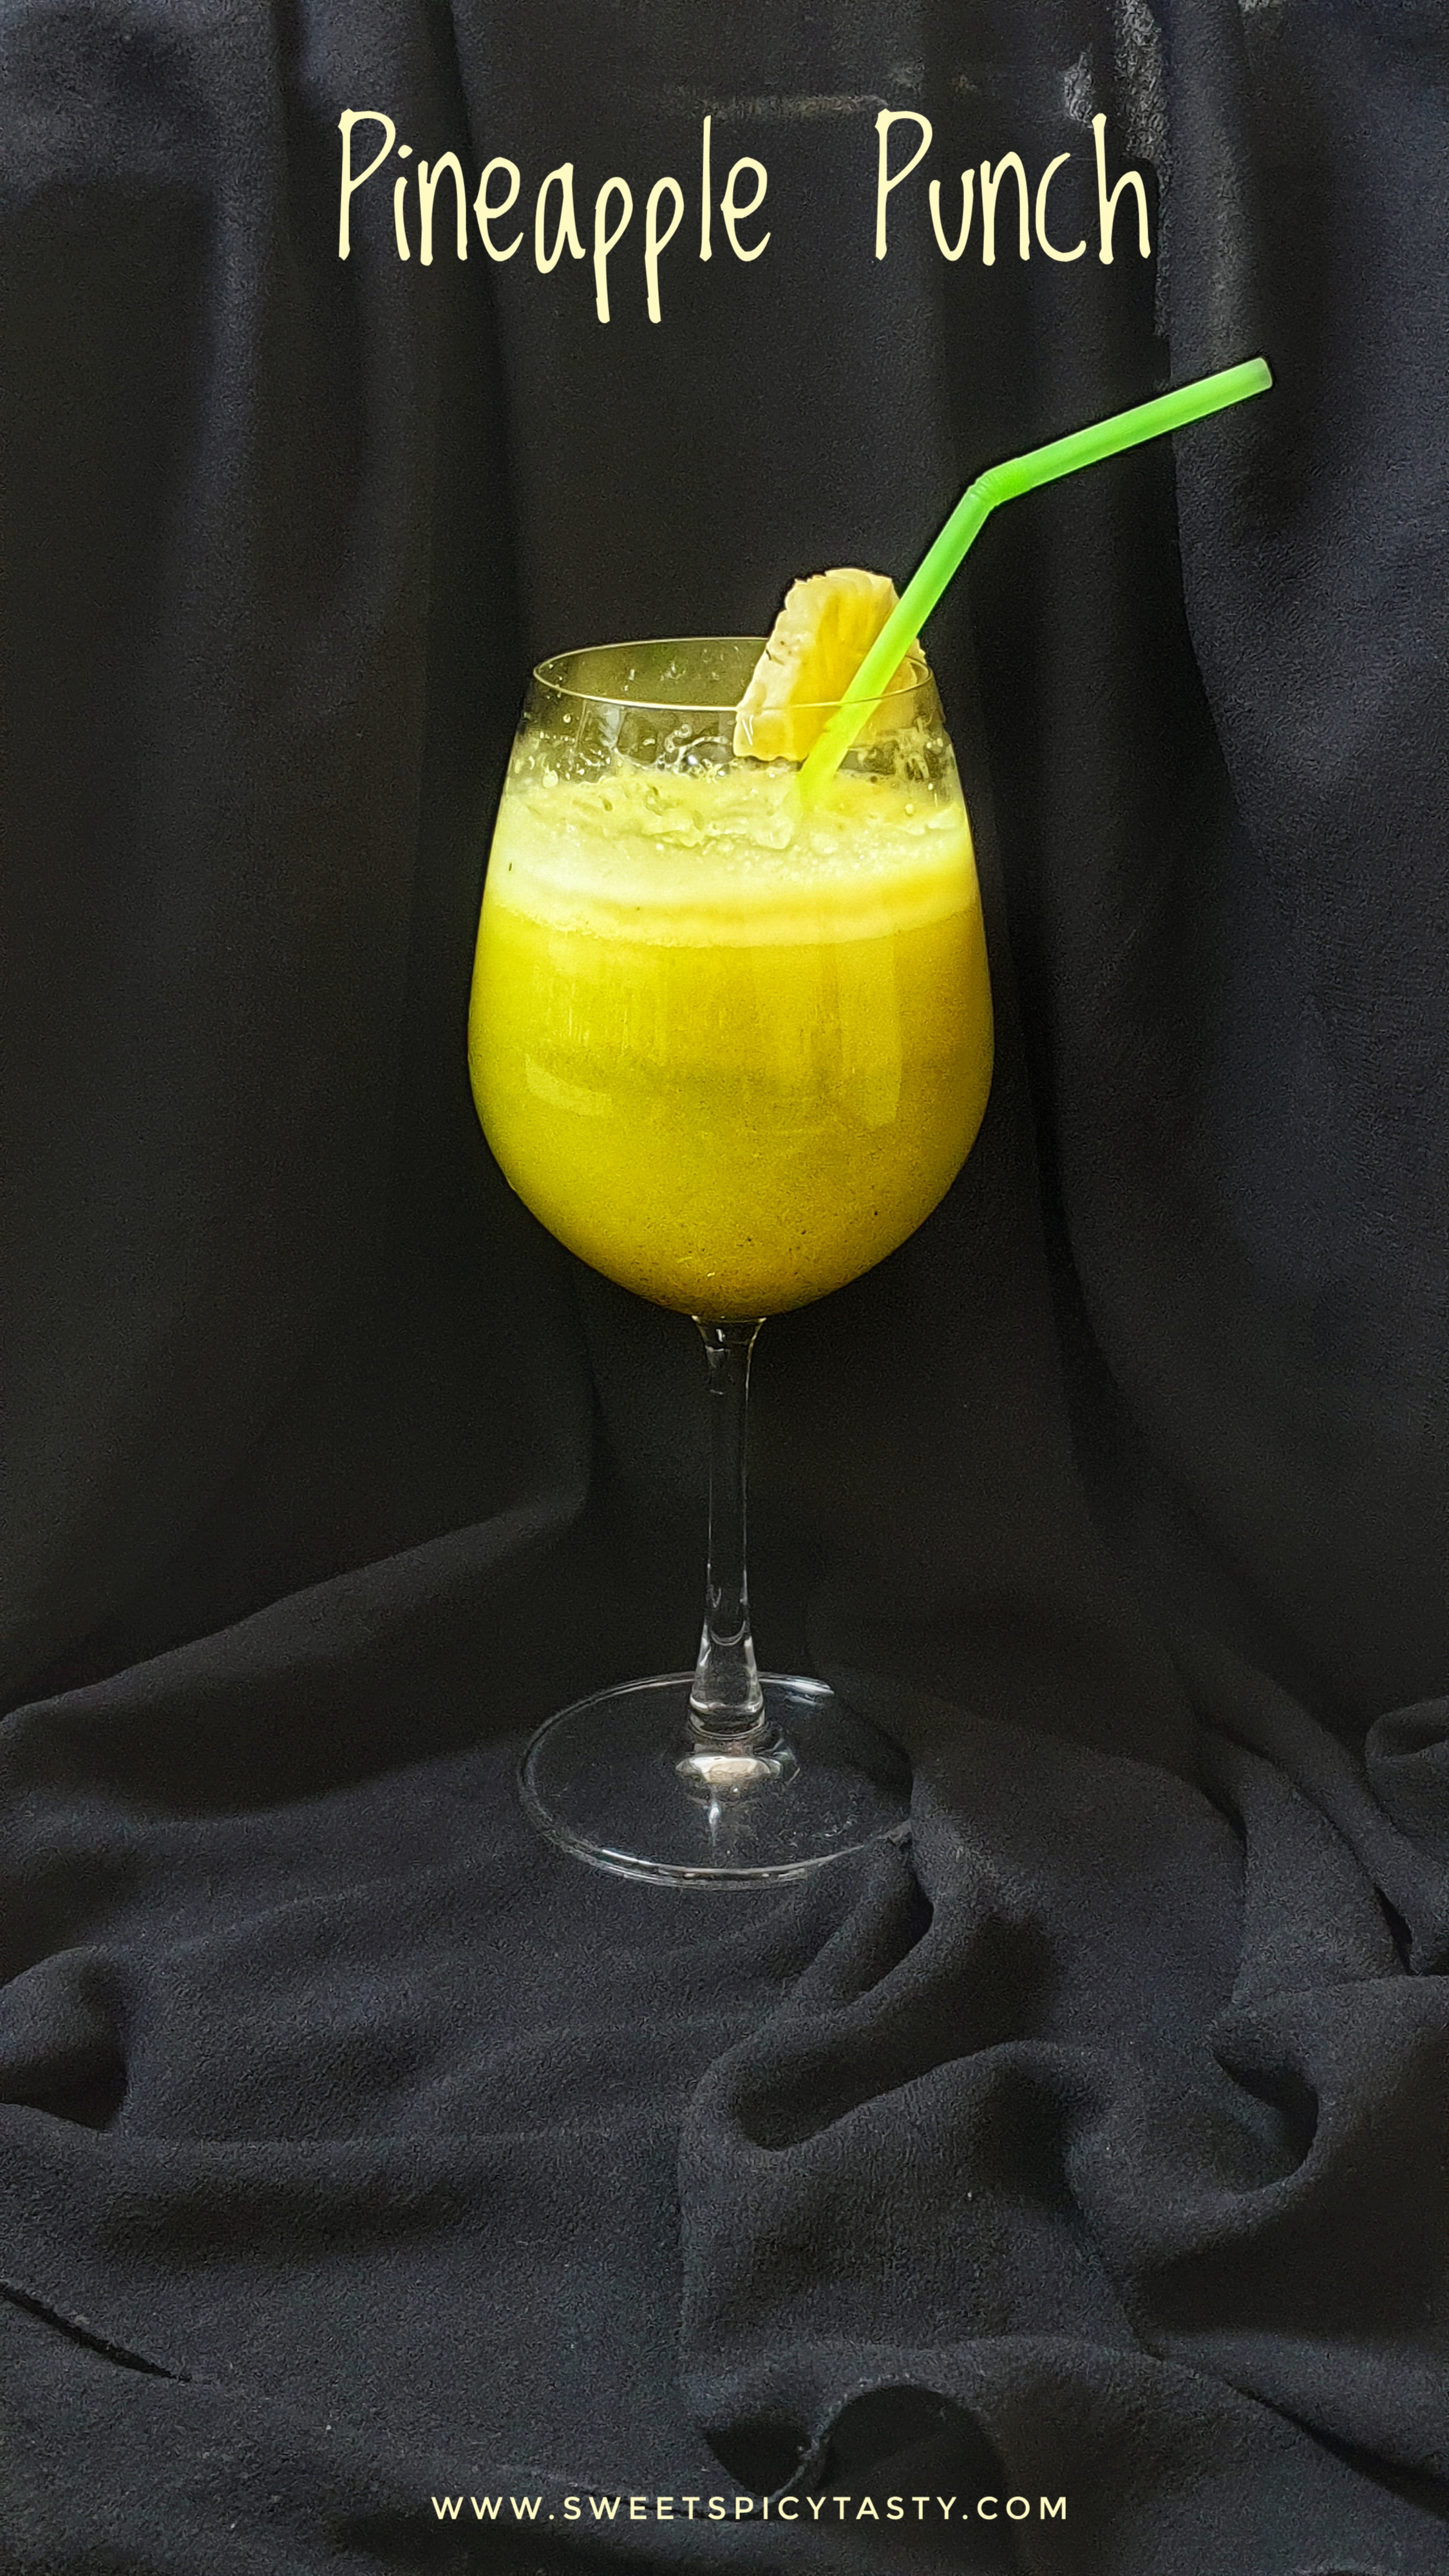
 In India as soon as summer starts you can find food carts  serving fresh lemon juice, masala chaas , freshly pressed sugar cane juice all along the highways and main streets . By standers stop by and quench their thirst by gulping down chilled glasses of these yummy cold drinks .

Along side these juice carts and crowded business districts , you will always find a cart load of fresh seasonal fruits and the vendor will chop a few fresh fruits, toss it in a bowl along with some delicious chat masala,pepper powder, cumin powder and a dash of lemon juice and serve it in a disposable bowl made from palm barks or thatched leaf bowl .

This fruit bowl is nothing fancy and is a truly rustic style or desi style of enjoying mixed fruits known as fruit plate or cut fruits or fruit chaat .

The fruits used are the very common ones like watermelon, grapes , apples ,oranges ,papayas and bananas . At times few pomegranate arils are topped up . 

Today's recipe ,I have tried to replicate the exact street style version and hence not added any exotic or costly fruits like strawberry ,kiwis ,blackberries etc . You are free to add all these fruits and many more depending on your liking and taste . The more the merrier.  


Preparation Time - 15 mins 
Cooking  Time - nil 
Complexity - easy
Serves - 2 to 3 

Ingredients 

2 oranges
2 apples
1/4 watermelon 
150 gms grapes (Green/black /assorted) 
1/2 tsp chat masala
1/4 tsp pepper powder 
1/4 tsp roasted jeera powder 
1 tsp lemon juice 
Sugar if needed 

Method 

  • Peel the oranges ,separate the slices and de seed them by making a vertical slit in the center of the orange slice. 
  • Chop the watermelon into small cubes and remove the seeds as much as you can. 
  • Wash the grapes thoroughly and keep ready .
  • Lastly peel the apples and cut them into cubes .Remember to chop the apples in the end as they tend to change color on cutting and we don't want that .
  • Add all these cut fruits to a wide mixing bowl, sprinkle the chat masala,  pepper powder,cumin powder ,lemon juice and give it a quick toss and serve immediately. 

Tip 

  • Before adding the spice powders, you can refrigerate the chopped fruits for 1 hr or so if you want to have it chilled. 
  • Remember to keep the whole apple in the fridge and chop it just before adding to the salad . 
  • If using bananas, chop that also towards the end as bananas turn mushy and soggy very soon and never refrigerate the bananas.

Pin it up 


March 28, 2022

Vellarikaai (cucumber ) Pachadi | Vellarikaai Kichadi (Kerala Sadhya Menu)


Share with friends and family
6 comments:

 Vellarikaai means cucumber in Tamil and Malayalam.  Any Tamil or Kerala festive spread is incomplete without this delicious and lipsmacking Vellarikaai Pachadi . Vellarikai pachadi is also known as Kichadi in many households .

This Kichadi shouldn't be confused with the North Indian Kichdi which is a rice + dal based preparation.  

In Tamil / Malayalam pachadi or kichadi is the term used to refer to raita and is totally different from the North Indian style raita . Coconut chilli paste is mixed with thick whisked yogurt /dahi and added to the chopped cucumbers .

Bring summer ,cucumbers if included in our regular menu is very beneficial as it cools down the body apt to the idiom "as cool as cucumber"

This pachadi is really very easy to make and can be paired with the regular menu . Vellarikai pachadi was part of our Sunday lunch which had Aloo Capsicum Sambar , Tomato Rasam , Brinjal Curry and some papads .

On a hot summer night ,I love to have this pachadi with hot fulkas .It is indeed filling and also light on the stomach and Sasmita's cucumber mint lassi will be an icing on the cake to end the day's meal.

Preparation Time - 10 mins
Cooking Time - 3 mins
Complexity - simple
Serves - 2 to 3 

Ingredients 
1 medium size cucumber 
2 cups thick yogurt /dahi
1/4 cup grated coconut 
1 green chilli 
1/2 tsp jeera 
Small piece ginger (skip for jain variant)
Salt to taste 
1/2 tsp oil
1/4 tsp mustard seeds 
Pinch of asafoetida 

Method 

  • Grind the coconut, green chilli,jeera,ginger to a fine paste using little water .
  • Chop the cucumber into medium sized cubes and cook it with salt and little water until the cucumbers turn soft and the water is all absorbed. Let it cool down.
  • Whisk the curd until it is thick and creamy. 
  • Add the ground coconut paste to the yogurt  along with the cooked cucumber and mix it . Add salt if required. 
  • Prepare a tempering using mustard seeds and asafoetida.  Pour it over the raita and enjoy with your meal. 

Pin me up !


March 23, 2022

Pineapple Punch - Tropical Drink


Share with friends and family
8 comments:

 Pineapple punch is a refreshing tropical drink and will remind you of a beach vacation instantly. 

Pineapple punch is made up of 5 ingredients Pineapple chunks , lemon juice , slice of ginger ,sugar and few mint leaves.  I have used all fresh ingredients to make this punch, but you can also use the concentrates or crushes available in the market . 

Pineapple being a summer fruit, I like to use it fresh and blend it to make this energizing cooler.


Pineapple punch is perfect for barbecue parties or any beach parties that you plan to host or enjoy this summer .

For those of you who like to have some fizz ,you may replace the water with club soda or ginger ale too . 

Pineapple punch can be made in advance and kept under refrigeration until serving..I prefer to

consume it on the same day as the freshness remains intact and the drink doesn't get the extra tartness from lemon and pineapple when left for an extra day.

If you are using canned pineapples make sure that you adjust the level of sugar while you prepare the punch as canned pineapples are soaked in sugar syrup which make them extra sweet .


Preparation Time - 5 mins
Cooking Time - nil 
Complexity - easy
Makes 3 to 4 glasses 

Ingredients 

3 cups of chopped pineapple 
Juice from 1/2 lemon
Few leaves of fresh mint
Small piece of ginger 
3 to 4 tbsp powdered sugar 
Pinch of salt
3 to 4 glasses chilled water
Few ice cubes 

Method

  • In a blender add the chopped pineapples ,ginger and mint leaves with half cup water and blend it nicely until all the pineapple chunks have  pureed .
  • Pass this puree through the strainer and add the lemon juice, salt,sugar as needed along with the water and stir it well .
  • Pour into serving glasses and top it with some ice cubes and also fresh mint if you like and serve .

Pin me !! 


March 22, 2022

Peanut Butter Cheese Sandwich


Share with friends and family
4 comments:

Does cheese and peanut butter sound like a weird combination to you ? Well,it may feel so; but peanut butter and cheese in a sandwich is a hit combo. 

The salt from the cheese and the sweetness from the peanut butter compliment each other so well that it is a heavenly experience when we take a bite . Especially when the sandwiches are grilled or toasted ,the extra crunch from the toasted bread makes it all the more delicious. 

Instead of just grilling cheese and peanut butter ,I have prepared a cheesy filling with some chopped capsicum,grated carrots, finely chopped tomatoes with some mild spices to make it healthy and sumptuous. 

These sandwiches are a perfect choice for packing in lunch boxes for school or even as a quick morning breakfast before we head out for the day .

Boiled sweet corn, grated paneer and chopped onions can also be added to the filling. 

To make it easy to spread the peanut butter ,make sure you thaw it well in advance if you have it refrigerated or use the easy spread versions of peanut butter which are now available in the market .  I recently came across a very nice brand of peanut butter that is buttery, nutty and smooth for a seamless spread on the bread slice. 

Preparation Time - 15 mins

Grilling / Roasting  Time - 3 mins per sandwich 

Complexity - simple

Makes - 3 sandwiches 

Ingredients

6 slices of bread (any variety that you like )
Peanut butter to spread 
Butter for roasting/Grilling 
3 cheese cubes 
1 carrot grated 
1 capsicum finely chopped 
1 tomato deseeded and finely chopped
Chilli flakes as needed 
1 tsp pepper powder
1 tbsp tomato sauce 
Finely chopped corriander 

Method 


  • In a wide mixing bowl, grate the cheese . Add all the chopped vegetables, chilli flakes , pepper powder and give it a gentle toss . Mix the tomato sauce gently . Keep it refrigerated if you are going to make it after a while or if it is too hot in your city . We don't want the cheese to melt before grilling the sandwiches. 
  • Heat up the grill pan .
  • Take a slice of bread ,spread the peanut butter on it and top it with the cheese filling.  Cover using the other slice of bread.
  • Apply some butter to the pan and roast the sandwich on both sides until crisp,golden brown and crunchy .
  • Let it cool for a minute and then slice it the way you like and serve hot !


Pin me up,will you ??


March 19, 2022

Black Grapes Lemonade | Black grapes Juice


Share with friends and family
5 comments:

 Freshly pressed black grape Juice at home is very hygienic and free of preservatives or artificial colors.

Black grapes have a lot of antioxidant properties and a good source of minerals and vitamins.Black grapes when consumed regularly help in lowering cholesterol and also aids digestion, thus improving metabolic activity of the body. 

Black Grape Juice tastes good with lemon ,ginger and even mint leaves added to it . Do check out the tasty Green Grapes Lemonade that I prepared a few days ago . You can add club soda for the extra zing instead of water. 

Making grape Juice at home is very easy . Only care to be taken is that you should wash the grapes  multiple times to remove the pesticides and any other impurities that may be on the fruit . 

We like grape Juice just with a hint of lemon or plain . Today's recipe is simple black grape Juice pressed with some lemon,sugar and salt for flavor. 

How to clean grapes ?

Remove the grapes from the stem and soak them in a huge bowl of water with a little salt for 10 mins . Any rotten grapes if you see,remove it before soaking. 

After 10 mins rinse it gently and discard the salt water and wash it 2 or 3 times in fresh water until the water appears clean . Now the grapes are ready for consumption. 


Preparation Time - 10 mins
Cooking Time - Nil 
Complexity - easy 
Makes 2 to 3 glasses 

Ingredients 

150 gms black grapes
1 tbsp lime juice 
1/4 tsp salt 
3 to 4 tbsp powdered sugar 
3 glasses chilled water 
Ice cubes 

Method

  • Wash the grapes properly and add it to a blender with 1/2 cup water.
  • Blend the grapes until it turns pulpy. Pass the grape pulp through a strainer and press the juice into a deep bowl.
  • Add lemon juice,sugar,salt ,remaining chilled water and stir it thoroughly. 
  • Add some ice cubes in the serving glass and pour the grape Juice. Serve chilled . You can garnish with fresh mint leaves if you like .


Pin me,relish me !! 


March 17, 2022

Vegetable Bonda | Mix Veg Bonda | Tarkari Bonda - Vegan Snack


Share with friends and family
7 comments:

 Vegetable Bonda or mix veg bonda is a very popular tea time snack in Southern India. Just as Batata Vada is a loved snack in Maharashtra, similarly Mix veg bonda is a sought after snack just as popular as Vazhakkai Bajji in south india especially in Tamil Nadu .

As the sun begins to set and the evening starts to feel young ,the small food carts  along the streets start preparing to handle the evening rush by dishing out piping hot vegetable bondas and serve them with a slightly runny coconut chutney . People love to enjoy the hot and spicy bondas with some tea as they catch up some good time with their near and dear ones .

Not only is it a famous as a street food,but it is also served at weddings too . A typical Tambrahm wedding would definitely serve these tasty bondas along with tasty flavored Sevai (string hoppers) and some rich and royal sweet dish on the evening prior to the wedding ,while the groom's family is welcomed by the bride's family .

When served for weddings, normally onion and garlic are omitted but on other days you can add them to the vegetable mixture to make it all the more tasty and delicious. 


Preparation Time - 30 to 40 mins
Frying time - 20 to 30 mins
Makes - 15 to 20 bondas 
Complexity - medium 

Ingredients 

For the filling 

5 medium sized potatoes 
3 small carrots finely chopped 
1/2 cup boiled green peas 
3 to 4 green chillies finely chopped 
10 to 12 cashews roughly broken
1 tsp ginger grated or finely chopped 
1/2 tsp turmeric 
Salt as needed 
Pinch of asafoetida 
Lots of chopped corriander
Handful of curry leaves chopped
1 small onion finely chopped (optional)
2 small cloves of garlic finely crushed /chopped (optional)

For the batter
1.5  cups besan /gram flour 
2 tbsp rice flour 
1 tsp red chilli powder
Pinch of asafoetida 
Salt as needed 

Oil to deep fry 

Method 


Preparing the Filling. 

  • Pressure cook the potatoes until soft . Let it cool before peeling the skin.  Boil the chopped carrots in an open pan until soft and well cooked. 
  • In a wide mixing bowl, mash the boiled potatoes roughly, add to it chopped green chilli, boiled carrots, peas, ginger, cashews, curry leaves,asafoetida, corriander, salt and turmeric and mix it well with your hands to form a smooth and nice filling . Adjust salt if needed . If you are using garlic or onion add them at this stage and mix it along with other ingredients. 
  • Pinch out lemon sized balls from the filling and make smooth round balls and keep aside .

Preparing the Batter

  • Place the oil in a deep wok / kadai for heating. 
  • In another mixing bowl,add the gram flour, rice flour, salt ,red chilli powder, asafoetida and make a batter of dropping consistency by adding water gradually . 
  • Incase ,you happen to add more water by mistake,add a little more gramflour to thicken the batter to get to the right consistency. 

Frying the Bondas 

  • Take vegetable mixture/filling dumpling and drop them into the batter carefully .
  • Coat each of the dumpling well with the gram flour batter and carefully drop it into the hot oil.
  • If you have a medium sized kadai, drop only 4 to 5 bondas at a time and never over crowd the frying pan. 
  • Slowly splash oil on the bondas and gently flip it over at regular intervals. 
  • Fry until the oil stops sizzling and hissing and the bondas appear crisp and golden brown.
  • Carefully drain it on an absorbent paper and serve hot with coconut chutney and filter coffee. 


Donot forget to pin me !!


March 16, 2022

Green Grapes Lemonade


Share with friends and family
7 comments:

 I am looking for healthy ways to keep my family energized and hydrated this summer.  Classic lemonade or Nimbu Paani is always ready in the fridge for a quick gulp ,but my latest love is this refreshing Green Grapes Lemonade. It is sweet as well as tangy and gives an instant enrrgy boost to the parched throat.

Making Grapes Lemonade at home is very easy ..you just need fresh grapes ,little lemon juice ,chilled water and some sugar depending on your sweetness tolerance level.

Grapes have 80% water content and a good source of vitamin C and vitamin K .  Grapes also contain some amount of Vitamin B6, potassium and manganese too . People who are diabetic need to exercise caution while consuming grapes as it may alter the level of sugar in the blood .

This year even though it's just early days of March, the heat is sweltering and throats are parched. A few minutes of going out is really tiring and makes one feel drained out and dehydrated . To beat the heat this year ,I am literally pressing fresh fruit juices / shakes on a daily basis . Some more healthy fresh fruit juices for you and your family : 

Classic Lemonade 

Ganga Jamuna  (Orange Mosambi Juice)

Watermelon Lemonade 

Grapes Gooseberry Cooler

Strawberry Milkshake 

Chikoo Milkshake 


Preparation Time - 10 mins
Cooking Time - nil
Complexity - easy 
Serves - 2 to 3 

Ingredients 

2 cups washed grapes 
Juice from 1/2 lemon
4 to 5 tbsp powdered sugar (adjust as per need)
3 glasses chilled water
Few ice cubes 

Method 

  • Wash the grapes thoroughly and put it in a blender and blend it . Strain it through a juice strainer and discard the pulp .
  • Add the chilled water ,sugar and lemon juice to the grapes extract and stir well .
  • Keep refrigerated until serving and top it with ice cubes while serving.

Pin me up !


March 15, 2022

Rose Thandai - Holi Special ( रोस ठंडाई)


Share with friends and family
7 comments:

  Thandai (ठंडाई) is a very special cold drink made in North India during Maha Shivratri and Holi .Thandai is also known by the name as Sardai .

Thandai is a milk based drink which comes in various flavors like kesar -badam , rose ,mango and the latest being Chocolate thandai . 

Various condiments ,dry fruits and spices are roasted and ground to a fine powder or paste which is then mixed in milk along with sugar in the right proportion and then served  chilled .


There are various ways in which thandai can be made and you can decide what goes into the thandai mixture depending on your likes .

I have kept the essence of fennel very mild as it would cut the taste of the rose flavor which is the Star of this thandai . Also,the condiments and spices used in this recipe will be easily available in everyone's kitchen and you can easily manage to prepare a lipsmacking thandai in no time. 

I have used concentrated rose syrup in my thandai as I didn't have an access to edible rose petals and I don't want to risk using any other rose petals. You can also add a spoon of gulkand while blending for added taste and flavor. Using sabja seeds or chia seeds is  purely optional. 


Preparation Time - 10 mins

Cooking Time - nil

Serves - 3 to 4 glasses

Complexity- easy 

Ingredients 

8 to 10 almonds / badam
7 to 8 pistas /pistachios
1/2 tsp fennel/saunf seeds 
2 cardamoms
Few pepper corns 
3 tablespoons rose syrup 
2 - 3 tbsp Sugar or as needed
3 cups of boiled and cooled milk 
Few strands of saffron
1 tsp chia / sabja seeds soaked in water 

Method 

  • In a pan dry roast the badam,pista , fennel, pepper ,cardamom until it feels warm. Cool it for a few minutes and make a fine powder in pulse mode . Don't run the blender for long as the nuts will release oil making the powder sticky.
  • In a juice jar ,add this thandai powder ,sugar and 1 cup milk and blend to a fine paste .
  • Add the remaining milk ,rose syrup and give it a quick blend .
  • Pour it into a jug and refrigerate until you serve. 

Serving suggestions 

Add 1/2 tsp of soaked sabja /chia seeds in a glass ,pour the thandai and top it with some chopped nuts and few saffron strands.

Pin me up 


March 14, 2022

Ammini Kozhukkattai | Steamed rice flour dumplings


Share with friends and family
10 comments:

Ammini Kozhukkattai,  mani Kozhukkattai is a steamed preparation using rice flour or rice batter . It is offered to lord Ganesha on Ganesh Chaturthi or on Sankashti as prasad. 

These ammani Kozhukkattais look very cute and pretty as the dough is rolled into small and tiny balls and steamed later to be tempered and sauteed in a special spice mix .

Generally ,after making the Modakam / Kozhukkattai, the balance dough is used to make the Mani Kozhukkattai without wastage . Kids love to have these ammini Kozhukkattai as it is fun to pop the small balls into the mouth one after another. 

We can prepare the ammani Kozhukkattais either using rice flour or by soaking the rice and then grinding it to batter . This batter is then cooked to form a dough which is then rolled out and steamed .

I prefer soaking the rice and then making the Kozhukkattais as I feel it turns out to be very soft and is fail proof.  


Soaking Time - 3 hrs 
Preparation Time - 45 mins
Steaming Time - 7 to 8 mins
Complexity - medium

Ingredients 

For the outer cover 
1 cup rice (regular cooking rice except basmati )
2 cups water 
Pinch of salt 
1 tsp oil 

Tempering and flavoring 
1/2 tbsp oil
1/2 tsp mustard seeds 
Few fresh curryleaves 
1 chilli finely chopped
Pinch of asafoetida 
1 tbsp curry powder 
2 tbsp fresh grated coconut 

Pre Preparation for the Rice flour dough
Wash and soak the rice in sufficient water for  3 to 4 hrs . I have used sona masuri which is used for day today cooking ..avoid using any variety of par boiled rice as it is never used for making prasad/offering to God .

Method 

Preparation of Rice flour Dough


  • Transfer the soaked rice to a blender with 2 cups of water and grind to a very fine paste. 
  • The batter will be runny and that is how it has to be.  Incase you happen  to add extra water ,donot worry ,it can be handled while cooking the dough .
  • Strain this rice flour batter through a strainer to remove any rice grits that may have remained while grinding .
  • To the strained batter add a pinch of salt and oil and mix well.
  • Heat a heavy bottomed fry pan or vessel and transfer this batter to it . Reduce the flame to medium.
  • Go on stirring the batter and you will observe the batter begins to thicken and starts forming lumps.
  • Keep stirring and breaking the lumps until all the batter is well cooked and it appears lumpy. 
  • To see if the batter is cooked well ,touch with your fingers and the dough must not stick on the fingers.  If it sticks continue cooking for 1 more min. 
  • Turn off the stove and close the dough with a lid . The dough will further get cooked on this heat
  •  Once the dough is warm enough to handle ,transfer it to a large plate ,grease your palm with some ghee or oil and knead the dough for 5 to 6 mins until you get a soft ,crack free and smooth dough . 
  • Pinch out a portion of the dough and you should be able to roll into a smooth ball without cracks . This is the right consistency of the dough . If you are getting cracks while rolling ,the sprinkle a little hot water and continue to knead further till you get the desired consistency.  
  • Cover this with a damp cotton cloth until use.

Preparing the Ammini Kozhukkattai 


  • Pinch out small balls from the dough and roll it until it is smooth and without cracks . 
  • Place all the tiny rolled out balls in a steamer and steam for 7 to 8 mins .
  • Heat oil in a thick bottom kadai and splutter the mustard seeds , fry the green chillies ,curry leaves and add asafoetida. 
  • Tip in the steamed rice balls ,top it with the curry powder and give a quick toss until the curry powder coats the amminis / rice balls wel . Adjust salt if needed . Close and cook for 1 min. This will help the flavors to absorb nicely. 
  • Lastly garnish with fresh coconut , mix it and offer to lord Ganesha .


Pin me up 


March 11, 2022

Classic Lemonade | Nimbu Paani | Lemon Sharbat


Share with friends and family
4 comments:

 Lemonade is a quintessential summer drink . Sour ,sweet and tart it is the best thirst quencher on a hot day . So get out your flip flops , sun glasses and sunscreen lotions to enjoy this cool and classic Lemonade 

As simple as it may sound, it is the best source of hydration for scorching heat . A cool and tall glass of lemonade is enough to give you instant energy as soon as you come from outside in summers. Loaded with vit C limbu paani is a power house of energy. 

Today we shall see the recipe for basic lemonade or nimbu paani a.k.a nimbu sharbat as we call it in India . Translating loosely Nimbu /Limbu is lemon in Hindi and Paani stands for water . Sharbat or Sarbat is a local term used for juices or fruit drinks .

We can very well make this lemonade in large quantity and refrigerate it in a glass pitcher. This helps the lemonade to remain cool while serving for a large crowd .

Add some lemon wedges in the pitcher while storing it.  The lemon wedges give a nice and refreshing taste to the drink .  There is another variation of lemon juice where we can add some mint leaves , black salt and pepper to make it a little spicy ,that recipe I shall share soon .

Lemons are available in plenty and very cheap during summers hence it makes it a very very affordable drink . In India,  we can find hand carts all over the highway and main roads ,where the sellers sell fresh lemonade during summer which is a boon for travelers and truck drivers  to beat the heat  during travel .


Preparation Time - 10 mins
Cooking Time - nil 
Complexity - easy 
Makes 3 to 4 glasses 

Ingredients 

2 to 3 medium sized lemons
1 cup powdered sugar 
1/2 tsp salt 
3 - 4 glasses chilled water
Some ice cubes 

Method 

  • Roll the lemons on a hard surface using your palm to soften the lemon or microwave the lemons for 10 sec .This will help in getting maximum juice from the lemons. 
  • In a wide  mixing vessel, squeeze out the lemons using a squeezer  .
  • Add the chilled water ,sugar and salt.  Mix it well . Adjust sugar if needed .
  • Pour into Serving glasses and top it with ice and serve chilled .

Chill Out & Pin me !! 


March 10, 2022

Potato Chips | Aloo Wafers


Share with friends and family
2 comments:

Potato chips / Potato Wafers needs no introduction . Children to adults, there would hardly be anyone who dislikes these paper thin crispy potato chips .

Finally this post is seeing the light of the day after being on my drafts for close to 1 year .I make chips frequently at home but  each time I would miss clicking the pics and this post which is very dear to me never made it to the blog..So this time I made sure I click and publish the post without fail.


A  bowl of potato chips makes up for a perfect company when we are on long drives,  outings, catching up on late night movies,nail biting cricket match or a quite evening with friends over a drink

Would you believe me if I said making potato chips at home was easy ? You  can make potato chips just like the ones we get at the fresh chips outlets where we can see the potato slices sizzling in hot oil before they turn crunchy and crispy.

 It indeed is easy..nonetheless it requires a little pre preparation, but the end result is just perfect to make us forget all the effort that has gone into the making of these crunchy delights .

You may also want to try out  (click the images below for recipes) 


Pin me up as you read the recipe !!


Ingredients
Potatoes - as many as you want
Oil for deep frying
1 tsp salt 
1 tsp red chilli powder 

Method


  • Wash and peel the potatoes.Soak the potatoes in water until you are ready to slice them.This step will prevent the potatoes from turning black. 
  • Using a slicer make thin slices of the potatoes and soak them in cold water for 15 mins. This helps in removing the starch from the potatoes and chips will be crisp and not turn brown while frying. 
  • Heat the oil in a pan and simultaneously take some potato slices out of water and dry them on a kitchen towel to remove excess water.
  • Once the oil is hot enough, drop the potato slices into the oil and fry until the oil stops hissing and the chips are crisp. 
  • Drain on an absorbent paper .
  • In a mixing bowl ,add these fried chips ,sprinkle some salt and chilli powder and give a lightly toss to mix it evenly. Store in a dry air tight container once the chips have cooled down.
Notes

  1. Washing the potato slices and soaking it in water is a very essential step . Do not Miss It . 
  2. If there is starch present in the potato, the chips will turn black very soon and will not get fried properly giving a weird taste.
  3. Ensure that after the slices are dropped in oil, reduce the flame to medium after 1-2 mins and keep stirring the fries occasionally to prevent sticking and even frying.
  4. Patience is the key to getting the perfect crisps . Do not increase the flame for quicker results, the potatoes take time to get crispier. Hastening will make the outer portion crisp while the inner will remain soft and you will end up with soggy fries. Fry only in medium flame and drain them after the sizzling sound stops completely.

March 09, 2022

Chawal Ke Pakore | Chawal k tikki | Rice Fritters (Vegan snack)


Share with friends and family
7 comments:

 Does the leftover rice from lunch or dinner make you go crazy ?

Today ,I shall share with you a very delicious and lipsmacking chawal k pakore or chawal k tikki recipe and trust me your family won't even notice the transformation of the rice and you won't have to worry abt wasting the left over Rice .

These pakoras made from rice can be served as appetisers for parties or get together . They are a  perfect crowd pleaser and everyone would love it . You can prepare rice in the morning if you are hosting a party in the evening or night as the rice has to be little dry and grainy before you can make the tikkis or pakodas . The dryness helps in getting crisp and crunchy pakodas ..soft and moist rice will make the pakodas mushy and we don't want that. 

 I am sure we all make the left over Rice turn into lemon rice, curd rice or fried rice and over time it certainly gets monotonous and boring for us as well as our dear family.

From now on you can make these yummy and lipsmacking chawal k pakode or  chawal k tikki and serve it with some tamarind dates chutney and piping hot tea or coffee . At times, I purposely keep some extra rice so I can make these delicious pakodas in the evening for tea time .

You can also add some veggies like shredded carrots , boiled sweet corn , finely chopped methi (Fenugreek) or even palak to make it even more tasty . I had some soaked sabudana (sago pearls) which I added to the pakora mixture and it gave it a nice texture and taste to the pakoras .


Preparation Time - 10 mins
Frying Time - 20 to 25 mins
Serves - 2 to 3 
Complexity - medium 

Ingredients 

2 cups left over cooked rice 
1/2 boiled potato 
1 tbsp soaked sabudana /sago pearls (optional)
Chilli flakes as per taste 
1 green chilly finely chopped 
1/2  tsp kashmiri chilli powder
1 tsp chat masala 
2 tbsp gram flour / besan 
Finely chopped corriander 
Salt as needed 
Oil to deep fry

Method 


  • Take the rice in a blender with some salt and red chilli powder and give a quick pulse . This helps the rice mash well and you don't have to spend time to mash with a masher or your fingers .
  • Take this mashed rice in a big bowl and add the mashed potatoes, gram flour ,chilli flakes,  chat masala,  corriander leaves, green chillies and sabudana if using. 
  • Mix all the ingredients and form a nice and smooth dough.  Adjust salt if needed while mixing the dough .Leave this dough in the fridge for about 10 mins . Refrigeration helps to shape the pakoras as tikkis/patty easily. 
  • Heat the oil in a kadai while the dough is resting in the fridge. 
  • Grease your palms with a little oil, pinch out small portion of the pakoda dough and shape them like a tikki or patty and slowly slip it into the oil and fry until the oil stops hissing and the tikkis turn crisp and golden brown.
  • Alternatively, you can also just roughly pinch out small portions of the dough and drop them into the oil and fry them until crisp and golden brown.
  • Serve with chutney or sauce of your choice and enjoy.

You must definitely pin me to enjoy 😉 


March 07, 2022

Carrot Rice - Quick lunch box recipe (Vegan & GF)


Share with friends and family
7 comments:

Carrot rice is a very healthy and delicious flavored rice and perfect for carrying as a lunch option for kids as well as adults.  This rice is mildly spiced and also there is a subtle hint of sweetness from the grated carrots . We can also add cashews, groundnuts, peas or boiled sweet corn while preparing the carrot masala making it all the more tasty ,healthy and delicious. 


Carrot rice is very simple to make and gets done in less than 15 mins if we have cooked rice ready on hand . If you have to pack an early lunch, you can precook the rice previous night, prepare the carrot masala and in the morning and just mix it with rice ,viola you are lunch box is ready in a jiffy! 

Serve it with some papads and flavored dahi seasoned with some roasted jeera powder or even goes well even with Boondi Raita . To make it even more sumptuous,  you can pack some carrot fries too. (recipe courtesy- Magical Ingredients by Radha R ) 

Have you tried the delicious  

Carrot Pumpkin Soup 

Carrot Kheer (Payasam) 

Evergreen Gajar Halwa

Carrot Sambol   (Srilankan Vegan Salad)

Carrot Koshimbir  from my blog ?? 


Preparation Time - 10 mins
Cooking Time - 15 mins
Complexity - Simple 
Serves - 2 to 3

Ingredients 

1.5 cups cooked rice. 
2.5 cups grated carrots 
Handful of boiled sweet corn
Handful of green peas 
2 tbsp groundnuts 
few curry leaves 
1-2 dry red chillies 
1 tsp mustard seeds
2 tbsp vangi Baath masala 
1 tsp turmeric powder 
1/2 tsp red chilli powder
1/2 tsp rasam powder
4 tbsp oil 
Salt as needed 

Method


  • Heat the oil in a thick bottomed pan fry the ground nuts followed  by  mustard seeds ,curry leaves , red chillies and asafoetida. 
  • Add the grated carrots ,turmeric powder , red chilli powder and saute it  nicely.  Sprinkle some water and cook covered for 2 mins on medium flame. 
  • Open after 2 mins ,the carrots would have become soft and semi cooked,at this stage add the rasam powder, vangi Baath powder ,salt and mix well . Continue closed cooking for another 2 mins.
  • Open the lid ,add the boiled corn , peas and mix it nicely.  By now the carrots would have cooked well and become soft.  The masala for the Rice is ready now . 
  • Add the cooked rice and carefully mix it with the carrot masala taking care not to break the rice..adjust salt if needed at this stage . Keep the rice covered for 5 to 10 mins for the flavors to steep in well with the rice .you can also add some roasted cashews just before serving. 
  • Serve with chilled dahi and papads .

Pinned me yet ??


March 06, 2022

Ganga Jamuna - Orange Sweet Lime Juice


Share with friends and family
15 comments:

 Ganga Jamuna - does this name sound very interesting and attractive?? This was my reaction too when I first saw this name on the menu card of a fresh fruit Juice shop .

As intrigued as I was with the name ,I was very skeptical to try and was even hesitant to ask the owner what it comprised off . But luckily for me,  my friend very boldly ordered for this drink while I settled for my favorite Pineapple juice. 

I was very keen to see what ingredients went into the making of Ganga Jamuna . I observed the shopkeeper  very closely and to my surprise he picked up oranges and sweet lime (mosambi) to prepare. Since it was a mix of 2 fruits going into one juice, it has been called Ganga Jamuna .

You may use the traditional citrus juice presser to extract the juice or use modern day  electric juicers which remove the pulp and extract pure juice. 

Ensure that the seeds from the oranges and sweet lime are removed before pressing the juice in a blender as the juice may turn bitter if seeds get crushed. 


Preparation Time - 5 mins
Cooking Time - nil 
Complexity- simple
Serves - 2 to 3 glasses of juice
 

Ingredients 

2 oranges
2 sweet lime (mosambi)
Sugar as per taste
Pinch of salt 
2 glasses of chilled water 

Method

  • Peel the oranges and sweet lime and remove the seeds from the pulp from individual slices . This step can be skipped if using traditional citrus juice presser.
  • Add the  slices to the juicer,  sugar and blend it for 2 mins. 
  • Strain the extracted juice through a strainer ,add salt mix it well . Adjust sugar at this stage if you want it a little more sweet . Sugar can be skipped if the oranges and sweet lime are sweet naturally. 
  • Pour it into tall juice glasses, top it with ice cubes if you want and serve chilled. 

Pin me ??