December 20, 2021

Methi na Gota | Methi Pakora | Fenugreek Fritters - Gujurati cuisine


Share with friends and family
14 comments:

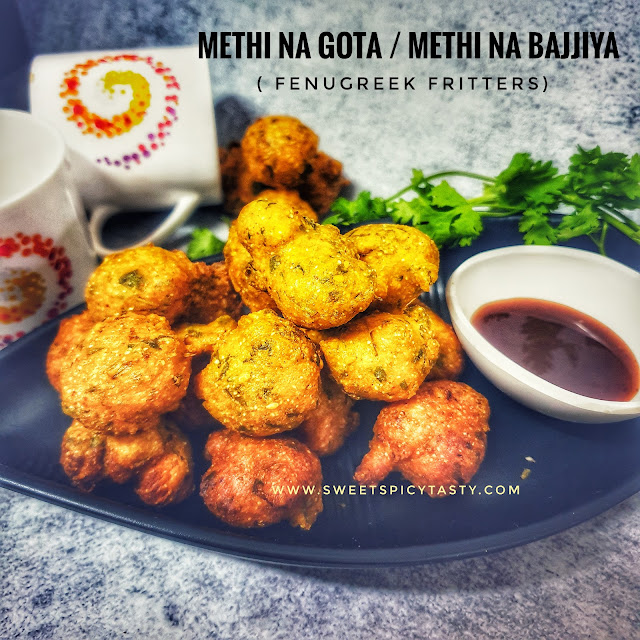
 Methi na Gota / Methi Bajjiya or methi na pakora is a classic winter delicacy and a popular Street food in Gujurat and Bombay. Even though fresh fenugreek is now available all round the year, there is always a special place for the tender and fresh methi available during winters.

Methi na gota doesn't require any fancy ingredients or preparations as we will invariably have the ingredients in our pantry supply . The main ingredients are gram flour/besan and sooji/semolina with added spices and fresh fenugreek leaves .

I have had these amazingly tasty and delicious pakoras many a times since my childhood.  Come winters,  these methi gotas are always a part of the meal or as tea time snack in most gujju homes .  Carrot halwa and methi na gota are inseparable delicacies during winter. 

Crispy from outside and spongy from inside,these fenugreek Fritters are a perfect treat  on chill evenings and makes it an awesome appetiser or party pleaser option for all kinds of parties and holiday get togethers .

You may serve them with Dates Tamarind Chutney and Green chutney or even a cup of piping hot masala tea makes it an enjoyable experience with friends and family .


Preparation Time -15 mins
Frying Time- 20 mins
Complexity - Simple 
Serves - 3 to 4

Ingredients 
1 cup gram flour/ besan
1/4 cup semolina/rava
1/2 cup finely chopped methi Leaves
1/4 cup finely chopped corriander 
1 tsp grated ginger
1/2 tsp turmeric 
1 tsp red chilli powder 
1 tsp white sesame seeds 
1/4 tsp jeera/cumin
1/2 tsp sugar
Juice of 1/2 lemon
Salt as needed 
1/4 tsp cooking soda 
Water to make the batter 
Oil to deep fry 

Method 


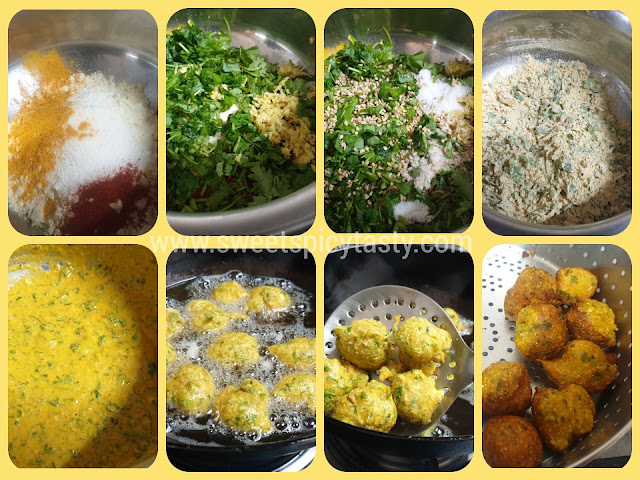
  • In a wide mixing bowl,mix the gram flour,salt,semolina, turmeric and red chilli powder. 
  • To this add the freshly chopped corriander, methi ,ginger and sesame seeds .
  • Mix it well with a spoon and make a batter of dropping consistency by adding water little by little .whisk it well to form a lump free batter.
  • Let the batter rest for 10 mins while you heat up the oil for frying.
  • Just before frying add the lemon juice,  soda and sugar . Whisk the batter quickly and drop small balls of batter in the hot oil . Donot over crowd the frying pan.  Fry on medium flame until they turn crispy and golden brown.
  • Drain the pakoras carefully and serve hot with chutney and tea.  

Some more must have winter delicacies 

Gajar Halwa / Carrot Halwa 

Doodhi (bottle gourd) Halwa 

Doodhi Muthiyas (steamed)

Cabbage Methi Pakoras 

Methi Pooris 

Methi Dal 

December 18, 2021

Thiruvadhirai Kali - Traditional prasadam for Lord Shiva


Share with friends and family
5 comments:

 Thiruvadhirai Kali is a special offering made to lord shiva / Nataraja in the holy Tamil month of Dhanur /Margargashira/ Margazhi .  Kali and kootu are offered as prasadam on the holy festive occasion of Arudra Darshanam. 

Kali is a sweet dish made from broken rice,  jaggery and flavored with cardamom powder and garnished with cashews nuts fried in ghee . I donot use moong dhall in my version of kali while some families make use of some moong dhall (paasi paruppu) too while preparing kali .

Kali is paired with a special and yet another traditional curry called 7 kari kootu / Thalagam(recipe already on my blog)  made from fresh native vegetables .  The sweet kali and spicy kootu hit the right notes while eating and makes it a very divine and a pleasurable experience.  

This recipe of preparing the kali is very simple and doesn't require much experience.  Even beginners can prepare this and dish out the perfect kali without any hassles.  

In 2021 Arudra Darshanam falls on Monday, 21 Dec


Preparation Time - 20 mins
Cooking Time - 20 mins
Serves - 2 to 3
Complexity - easy 

Ingredients 
1 cup rice
1.5 cups grated jaggery
1 tsp cardamom powder
Few cashews 
3 - 4 tbsp ghee
3.5 cups water 
2 tbsp fresh grated coconut 

Method 

Preparing the broken rice 

  • Wash the rice under running water and drain it in a colander for 10 mins
  • Roast this rice in a dry kadai until it turns slightly pink and crisp.  Cool and blend it in a blender till you get a consistency like rava. (Has to be coarse and grainy not like a flour) 

Preparing Kali 

  • In a thick bottomed vessel heat 1tbsp ghee and fry the cashews until golden brown. 
  • Add the water and bring it to a rolling boil while you add the jaggery . Wait until it melts .
  • As the jaggery syrup is boiling,add the broken rice slowly and keep stirring to avoid the lumps . Break the lumps in case you feel them.
  • Close the kadai and cook on medium flame for 10mins .
  • Open the lid carefully after 10 mins and you can see the water has been fully absorbed by the rice and the kali is well cooked resembling the texture of upma. Turn off the stove. 
  • Add the remaining ghee, cardamom powder and grated coconut.  Mix it well ,keep covered for 5 to 10 mins to let the flavors steep in .
  • Delicious kali is ready to be offered as prasadam.  Prepare the 7 kari kootu also simultaneously and offer it to Lord Nataraja .


Have you pinned me ?


December 13, 2021

Araichuvitta Sambar - Tamil Nadu special


Share with friends and family
5 comments:

 Sambar is a quintessential item on the daily menu . There are varities of sambar we make on a day to day basis and the recipe slightly varies in each home to match the taste and liking of the family. 

Every home will have a stock of the staple sambar masala or sambar podi as we call in Tamil in the pantry . This is the most essential ingredient to make a delicious sambar .

Araichuvitta Sambar is a typical and traditional recipe from Tamil Nadu.  We prepare a fresh spice mix and grind it with coconut and make sambar using this aromatic and flavorful spice mix.  Araichivitta sambar is made on special occasions like festivals or functions and even marriages.  

Araikardhu in Tamil means grinding..since we grind a fresh masala ,this sambar is known as Araichuvitta Sambar . 

For araichuvitta sambar , we roast the dry spices until crisp and aromatic.  This is then ground along with fresh coconut to a fine paste.  Mixed vegetables are par boiled and then simmered in tamarind water until the raw flavor is lost to which is added the boiled thoor dhall and the coconut paste . The entire mixture is simmered until the dal and coconut mix blend well and you can experience a wonder aroma envelope your kitchen.  Lastly ,freshly prepared tempering of mustard seeds and asafoetida is poured over the piping hot sambar.  Serve it with hot rice and a nice stir fry of your choice . 


Preparation Time - 15 mins 
Cooking Time - 20 mins
Serves - 3 to 4
Complexity - medium 

Ingredients 

To roast & grind
2 tbsp dhaniya /corriander seeds 
1 tbsp channa dal 
1/4 tsp pepper corns 
Few fenugreek seeds 
4 to 5 dry red  chillies 
Few curry leaves 
3 tbsp fresh coconut 

For the sambar 
Chopped mixed vegetables (beans, carrot, ash gourd , capsicum , potato)
1 cup tamarind extract 
1/2 cup thoor dhall 
Salt as needed
Pinch of jaggery 
1tsp mustard seeds 
Pinch of asafoetida 

Method 


  • Par boil the chopped vegetables in 1 cup water with a little salt .
  • Pressure cook the thoor dhall with turmeric. The dhall must be mushy and soft . Adjust water accordingly. I normally use 2 cups of water for 1/2 cup thoor dhall and pressure cook for 3 whistles on medium flame .
  • Roast all the ingredients in 1tsp oil ( under the roast & grind ) except the coconut. Start with the channa dhall followed by the dhaniya,  curry leaves,  fenugreek seeds ,pepper and then red chillies. let it cool , then add the fresh coconut and grind it to a fine paste with sufficient water.


  • Add the tamarind extract to the par boiled vegetables and boil until the tamarind loses it raw flavor . 
  • While the tamarind is simmering ,add the mashed thoor dhall ,adjust salt and bring to a rolling boil .
  • Add the coconut masala paste, quickly stir to mix it well .continue cooking until you see the sambar frothing . Be very attentive and keep stirring else the coconut paste has a tendency to stick to the bottom and burn giving a very bad taste.  Cook on low flame .
  • Once you see the sambar frothing and bubbling add the jaggery and fresh chopped corriander and turn off. 
  • Prepare a tempering of mustard seeds in hot oil with asafoetida and fresh curry leaves and pour it over the araichuvitta sambar .
  • Serve hot with rice,  ghee , vegetable stir fry and some papads.  I served Cabbage Peas stir fry alongside the araichuvitta sambar. 


November 29, 2021

3 in 1 Flavored Sweet Corn


Share with friends and family
12 comments:

 Sweet corn makes a perfect ingredient for making healthy salads and starters for parties and get togethers .

We can cook the sweet corn in bulk and season it in less than 5mins just before serving. Sweet corns are very easy to cook and doesn't require any special skills .

I prefer to keep a pack of frozen corn always in my fridge to take care of sudden hunger pangs or to treat unexpected guests. 


A few years ago ,these flavored and tasty sweet corn took by the storm and was a hot favorite among kids as well as elders. There would be small food carts stationed at malls , theaters and many other prominent public places where the vendor would dish out lipsmacking piping hot corn in small cups with a lot of flavors .It was fascinating to see how corn be constantly being steamed in a steamer and the vendor would very efficiently dish out various flavors based on customer demands and hand it out perfectly. 

My favorite would always be desi masala and spicy chilli butter . Both these flavors would be so tasty and the after taste with essence of lime juice will be refreshing.   Today,I thought of recreating the same flavors in my kitchen and these were so apt and tongue tickling for the gloomy and chill weather in my city .

Beetroot corn bites by Preethi is on my cards soon . The recipe shared by her is a must try as it is not deep fried and makes it a healthy and nutritious snack for a guilt free indulgence. 


Ingredients 

3 cups frozen corn 

2 cups water 

50 gms salted butter

1 tsp chat masala

1 tsp red chilli powder 

1/2 tsp kala namak /black salt 

2 tbsp lemon juice 

Salt as needed 

Method 


  • Wash the frozen corn thoroughly and boil it in a deep sauce pan until the corn kernels are fluffy and well cooked .
  • Drain the water using a colander .
  • Divide the corn kernels into 3 portions .

Classic Salted flavor

Add some salt to one portion of the boiled corn and add 2 -3 tsp of melted butter and mix it well .

Serve hot ..adjust salt based on your liking.  Remember that the butter is also salted,hence add salt cautiously. 

Chilli Butter Flavor 

Add salt, 2 - 3 tsp melted butter ,red chilli powder and 1/2 tsp lime juice to a portion of cooked frozen corn and mix well and serve .

Indian Desi Masala Flavor

Add salt, 2 - 3 tsp melted butter ,chat masala, kala namak, 1/4 tsp red chilli powder and 1/2 tsp lime juice to a portion of cooked frozen corn and mix well and serve.


Pinned me ?? 


November 28, 2021

Salt & Pepper Cashews


Share with friends and family
6 comments:

Salt and pepper flavored cashewnuts are an exotic snack which can be served at all parties as part of the starters or appetisers . These mildly flavored cashewnuts are perfect for gifting during the holiday season as a token of love . 
You can easily make a whole  batch in very less time and pack them in advance along with your holiday gifts for family and friends .


Perfectly roasted cashews seasoned with salt and freshly ground black pepper powder are very addictive .  The cashews are crunchy and spicy making it perfect for the taste buds when enjoyed with your favorite cocktails, Mocktails or drinks.   

Not only for parties  ,these tasty flavored cashews can also be packed for your kids snack box or even your lunch to take care of mid morning  or late evening hunger pangs. 

There is no specific measurement for making this delicious snack.  You can adjust the salt and spice level depending on your liking and trust me one can never go wrong with this recipe. 


Preparation Time - 2 mins
Cooking Time - 5 mins
Complexity - easy 

Ingredients 
1 cup  unsalted cashews 
1 tsp oil 
Pinch of salt 
1 tsp coarsely ground fresh pepper  

Method 


  • Heat the oil in a pan and roast the cashews evenly until they turn crisp and golden brown.
  • Sprinkle salt and pepper as per your taste and mix it well while the cashews are still warm. 
  • Let it cool on a wide plate and then pack them in a dry and moisture free container .


Have you pinned me ? 


November 22, 2021

Apple Custard


Share with friends and family
11 comments:

 Apple custard is my favorite dessert since childhood.  Mom would make some yummy Custard using apples during winter.  Though fruit custard would be on the menu during summer and most other times  ,Apple custard has been a winter delicacy  as we would get really sweet ,juicy and tasty apples.

Growing up 2 desserts were very common at home ; custard and sheera - both off these were hot favorites and we never got bored. Now Poonam's creamy rich Apple Rabadi is also on my to do list ..the recipe is so tempting to miss out .

 The city where I grew up hardly experienced harsh winter, so apple custard would taste heavenly when had chilled during the noon .


Custard may sound very simple to make but if we don't take care of the nuances,the custard will turn watery or may have a raw after taste .

Many brands of  custard powder are available in the market,but I always prefer using Brown & Polson or Weikfield brand to make custard.  You may call it as OCD or creature of habit, I cannot pick any other custard powder brand if I don't find either off these on the shelves .

I prefer using full fat milk or 2% fat milk as it gives a nice creamy texture .I did want to be health conscious and prepared custard with skimmed milk and low fat milk but somehow the taste didn't appeal to me and my family .

Before adding apples to the custard, make sure you taste them first before you add . The apple has to be sweet, if they taste sour, pls donot mix it with the custard as it will spoil the taste making it really unpleasant to enjoy .

Always ensure you soak the apples in warm salt water or vinegar solution to remove the wax / powder coating if you feel the same when you touch the apples.  


Preparation Time - 15 mins
Cooking Time - 20 mins
Cooling Time - 2 to 3 hrs
Complexity - easy 

Ingredients 
1/2 litre milk (2% fat or full fat ) 
3 tablespoon vanilla flavored custard powder 
2 medium apples 
6 to 7 tbsp sugar (adjust as per your taste) 

Method 

  • Mix the custard powder with 3 to 4 tbsp milk and make a paste without lumps and keep aside.
  • Bring the milk to a boil in a thick bottomed vessel .lower the heat and mix in the sugar until it dissolves completely. 
  • Add the custard paste to the milk and go on stirring or whisk it on medium flame until the milk starts thickening. Keep stirring constantly to avoid the milk sticking to the bottom and getting burnt .
  • Once the custard thickens, turn off and let it cool ..donot cover with a lid as the  vapor will make the custard watery.
  • Chop the apples into small cubes and lightly boil it in water for 1 or 2 mins. Drain the water and put the apples away in the fridge for chilling ..this way the custard and apples blend really well as the apple absorbs the custard flavor very nicely.
  • Once the custard cools down,place it in the refrigerator for 2 to 3hrs for chilling. 
  • Just before serving add the chilled apple slices to the custard ,mix it gently and serve . You can top it with some nuts or pomegranate pearls. 

Notes

  • Adding fruits will make the custard watery,so cook the custard patiently till it thickens. 
  • You may add a few drops of butterscotch or rose essence to the custard. 
  • It is always best to add fruits to the custard just before serving . Take the potion of custard that you would want to serve and mix fruits to it rather than mix it to the entire bowl of custard. This way it won't turn watery. 

Pinned me yet ?


November 16, 2021

Simple North Indian Thali


Share with friends and family
3 comments:

 Some days I am in the mood for an elaborate cooking while at times I hardly feel like stepping into the kitchen to cook up a meal.  Today was one such day when I felt like cooking something different from the usual South Indian menu .

After continuous rainfall for the last few days and a severe dip in mercury levels ,we saw a little sun shine this morning and I set my mood for some elaborate cooking to pep up the mood and prepared this quick and delicious North Indian style menu which can be easily put together in about an hour .  This combination of menu comes very handy when you have to prepare lunch or dinner in short notice for guests .


The entire platter is Saatvik meaning sans Onion & Garlic and hence doubles up even as a Prasad/ Bhog Thaali as well. 

On the Platter ,

Sheera / Sooji Halwa 

Aloo Tamatar Sabji / Potato Tomato Curry

Masala Matar Pulao  / Spiced Peas Pulao 

Hot Fulkas 

Masala Chaas  (video post)

Roasted Papad

To further elaborate this thaali, you can also make Boondi Raita , Moong Bhajjiya , Sweet Corn Salad .

Pinned  Me ???


November 15, 2021

Thurai Moong ki Dal | Ridge Gourd Lentil Curry


Share with friends and family
5 comments:

 Some recipes are close to our heart for many reasons, and this Thurai Moong ki dal is one such recipe for me . Memories of this dal dates back to those days when internet was not heard off and we relied on magazines and cook books for various recipes to try on . Amma used to collect a lot of recipes from various magazines and also write down in her diary from the cookery shows that she would watch on TV . All off those have been my source of inspiration for what I am today. 

Thurai Moong ki Dal was one of the very first recipe I tried on my own right from chopping to pressure cooking and received a big pat from my mom who has been the  best critic of my life. I don't even have the magazine cutting with me now ,but this recipe is etched in my mind and credit goes to Mrs Tarla Dalal for having detailed the recipe so well even for a novice to prepare with confidence. 

 Ridge gourd is known as Heerekaai (kannada) , Beerakai (Telugu)  , Thurai (Gujarati) , Peerthangai (tamil) .Ridge gourd is a very healthy vegetable packed with healthy nutrients and can be used in a variety of recipes.  Peerthangai Thogayal is a very famous recipe made in Tamil Nadu and pairs very well with rice and also dosa ,idli,chapathi .Kalyani has a very detailed and delicious recipe for Peerthangai Thuvayal on her blog.

Thurai Moong Ki Dal is simple to make and gets done in less than 20 mins and the best part is ,it can all be done just using your pressure cooker. Serve this delicious mildly spiced dal with steaming hot rice or piping hot fulkas . Thurai Moong dal is easy to digest and hence you can serve this to kids or even to old people who need soft and simple food which is light on the stomach .

Have you pinned me ??


Preparation Time - 10 mins
Cooking Time - 15 mins
Complexity- simple 
Serves - 2 to 3

Ingredients 

1 medium ridge gourd 
1 cup moong dhall /split yellow lentil 
2 green chilies 
1tsp finely chopped ginger  (skip for Jain version)
Few curry leaves 
1/2 tsp mustard seeds 
1/2 tsp jeera 
2 tsp oil
Salt as needed
Pinch of turmeric
1/2 tsp sugar
Fresh corriander 

Method 


  • Wash and peel the ridge gourd and cut them into medium sized chunks. 
  • Wash and soak the moong dhall for 10 mins in water .
  • Chop the green chillies and curry leaves finely .
  • Heat oil in the pressure cooker , splutter the mustard seeds ,jeera and then fry the green chillies ,curry leaves and ginger. 
  • Add the chopped ridge gourd with turmeric, salt and saute it for 2 mins.
  • Add the soaked moong dhall  2 cups of water and suagr along with some chopped corriander and close the pressure cooker lid. Adjust salt at this stage if needed. 
  • Pressure cook for 2 whistles on medium flame ..let the pressure release naturally .
  • Open the lid, mix it well. Add some ghee if you like and serve it hot with rice or rotis .

November 08, 2021

Kothmir Paratha | Corriander Flat Bread


Share with friends and family
5 comments:

 After all the festive binge eating we all settled for a simple yet wholesome meal for dinner . Instead of making the usual dal roti and sabji ,I prepared some flavor packed aromatic kothmir parathas and served with some thick curd and freshly ground green chutney. 

I make kothmir paratha quite often whenever I get a fresh bunch of corriander from the vegetable vendor. I donot use a chopper or blender to cut the corriander ..I prefer to roughly chop the corriander and then mix it with spices using my fingers ,this way the flavor is released well when kneaded with the wheat flour . You may add some ajwain/carom seeds to the dough ,but I prefer to keep it plain .

Parathas are the best way to feed and sneak in vegetables which are generally avoided by kids as well as elders . Pumpkin Paratha by Narmadha is a perfect treat for the Fall Season when pumpkins are available in plenty. 

Some such healthy parathas for you all to try from my blog .


Preparation Time - 10 mins
Resting Time - 10 mins
Cooking Time - 2 mins per paratha 
Complexity - medium 
Makes 8 to 10 parathas 

Ingredients
1 cup whole wheat flour
3/4 cup tightly packed roughly chopped kothmir/corriander leaves
2 tsp red chilli powder
1/2 tsp turmeric
salt
Water to knead

Method
  • Sift the flour with turmeric,salt,red chilli powder and salt.
  • Now ,add the chopped corriander and knead into a smooth soft dough. Mix the corriander with your fingers nicely by sprinkling water little by little so that the flavor seeps into the dough 
  • Add water little by little while kneading and make a soft pliable dough . Smear some oil all over the dough and cover it. 
  • Keep aside for about 10 to 15 mins.
  • Pinch out lemon sized balls and roll into rotis.
  • Heat a griddle,and cook the rotis on both sides,using a little oil. [OR]
  • Oil Free Version : Cook on both sides until brown spots appear and the rotis are cooked.
  • You can also puff the  rotis on open flame like fulkas if you want a softer version .
  • Soft Tasty Yummy parathas ready. Serve with any kind of gravy,pickle,green chutney or thick yogurt/curd.

Donot forget to pin me up !!!


November 03, 2021

Diwali Marundhu | Diwali Legiyam (Lehiyam)


Share with friends and family
5 comments:

 Diwali Marundhu or Diwali Lehiyam is a must have on the day of Diwali in our home before we eat any goodies . This practice ,I am sure is followed in many homes in Tamil Nadu.  

Marundhu in Tamil means Medicine and since it is specifically made during Diwali it has been termed as Diwali Marundhu. It is prepared using various natural herbs and sweetened with jaggery . One can call it as home made Chyawanprash. Not only during Diwali, you can easily make this herbal choornam anytime at home and keep it ready . Very helpful in treating mild symptoms of cough,cold or sore throat.  

As per my understanding the practice of having this Marundhu first thing on Diwali Day is probably because we get up as early as 4am , take an oil bath and since October/Nov is winter time ,this herbal medicine will keep us safe from catching  a cold or fever due to the chill weather .

Traditionally there are close to 10 to 12 ingredients that go into the making off Diwali Lehiyam ,but today I am giving you a quick and easy recipe with easily available ingredients in the pantry and can be made in less than 15 mins .


Preparation Time - 10 min
Cooking time - 10 min 
Complexity - easy 

Ingredients 

2 tbsp dhaniya 
1 tsp ajwain /omam
2 tsp pepper corns 
3 tsp dry ginger powder 
3 to 4 cardamoms 
2 to 3 cloves 
1 tsp  ghee 
1 tsp gingelly oil /til oil 
1/2 cup grated jaggery 

** you can also roast a small stick of yashtimadhu/athimadhuram/mulethi if you have at home. 

Method 


  • Dry roast the dhaniya, pepper and ajwain on medium heat until it is warm to touch..keep aside. 
  • Roast the cardamom and cloves and keep aside. 
  • Once the ingredients are cool ,blend into a fine powder along with dry ginger powder .
  • Melt the jaggery in 1/4 cup water and once it begins to appear frothy,add the ground spice mix and mix it nicely.  The flame has to be low .
  • Now add the ghee and gingely oil and continue to cook for another min . The marundhu will appear glossy and resemble halwa texture . Donot stir for a long time else it will be become hard like a candy.
  • Turn it off and transfer to a dry container and store it. 


Ukkarai | Okkarai | Sweetened Lentil Crumble


Share with friends and family
1 comment:

 Ukkarai is a traditional sweet prepared for Diwali without fail in certain parts of Tamil Nadu and Kerala . It is a customary tradition for Tambrahms of Tirunelveli, Madurai side to make this Ukkarai for Deepavali . The  Chettinaad style Ukkarai is different from this version as that recipe calls for only moong dhall in the preparation .

I was introduced to this sweet only after my marriage and till then I had neither tasted nor even heard of Ukkarai as it was never made in my mom's house .

The name really intrigued me and I thought it must be a very complicated sweet to make and was waiting to see how it is prepared by MIL .When MIL shared the recipe, I was surprised that it was very easy to make and really doesn't require any special skill of making jaggery syrup or cooking nuances.  

Ukkarai is actually a vegan recipe as freshly pressed gingelly (til) oil was used to make this in olden times ,but now a days not relish the flavor of sesame /til oil in sweets and hence ghee is used which doesn't make it vegan friendly.

Some families make this Ukkarai even for Avani Avittam and I found this to be very close to Hayagreeva Maddi except that Ukkarai is a little dry and coarse . 

Each family has a slightly different proportion of dal used for making Ukkarai . Some use 50/50 proportion of moong dhall and channa dhall while some use just moong dhall and some just channa dhall .I did experiment with all these combinations but at the end we were all happy with just the Channa dhall Ukkarai in terms of taste as well as texture .


Soaking Time - 3 hrs 
Preparation Time - 15 mins
Cooking Time - 45 mins
Complexity - Medium 

Ingredients 

1 cup channa dhall / kadalai paruppu
1 cup grated/powdered jaggery 
1 tsp elaichi powder 
2 tbsp ghee /gingelly (til) oil
Few cashews 

Method 


  • Wash and soak the channa dhall in sufficient water for 3 hrs .
  • Drain the water and grind to a fine paste without adding water.  Incase there is difficulty in grinding, you can sprinkle some water and grind. 
  • Grease a plate with some ghee and spread this ground batter on it and steam it for 15 mins . Use a knife or tooth pick to check if it is steamed well . When you prick it through the steamed dough,the knife/tooth pick should come out clean. Let it cool .
  • Break the steamed dough roughly with your hands and pulse it in a blender until it turns into a coarse crumbly mixture.  Keep aside. 
  • Melt the jaggery with half cup water and filter it incase you find any impurities else let it boil further on medium heat until it reaches the soft ball consistency (meaning- when you drop a few drops of jaggery syrup in water, it should hold shape and not spread)  {{ 2nd row 1st picture above }}
  • At this stage add the crumbled dal mixture with cardamom powder and quickly mix it in with the syrup .keep on stirring and breaking the lumps simultaneously.  
  • Add some ghee and continue to stir it for another 5 to 10 mins . The mixture may look lumpy and soft initially, but will turn fine on cooling. 
  • I prefer to keep the Ukkarai a little soft and not very grainy so I don't continue stirring for a long time to get the grainy texture .
  • Roast some cashews in ghee and mix it well with the ukkarai.

Pin it up for future 


November 01, 2021

Sev | सेव - Diwali Snack


Share with friends and family
10 comments:

 Sev and Ghatiya are two quintessential traditional snack made during Diwali in North India . 

Sev is a versatile savory snack made from besan /gram flour.  It can be served as is during tea time, added to Chivdas or used on various chats  like BhelpuriMasala PapadSev Puri for garnish.  I prefer making this thin sev at home and keep a batch ready most of the days so that it is easy when I plan to make chaat for dinner or evening snack.

In Tamil Nadu,we make Omapudi which is same as this sev but flavored with the essence of Ajwain/ Omam/Carom water . 

Requires just the basic ingredients from the pantry and the sev press of murukku maker with the correct mould to press the dough out of the sev press.   If you like you may flavor it with pudina extract , spinach extract or even garlic extract to get the desired flavor sev .

The only tricky part is kneading the dough to the perfect consistency so that it easily slips out of the mould and you can shape the sev very comfortably.  

I donot use cooking soda as many recipes call for it to get the crunchiness ,but my sev turns out crunchy as I use hot melted butter and a tsp of rice flour while kneading the dough.  You can skip butter if you are Following Vegan diet and use hot oil instead


Ingredients
2 cups of gram flour/besan/kadalamaav
2 tbsp rice flour
Salt as needed
1 tsp red chilli powder
1tsp haldi powder 
Asafoetida a pinch
2 tablespoon butter or 2 tbsp hot oil 
Oil to fry


Method


  • In a wide mixing bowl, add the flours, salt, asafoetida, red chilli powder and mix it well.
  • Now add the melted butter or hot oil and rub it well into the flour to form a crumbly mixture .
  • Knead the dough by adding water slowly . In case you feel the dough needs more water , you can sprinkle water to complete kneading.
  • The dough has to be soft and pliable . Too hard a dough will make it difficult to press from the sev maker mould. 
  • Heat oil in a kadai and same time grease the sev press and plate well with oil.
  • Take a small portion of the dough and put into the mould and carefully press it over the hot oil .
  •  Flip it over after 2 mins and fry for just 1 more min. Take it off the oil as soon as the hissing sound of the oil stops. Drain it on an absorbent paper or in a colander . 
  • Prepare sev from all the dough and keep the dough covered with a moist cloth while you are making the sev.
  • Crush the sev/omapudi with your hands and store in an airtight container. 
  •  Enjoy with a cup of hot tea or coffee!! 

Have you pinned me ??


October 30, 2021

Thikkat Shankarpali | Spicy Shankarpaali | तिखट जीरा शंकरपाली


Share with friends and family
13 comments:

 Shankarpali , Shakkarpare is a very special snack made during Diwali in most households in India . Known by many names according to region, this is a must have in Maharashtra and Gujarat .  There is  sweet  and  savory version of this yummy and crunchy snack.

Traditionally shankarpali is made using maida / APF ,but these days whole wheat flour is also used owing to health reasons . I for one have grown up eating the spicy Shankarpali made using maida and atleast during Diwali I make this  unfailingly using maida . 

My paati a.k.a grand mom would always keep this stocked round the year and she would say no one can fail with this recipe.  She was an expert in making all types of sweets and savories.

To prepare Thikkat / Spicy Shankarpaali is actually a breeze and the measurements are totally eye ball / random . Unlike other sweets or savories we need not worry about any particular consistency, perfect roasting etc.  

Just 5 basic ingredients viz ; maida ,salt, red chilli powder,  turmeric powder ,cumin seeds and oil to fry from our usual kitchen pantry and we are ready to make this crunchy munchy shankarpaali . This is also known as Thukkadi or Khaara Diamond cuts in the south .

The sweet shakkarpare is very tasty and flaky with subtle sweetness making it delectable and gentle on our palate . I am yet to make the sweet version and you can watch out this space for the recipe when I upload it soon.

Some special and Traditional Diwali Savories for you to impress and surprise your family 

South Indian Mixture 

Cornflakes Chiwda 

Poha Chiwda 

Sabudana Chiwda 

Thikha Ghatiya 

Omapudi / Sev 

Ribbon Pakoda 

Khara Boondi


Preparation Time - 15 mins
Frying Time - 8 mins per batch 
Serves - 3 to 4 
Complexity - Simple 

Ingredients 
1.5  cups maida / APF 
2 tsp red chilli powder 
1 tsp turmeric powder 
1 tsp cumin seeds /jeera 
Salt as needed 
2 tbsp hot oil 
Oil to deep fry 

Method 

  • In a wide mixing bowl ,add the maida ,red chilli,turmeric, salt and jeera and roughly mix with your fingers .
  • Pour 2 tbsp of hot oil over this dry ingredients and rub it well with both your hands to form a crumbly mixture . This is very important to get crunchy and crisp shankarpaali.
  • Add water little by little and knead to a smooth but tight dough.
  • Keep the dough covered to rest for 5 to 10 mins .
  • Pinch out a big lemon sized dough ,dust your working platform with little maida and roll out the dough into a medium thick roti .
  • Take a knife or pizza cutter and mark cuts to form diamonds or small squares .
  • Take these cut pieces and keep them on a plate while you heat the oil. 
  • Once the oil is heated properly reduce to medium and drop these pieces into hot oil carefully and fry them with occasional flipping until it turns crisp and golden brown. The oil must stop sizzling before you can remove it .
  • Drain it carefully and let it rest for a while before you transfer to a container. 
  • The shankar pali may look soft initially after frying but it will get crisp in about 20 mins.
  • Transfer to an airtight box and keep covered. 

Pin me to your board !! 


October 22, 2021

Varan Bhaat | वरण भात - Maharashtrian Meal


Share with friends and family
5 comments:

Varan Bhaat is a common and staple nutritious meal in most homes in Maharashtra.  This simple and traditional meal holds a very important place even during festive occasions like Ganesh Chaturthi,  Gudi Padwa , Sankrant and also wedding feast.  

 Varan Bhaat is a typical and soulful food which can be easily prepared without any fancy ingredients but from basic pantry supply . 

Varan in Marathi means Lentil curry and Bhaat is Rice ,so loosely it translates to Lentil curry Rice .  The Varan is prepared separately with very mild spices and served alongside steamed rice and a dollop of ghee . Varan bhaat is a perfect meal  for kids or elderly people as there is any spice added . 

Traditionally Thuvar Dhall viz Split Pigeon peas is used for preparing the varan but these days people use other lentils like Moong dhall,masoor dhall etc . I prefer to stick to the traditional way of making by using Arhar Dhall / Thuvar dal.

Varan(Lentil curry) ,Bhaath(Rice),Thoop(Ghee) ,Batata Bhaaji (Potato curry) and Loncha (pickle) is a preferred combo on a regular day . Today for lunch I prepared this wholesome meal and relished it with some fryums . I wanted to fry some puris as well but with some last min hurdle ,I took a shorter route and skipped making puris .

When being served on festive occasions, the meal spread is very elaborate with a few extra items being added to the menu. (Some of the typical menu items are given below) 


Preparation Time - 10 mins
Cooking Time - 20 mins
Complexity - Simple 
Serves - 3 to 4 

Ingredients 
1 cup thuvar dhall /Arhar dal/ thuvaram paruppu
3 cups water 
1 small green chilli
Fresh curry leaves 
1 tbsp ghee
1/2 tsp cumin seeds 
Turmeric powder
Salt as needed
Fresh corriander 
Pinch of asafoetida 

Method


  • Wash the thuvr dhall 3 to 4 times . Add 3 cups of water ,turmeric powder and finely chopped green chilli ,salt and pressure cook for 4 to 5 whistles on medium flame .
  • Let the pressure release and then mash the cooked dhall with a whisk until it is mushy.
  • Prepare the tempering by heating the ghee in a pan and then splutter the jeera ,curry leaves and asafoetida.  Pour it over the cooked dhall. Mix and close the lid for 10 min for the flavors to infuse . Garnish with fresh corriander. 
  • Serve hot with rice ,ghee and pickle .

Pin it up