Showing posts with label Cheese. Show all posts

June 25, 2022

Corn Capsicum Quesedilla


Share with friends and family 7 comments:

Corn capsicum Quesedillas are perfect to serve as quick after school snack or for an early dinner.  The gooey cheese and the crunch from the sweet corn and capsicums make every bite delectable. 

Make sure that these Quesedillas are served hot as soon as you prepare so that the filling and the tortillas don't loose the crispness and the texture

Mexican flavors are very close to our Indian spices and flavoring agents, so ideally you don't even need to hunt for special ingredients to make these melt in mouth Corn Quesedillas. 

There are ready made tortillas available in the market these days which can be used to make these Quesedillas or even the Indian Flat bread (Fulkas) can also be used as the base for making. 

You  can experiment with various flavors when preparing the filling and try to make it as healthy as you want. The amount of cheese can also be as per your preference. In today's corn capsicum Quesedilla I have kept the filling very simple and have used diced mozzarella cheese to get the gooey effect . 

Today's recipe makes use of ready made multigrain tortillas and for the filling I have used sweet corn , green bell pepper (capsicum) and red bell pepper. 

If you like Mexican flavors then you must try the following recipes from my blog

Mexican Bean Rice 

Bean Quesedillas 

Mango Salsa

Pineapple Salsa


Preparation time - 10 mins
Cooking Time - 3 mins per Quesedilla
Complexity - simple 
Makes - 4 Quesedillas
 

Ingredients 

4 multigrain/flour tortillas 
1 medium green bell pepper (capsicum)
1 medium red bell pepper
1/2 onion finely chopped (skip for jain /satvik ) 
1.5 cups boiled corn
1.5 cup diced /grated mozzarella cheese 
Finely chopped corriander 
1 green chilli finely chopped
Chilli flakes as needed
Salt as needed 

Method 


  • Finely dice the green and red bell pepper into small cubes .
  • Take 1/2 cup boiled corn in a blender and crush it coarsely. 
  • In a wide mixing bowl, take the finely chopped capsicum ,red pepper, crushed corn ,boiled sweet corn and onions if using and give a quick mix.
  • Add in the chilli flakes ,salt,  corriander ,green chilli ,2 tbsp diced cheese and mix it nicely. The stuffing is now ready. 
  • Take one tortilla and lightly roast it on open flame or microwave it for 10 seconds. 
  • Place the tortilla on a flat surface ,place the filling on one half of the tortilla ,spread as much cheese as you want and fold it.
  • Place this tortilla on a hot tawa and roast it on both sides until it turns  crispy and the cheese melts inside . If using a convection oven or OTG ,preheat the oven to 400F and bake the tortillas for 3 mins .
  • Using a sharp knife or pizza cutter , cut the Quesedilla into wedges and serve it hot .
  • Repeat the same process for the remaining tortillas.
Pin it up


March 22, 2022

Peanut Butter Cheese Sandwich


Share with friends and family 4 comments:

Does cheese and peanut butter sound like a weird combination to you ? Well,it may feel so; but peanut butter and cheese in a sandwich is a hit combo. 

The salt from the cheese and the sweetness from the peanut butter compliment each other so well that it is a heavenly experience when we take a bite . Especially when the sandwiches are grilled or toasted ,the extra crunch from the toasted bread makes it all the more delicious. 

Instead of just grilling cheese and peanut butter ,I have prepared a cheesy filling with some chopped capsicum,grated carrots, finely chopped tomatoes with some mild spices to make it healthy and sumptuous. 

These sandwiches are a perfect choice for packing in lunch boxes for school or even as a quick morning breakfast before we head out for the day .

Boiled sweet corn, grated paneer and chopped onions can also be added to the filling. 

To make it easy to spread the peanut butter ,make sure you thaw it well in advance if you have it refrigerated or use the easy spread versions of peanut butter which are now available in the market .  I recently came across a very nice brand of peanut butter that is buttery, nutty and smooth for a seamless spread on the bread slice. 

Preparation Time - 15 mins

Grilling / Roasting  Time - 3 mins per sandwich 

Complexity - simple

Makes - 3 sandwiches 

Ingredients

6 slices of bread (any variety that you like )
Peanut butter to spread 
Butter for roasting/Grilling 
3 cheese cubes 
1 carrot grated 
1 capsicum finely chopped 
1 tomato deseeded and finely chopped
Chilli flakes as needed 
1 tsp pepper powder
1 tbsp tomato sauce 
Finely chopped corriander 

Method 


  • In a wide mixing bowl, grate the cheese . Add all the chopped vegetables, chilli flakes , pepper powder and give it a gentle toss . Mix the tomato sauce gently . Keep it refrigerated if you are going to make it after a while or if it is too hot in your city . We don't want the cheese to melt before grilling the sandwiches. 
  • Heat up the grill pan .
  • Take a slice of bread ,spread the peanut butter on it and top it with the cheese filling.  Cover using the other slice of bread.
  • Apply some butter to the pan and roast the sandwich on both sides until crisp,golden brown and crunchy .
  • Let it cool for a minute and then slice it the way you like and serve hot !


Pin me up,will you ??


February 26, 2022

Paneer Cheese Corn Grill Sandwich


Share with friends and family 9 comments:

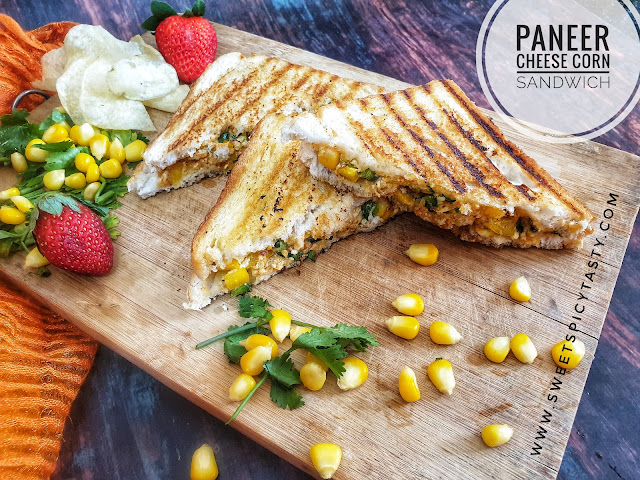
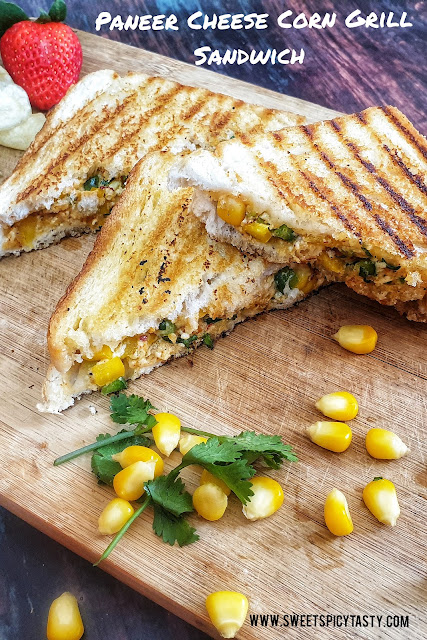
 Sandwiches are always welcome at my home and we love to experiment with different filling inside the sandwich.  This time we all enjoyed a delicious breakfast of Paneer Cheese Corn Grill Sandwich and hubby termed it as Royal delicious Breakfast. That compliment is more than enough to describe how cheesy and tasty the sandwich must have been.

This cheese corn paneer sandwich will now be a regular brekfast or dinner item at home. In addition to the Vegetable Cheese Grill Sandwich  Bombay style toast sandwich and chutney cheese sandwich.

In Bombay sandwiches are a favorite street food delight and it makes a filling and quick meal for tired shoppers , salesmen on the move  , college students and also many working ladies grab a sandwich on their way back home to keep them fill during  travel . When I moved to Bangalore I missed these yummy sandwiches and would yearn to gorge on them on my trip to Bombay. Now ,I have started experimenting with various varieties of sandwiches and will release them one by one on the blog as I perfect them to the style and taste that I have on my memory


Preparation Time - 15 mins
Roasting/Grilling Time  -  3 to 4 mins per sandwich 
Complexity - Simple 
Makes - 4 sets of sandwich 

Ingredients 

8 slices of sandwich bread / brown bread 
Salted (table) butter at room temperature 
1 cup grated paneer (100 gms) 
2 small Chiplets or 1/2 cup grated processed cheese
1/2 yellow bell pepper finely chopped
1/2 green capsicum finely chopped 
1/2 cup boiled corn kernels 
1tsp chilli flakes
Finely chopped corriander 
1/2 tsp pepper powder 
1/2 tsp chaat masala 
2 tbsp tomato ketchup 
Salt as needed 

Method

Preparing the filling 


  • In a large mixing bowl ,add the chopped bell pepper, capscium and paneer with the chilli flakes and mix it lightly. 
  • Next add in the corn kernels , grated cheese , pepper powder , chat masala and gently mix with a spoon until they combine well.
  • Lastly add the sauce, finely chopped corriander and if you like you may add some chopped onions too.  Gently mix again and check for salt, if need be sprinkle lightly and mix.  I did not add extra salt as the salt from cheese and chat masala was enough for our taste. 
  • Let this mixture rest for 5 mins.

Preparing the sandwich 


  • Heat the grill pan or if using electric grill turn it on to get heated.
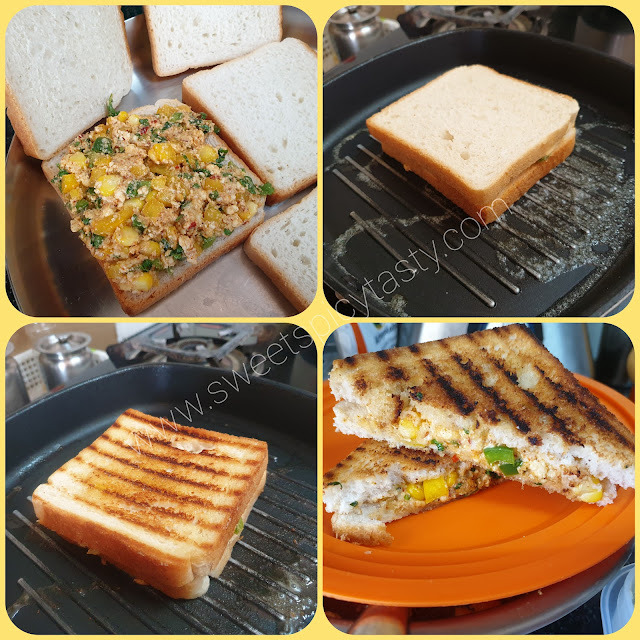
  • Take two slices of  bread and spread this cheese corn paneer filling on one slice and cover it with the other and keep ready ..repeat the same for all slices of bread .
  • Spread some butter on the grill pan and once heated place the sandwich on the pan for grilling. Keep the flame on medium. 
  • Once the bottom side gets roasted well , apply some butter on the top side and flip it over for it to get roasted. 
  • Roast it till you get nice deep brown grill marks and the bread turns crispy . You may add some butter while grilling for added taste .
  • Once both sides are nicely grilled ,take it off the pan and let it cool for a minute . Cut into slices as desired by you and serve hot with some sauce or mayonnaise. 

Pin me up 


July 30, 2021

Kulche wala pizza - A fusion pizza


Share with friends and family 15 comments:

 I love experimenting with various flavors and cuisines in my kitchen. Some are a super hit and some don't even pass my taste test ..haha !! 

After I tried my hands on Pav Bhaji Pasta which was a hit at home ,I was pondering on how else to infuse Italian flavors in our Desi style cooking.

While the thinking cap was on , my eyes fell on a pizza menu which had paneer Tikka pizza on the cards and that is how my Kulche wala Pizza was born . I was planning to make kulchas to go with a mix veg sabji ,but then I went ahead and tried my hands on this cheesy kulche wala Pizza  which was welcome by all at home .

I have used kulcha as the base and the toppings are in Italian style . So my dear readers , do let me know how you like this recipe and donot forget to try it at your homes too.

What is the difference in Naan and Kulcha ?

  • Though Naan and Kulcha fall into the category of Indian Breads, there is a slight difference in the way the dough is prepared. 
  • Naan uses yeast as  raising agent while for Kulcha baking powder and baking soda are used. 
  • Naan needs good amount of resting time as the yeast needs to react for the dough to raise whereas for Kulcha there is not much resting time. 
  • Naan and Kulcha both can be made in the Tandoor but they come out well even on stove top as well .
  • In terms of shape, Naan is generally oblong while kulchas are round like rotis .
  • Kulchas are easy to make with ingredients available in the pantry and fairly simple for beginners who haven't worked with yeast .
Italian pizza in Indian style , kulcha pizza , naan pizza,  fusion pizza , how to make pizza using kulcha as base,  how to prepare kulcha , what is difference in naan and kulcha , naan wala pizza , pizza on naan


Preparation Time -20 mins
Resting Time - 30 mins
Makes - 3 to 4 pizzas 
Complexity - Medium 

Ingredients 

Kulcha

2 cups whole wheat flour 

1/2 cup maida / APF 

1 tsp baking powder 

1/2 tsp baking soda 

1/2 cup curd/yogurt

Pinch of salt 

2 tsp oil 

Toppings

Assorted bell peppers cut length wise 

1 tomato deseeded and cut length wise 

1 onion cut length wise (optional) 

Handful of boiled sweet corn 

5 - 6 tbsp pizza sauce 

Mixed herbs /pizza seasoning 

Chilli flakes

1 slab mozzarella cheese 

Method 

How to prepare the Kulcha dough ?

  • In a wide mixing bowl, sift all the dry ingredients through a sieve .
  • Make a well and add in the curd and mix it with the flour .Slowly add the water and knead it to a soft pliable dough . Donot add too much water 
  • Stretch and knead the dough for about 5 to 10 min for the gluten to react well .Apply some oil  and cover with a damp cloth.  Let it rest for 30 mins .

How to make the kulchas for the pizza base ?

Italian pizza in Indian style , kulcha pizza , naan pizza,  fusion pizza , how to make pizza using kulcha as base,  how to prepare kulcha , what is difference in naan and kulcha , naan wala pizza , pizza on naan

  • After 30 mins punch the dough ,knead and stretch for another 5 mins.
  • Divide the dough to 3 or 4 equal parts.
  • Take one part,  dust rolling board and roll the dough into a  base which is neither too thick nor thin .
  • Prick the kulcha with a fork ,this enables even cooking. 
  • Place this kulcha on a pre heated tava and cook on both sides till it turns slightly brown and looks puffed up .
  • Follow this process for the entire dough and keep the kulcha base ready. 

How to prepare the topping and assemble the pizza?

Italian pizza in Indian style , kulcha pizza , naan pizza,  fusion pizza , how to make pizza using kulcha as base,  how to prepare kulcha , what is difference in naan and kulcha , naan wala pizza , pizza on naan

  • In a pan ,add a tsp of oil and lightly toss the assorted bell peppers with some salt and set aside .
  • Take one kulcha , spread the pizza sauce generously, top it with some mozzarella cheese. 
  • Add the vegetable toppings of onions,tomatoes, bellpeppers and sweet corn as per your liking.  You may also use jalapeños and olives too .
  • Sprinkle the mixed herbs , chilli flakes ,oregano and add some more mozzarella cheese on the top as much as you like .
  • Place this assembled kulcha pizza on a pre heated tawa and cook it covered with a lid until you see the mozzarella cheese melt and cover the entire kulcha pizza .
  • Take it off the pan , cut it into slices and serve hot .


Pin it up future and share with friends 

Italian pizza in Indian style , kulcha pizza , naan pizza,  fusion pizza , how to make pizza using kulcha as base,  how to prepare kulcha , what is difference in naan and kulcha , naan wala pizza , pizza on naan


June 28, 2021

Cheesy Pasta | Cheesy Penne Pasta


Share with friends and family 16 comments:

 Cheesy Pasta is a very easy and quick recipe and can be put together without much effort . It can be a very good after school snack for the kids or also a part of starter in any children's parties. 

Why only kids,even with elders the cheesy pasta is always a big hit and no one can ever say No to a second serving .  Load it with as much cheese as you want and relish the gooey and creamy pasta ! This cheesy pasta is certainly not for the weight watchers or the health freaks . 


I have used Penne pasta for this recipe but you can use macaroni,  spiral , fuesli or any pasta of your choice.  The most important part in getting the pasta right is to cook the pasta properly until it is al dente which means just soft enough to bite into at the same time hold shape and not turn mushy or disintegrate.  

If you have any doubt in cooking the pasta ,follow the instructions on the back of the pasta packet to get it right.  

I always run the cooked pasta under cold tap water in a colander, this helps remove extra starch and also stops the cooking process making it perfect to add on to the sauce.  This cooked pasta can be cooled and then refrigerated for later use as well.

If you like some spicy variant of Pasta , then do try the Pav Bhaji Pasta and Classic Pasta in Red Sauce on my blog.


Linking this recipe to our weekly food theme event Foodie Monday Bloghop.  Priya Iyer is the hostess for the 303rd week and our theme is Pasta Delicacies.  Stay tuned for some yummy Pasta recipes from my blogger friends.  If you love pesto ,check out Priya's easy peasy recipe of Basil peanut pesto. 


Preparation Time - 20 mins
Cooking Time -  15 mins
Serves - 2 to 3
Complexity- medium

Ingredients 
2 tbsp butter 
2 tbsp all purpose flour /maida
1/4 cup processed cheese grated
1/4 cup mozzarella cheese grated 
2 cups milk 
1 tsp red chilli flakes 
1 tsp mixed herbs 
2 cups of boiled pasta 

Method
  • In a pan heat the butter and roast the flour until you get a nice aroma. 
  • Slowly pour the milk and whisk it well to keep it lump free and cook it for 3 to 4 mins.
  • Now add in the processed cheese and mozzarella cheese with the chilli flakes and mixed herbs  and mix it well until the cheese melts.
  • Now add the cooked penne and toss it well till the sauce combines well with the pasta .
  • Transfer to a serving bowl and serve it hot.

Serving suggestions 
  • You can add some boiled corn or vegetables to the pasta along with the white sauce .
  • You may also add some grated cheese on top of the pasta and microwave it for 2 mins to get a more gooey and creamy pasta .
Pin it  up for future 


October 13, 2020

Chutney Cheese Sandwich- Mumbai street food spl


Share with friends and family 5 comments:

 Mumbai is known for its delicious sandwich varieties which are a part of the street food fanfare  .Every single sandwich seller has his own trademark special sandwich and he becomes quite popular in his area because of the same .

Chutney cheese sandwich is very easy to assemble and absolutely a child's  play . They can be served as finger foods at kid's birthday parties or even at kitty parties or get togethers, cheese sandwich, mumbai street food cheese sandwich, cheese chutney sandwich ,  chutney cheese sandwich , bombay sandwich , toast sandwich bombay special, grill cheese sandwich

In addition to that there are some sandwich varieties which are popular across the city and are people's favorite.  One such people favorite is Chutney Cheese Sandwich.  These can be served either toasted or plain . We at home prefer the plain non toasted ones as the taste of cheese feels delicious when it isn't melted. 

Chutney cheese sandwich is very easy to assemble and absolutely a child's  play . They can be served as finger foods at kid's birthday parties or even at kitty parties or get togethers. These can be prepared in advance and stored in air tight containers until serving . 

We can either use cheese slices or grated cheese to be stuffed between the chutney smeared bread. I prefer using cheese slices as it holds up the shape well and helps while cutting the bread without making it messy.  Bread can either be brown , white or Multigrain depending on your choice.  There is no hard and fast rule.

⬇️ Pin it up for future reference ⬇️

https://pin.it/4JjbLCBXl

Chutney cheese sandwich is very easy to assemble and absolutely a child's  play . They can be served as finger foods at kid's birthday parties or even at kitty parties or get togethers, cheese sandwich, mumbai street food cheese sandwich, cheese chutney sandwich ,  chutney cheese sandwich , bombay sandwich , toast sandwich bombay special, grill cheese sandwich

Preparation Time - 10 mins
Assembling Time - 10 mins
Cooking Time - Nil 
Complexity - Simple
Makes 4 sandwiches 

Ingredients

8 slices of bread 
4 cheese slices 
6 -7 tbsp green chutney 
Salted butter at room temperature 

Method 

  • Apply generous spread of butter on the bread. 
  • Take 1 tsp of green chutney and spread it on the slice of buttered bread and place a cheese slice over it. 
  • Take another slice of buttered bread, spread 1 tsp chutney over it and place it on top of the cheese.
  • Cut them into triangles and place them on a serving tray .
  • Serve with some delicious welcome drink .

Vegetable Cheese Grilled Sandwich and Vegetable toast sandwich are two other most popular and sought after sandwiches in Bombay . 

Click on the images below for detailed recipe


June 29, 2020

Veg Cheese Grill Sandwich | Grill Cheese Sandwich


Share with friends and family 16 comments:

I love sandwiches in any form, be it as a sub or the regular ones where veggies are stuffed between two slices of bread.  Toast them for an added taste and crunch and enjoy it hot - this is the way I like it .

Those who are familiar with the street foods of Bombay , will definitely know about the variety of sandwiches that are very famous. They have such amazing combinations and fusion sandwiches which one cannot even think off. There is a grilled cheese chocolate sandwich also on the menu which was a recent addition and I was literally blown when I read that combination of cheese , chocolate and bread .
 There is something special about the bread and paav that is available in Bombay,they are soft and fluffy and don't crumble easily.  

The street vendors prepare piping hot toast sandwiches using a hand toaster which is tossed around a traditional coal stove (sigdi) as it is locally called. It is a sight to see how quickly their hands and brain work in tandem and do multi tasking of chopping the veggies , buttering the bread, toasting it on fire and simultaneously serving the customers and collecting the payment.  All done single handedly and with utmost precision and perfection. Now a days the hand toasters are getting replaced with electric grills as the vendors are also turning to modern ways to improvise on their customer needs based on demand. 
You can check out the other famous variation of Toast Sandwich on my blog . 

As a child , I was never allowed to snack on these road side sandwiches because of hygiene factor and mom would dish out the same things for me at home and it was the best way for her to sneak in all the veggies that I won't eat into the sandwich and mask it with some cheese and butter and I would happily eat it and say "Amma yummy sandwich " . It was only later that I realized how smartly and tactfully she managed to hide the veggies I didn't eat in the name of sandwiches or parathas and fed them to me . Moms are always smart aren't they ??

Well coming to today's recipe , this Monday's theme for our foodie bloghop Monday is  #MunchkinMeals; suggested by Narmadha of Nam's corner who wanted us to present healthy meals for kids .  Narmadha has some excellent baked goodies on her blog which are made using millets and I have bookmarked 
 RAGI cookies to try out.

While thinking on what to make for this theme, lot of recipes were going on in my mind which my mom used to make for me and finally I was reminded off Grill Sandwiches which were and are my favorite and since it makes use of 3 slices of bread per sandwich, lots of veggies can be stuffed into it . Grate some cheese on it , which obviously is every child's favorite and you can be a happy mom to see your little one empty his/her plate and probably ask for even one more :-) 

Some delicious sandwich varieties from my fellow bloggers which you must try. There are many more such varieties, but I will reserve them for an exclusive post on breads and sandwich. 

Veg Club Sandwich by Kalyani 


The recipe is a little elaborate and requires some pre preparation, but it is worth all the time . 

Why only munchkins, even elders would love to feast on these sandwiches when served hot with chutney and tomato sauce . We can minus the cheese while making it for elders or reduce the quantity of cheese.  

Preparation Time :45 mins
Cooking Time : 15 mins per sandwich 
Makes  3 set of sandwiches 
Complexity: Medium 


Ingredients 

9 slices of bread (brown or white)
3 to 4 medium sized potatoes boiled and peeeled
1 large capsicum finely chopped 
1 salad cucumber cut into thin slices 
2 tomatoes cut into thin slices 
1 onion cut into thin slices (optional)
50gms Salted butter at room temperature 
2- 3 cheese cubes (25 gms chiplet) .
3 tablespoons green chutney/sandwich chutney 
Chat masala for taste 

Method 

Prepare the green chutney by following this recipe link .

Take 3 slices of bread and spread butter and green chutney on each slice evenly .
On the first slice , grate some potatoes, sprinkle a little chat masala and spread some finely chopped capsicum . Grate some cheese. 

** I couldn't get fresh brown bread hence used white. 


Place the second slice of bread over the base slice such that the chutney side faces up.
Arrange the slices of cucumber, tomatoes and onions (if using) on this second slice of bread . Sprinkle some chat masala and grate a little more cheese . You can skip this cheese if you want to avoid.  For one set of sandwich I have used 1/2 a cube cheese.  


Lastly , place the 3rd slice of bread with the chutney side over this 2nd slice and slightly press the assembled sandwich with your hand so that the veggies settle in place and it is easy to lift it up .
Heat a grill pan or electric grill and place this sandwich over it and roast it on both sides until crisp and golden brown .Add a little butter to the grill pan for crisp and golden brown toast.


Take it off the grill pan carefully and place it on a chopping board and cut them into triangles. 
If you like you may grate some more cheese over it while serving or serve as is with tomato sauce or green chutney. 


Notes 
  1. Quantity of cheese used for the sandwich is purely your choice.  You may skip the cheese if you want a totally healthy version. 
  2. Butter used for 3 slices of bread put together will be just 1 tsp . Make sure the butter is at room temperature so that it is easy to spread and quantity used is less .
  3. Boiled and sliced beetroot can also be used in the stuffing.
  4. There is sandwich masala also available in the market which can be used instead of chat masala.

Linking this post to Foodie Blog hop Monday week  #253 - munchkin meals


April 22, 2020

Pasta in Red Sauce - No Onion No Garlic


Share with friends and family 5 comments:

I am not a great fan of pasta but V loves pasta to the core especially when it is loaded with a lot of cheese and flavored with chilli flakes and oregano .
Pasta would always be on his menu when we dined out as I wouldn't make it at home since I was skeptical about the outcome and flavors


Now with the ongoing lockdown , all restaurant outings and dinners have taken a back seat and I thought this was the time to overcome my inhibition and try to satisfy V's craving of a cheesy pasta and I was  very happy with the texture and taste of the pasta and so was V , except for his comment was "some more cheese would have made it top class" ....hahaha that is because the health freak inside me uses cheese sparingly..
So for all the first timers who are skeptical about trying, go ahead and give it a try, it is easy and yummy .

Preparation Time : 20 mins
Cooking Time : 40 mins
Serves : 1
Complexity: Medium

Pasta , red sauce pasta , Jain pasta , how to make pasta without garlic, red sauce without garlic, can we make pasta without onion and garlic, penne , elbow pasta , fusselli,Italian pasta , cheesy pasta , penne in red sauce

Ingredients
1 cup pasta
3 medium sized tomatoes
1/2 capsicum
2 small green chillies finely chopped
1 tsp oregano
1 tsp chilli flakes
1 olive oil
Basil/parsley/cilantro for garnish
Cheese as needed
Salt
Pinch of sugar

Method

  • Boil the pasta al dente (until soft) as per the instructions on the back of the pack . I have used penne pasta here, you could use elbow,fusseli,twisted pasta anything that you like .
  • Drain the water through a colander and run cold water over the pasta and let it cool down.
  • Grind two tomatoes into a fine puree and keep aside . Chop the other tomato and capsicum into small pieces .
  • In a pan , heat the olive oil and saute the green chillies,tomatoes, capsicum .Add some salt and let it cook until the tomatoes get mushy. 
  • Add in the puree , oregano and chilli flakes and mix it well along with some sugar .adjust the spice level as per your taste .
  • Let the mixture boil and reach a saucy consistency and the raw flavor of the tomato must not be there .
  • Switch off the sauce when the desired consistency is reached .
  • Arrange the cooked pasta in a bowl, pour this sauce over it , generously grate some cheese and garnish with basil /parsley or thyme .
  • I had to use cilantro (kothmir) as basil was unavailable due to the lockdown .
  • Serve it hot with some warm toasted bread and enjoy your dinner . 


Notes

If you like garlic ,then saute some finely chopped garlic in olive oil along with the chillies and tomatoes.

Italian seasoning of mixed herbs can also be used instead of just chilli and oregano flakes .
If olive oil isn't available handy you can make use of unsalted butter or any cooking oil like rice bran or sunflower oil .

Pin me up


June 28, 2013

Bean Corn Quesedilla


Share with friends and family 7 comments:

Quesedilla is a native of Mexico made using Flour or Corn Tortilla. This recipe gets its name from Tortilla and Queso meaning Cheese in Spanish.
Tortillas are flat bread made from maize flour ,  APF , whole wheat or Multigrain. 

The tortilla is filled with various stuffing like beans,corn,spinach,chicken,meat etc.The primary filling being Cheese. The tortilla is then folded into half with the stuffing in it and is warmed until the cheese within melts.


I first tasted Quesedilla at a Mexican restaurant on one of our holidays in the US . The Quesedillas were a safe bet for a vegetarian like me as I had the choice of filling which I could select from to be put into my Quesedillas. 

Beans, corn, capsicum, tomatoes ,onions and cheese are anyway my favorites ,so I really loved enjoying this warm cheesy Quesedillas after a tiresome hike .It was a blessing for a hungry tummy .

I fell so much in love with the Quesedillas, that I wanted to replicate them at home and I really loved to put together Quesedillas with different fillings. 


Here,I make use of Red kidney Beans /rajma and boiled corn as stuffing along with chopped onion bellpeppers and tomatoes.I made use of ready made tortillas available in the market.But the tortillas can be made at home too. If you like a healthier version one can use the usual soft whole wheat roti that is made in the Indian homes and follow the same procedure.

Forward to 2025....

Now a days, most gourmet super stores in India have these tortillas on their racks in different variants like the whole wheat tortillas , spinach tortillas, multi grain tortillas and ofcourse the traditional flour tortillas.

I have been making Quesedillas even after my relocation to India, initially I used our regular rotis  as tortillas  to make them when ready made tortillas weren't easily available, but now occasionally,I do indulge into store bought tortillas especially the multi grain ones and enjoy our dinner.  I discovered these ready made tortillas in the open market a little before the  pandemic struck us .


Some more Mexican delicacies for you to try

Pin me up


Preparation Time : 45 mins
Baking Time : 5-6 mins per tortilla
Serves : 1 tortilla = 1 quesadilla 

Ingredients

3-4  tortillas (Multigrain/plain/spinach) 
1/2 cup red beans / rajma - soaked for 6-8 hrs
1/3 cup of boiled sweet corn
2 tomatoes finely chopped
1 onion finely chopped (optional)
Finely chopped assorted bell pepper (green ,red and yellow)
fresh corriander chopped finely
2 green chillies finely chopped 
Mozzarella cheese
Lime juice from a lemon
2-3 bay leaves
salt
butter
Tomato sauce or Tabasco sauce (optional)  

Method


  • Pressure cook the beans along with bay leaves,red chilli powder and some salt. The beans must be cooked until soft but they shouldn't get mushy.
  • Boil the sweet corn until soft.
  • Drain excess water from the beans and corn & let it cool.
  • Do not add too much salt we are going to add the cheese.
  • In a wide mixing bowl add the chopped bell peppers tomato,onions,finely chopped chillies ,fresh coriander/cilantro,salt and 2 tsp lemon juice. 
  • Add some Mozzarella cheese and mix it well.
  • Take 1 tortilla ,smear some tomato sauce ,spread some grated cheese and top it with the beans ,corn and bellpepper mix.
  • Top it with cooked beans and then finally some more grated cheese and then fold the tortilla into half .
  • Push the filling in tightly so that it doesn't spill out.
  • Place the folded Quesedilla on a hot griddle/tawa and toast it evenlt until crisp on both sides . You can smear some butter for added taste and crispness.
  • Cut as wedges and serve hot with chips and some salsa or guacamole. 
Notes
  1. Lettuce,spinach,guacamole can also be used as a part of the filling.
  2. I used a little tomato ketchup for added flavor and the mild sweetness.
  3. You can also use chilli sauce or some hot sauce if you prefer to have spicy quesadilla.  


June 14, 2013

Corn Capsicum Lasagna


Share with friends and family No comments:

I am sure,each one of us have a special liking towards cooking pasta-- the comfort dish. Its a quick meal and also sumptuous.Compared to the normal pastas,I somehow have developed a liking towards LASAGNA. Earlier I was very skeptical about even trying to taste this Cheesy Layered Dish smeared with tomato sauce until my hubby forced me to try and thanks to him.. I now LOVE this dish.
The recipe below is my version of making vegetarian lasagna.You can adjust the filling as per your taste. Vegetables like cauliflower,broccoli,mushrooms can also be added . For the non veg lovers,chicken,fish,eggs can be used as per their taste.

Preparation Time :  20 -30 mins
Cooking Time : 30 mins
Baking Time : 15 mins


February 18, 2013

Cheesy Bread Bites


Share with friends and family No comments:


This recipe ended up as a substitute for sumptuous Bread Upma .I had less number of bread slices in my fridge which would not be enough for making bread upma.Hence I cooked up this tasty yummy bread bites.
Can be a very good starter for any get together, kid's birthday parties or even a lunch box menu for school :)
Do try this and impress your friends or kids at the next upcoming  party.

Preparation Time : 15 mins
Cooking Time : 15 mins
Serves : 3-4

Cheesy Bread Bites