Showing posts with label Children's Special. Show all posts

December 18, 2024

Aloo Matar (आलू मटर) | Potato Peas curry - Winter Special


Share with friends and family 4 comments:

 Come winter, the market is flooded with fresh vegetables which are very tempting. Most of the times,I will hoard my fridge with the fresh produce and then struggle to consume it before the freshness withers away .

Winters at home means fresh green peas ,carrots,cauliflower and radish in abundance.  Of course the evergreen , doodhi aka lauki makes it presence in the menu atleast once a week . 

Aloo matar , alu mattar ,alu matar ,how to make aloo matar at home,urulai pattani masala ,urlai pattani masaal, alu matar gravy , restaurant style aloo matar

Aloo mutter is easy and simple to make,but packed with a riot of flavors. You can make with fresh peas or the frozen ones .Try and avoid the dried peas which needs to be soaked overnight . The dried peas don't blend well in to the curry is my opinion. 

In winters, I make this curry with fresh peas and during off season ,the frozen peas comes handy . We can easily make this Aloo Matar gravy for year end parties , get togethers and office pot luck.  

Aloo matar , alu mattar ,alu matar ,how to make aloo matar at home,urulai pattani masala ,urlai pattani masaal, alu matar gravy , restaurant style aloo matar

I learnt this recipe from my amma and she used just simple basic spices to make this curry and it would be served with piping hot fulkas just off the pan . I enjoy it with some thick yogurt or cucumber raita while hubby loves it with onion raita. 

Kulchas and Naan are a best combination too and if serving with rice, simple steamed basmati rice, jeera rice ,peas pulav or vegetable pulao are just the perfect pairing. 

I use the pressure cooker to make and it gets done quickly . Pressure cooker or instapot option is the best choice, if we want to make a large quantity of Aloo Matar.  

Donot forget to use lots and lots of fresh corriander as garnish.  It enhances the flavor of the gravy. Serve with some chopped onions and a wedge of lime.

Aloo matar , alu mattar ,alu matar ,how to make aloo matar at home,urulai pattani masala ,urlai pattani masaal, alu matar gravy , restaurant style aloo matar

Preparation Time - 10 mins
Cooking Time - 30 mins
Complexity- easy
Serves - 2 to 3 

Ingredients
3 to 4 medium sized potatoes  peeled & cut into big cubes 
1 medium onion chopped roughly 
2 tomatoes roughly chopped 
1 cup green peas
2 green chillies finely chopped 
Lots of fresh corriander
1 tsp ginger garlic paste
1 tsp Kashmiri chilli powder
1/2 tsp turmeric/haldi
1/2 tsp kasuri methi /dehydrated fenugreek leaves
3 tsp oil
Salt as needed 
Whole spices
 1tsp jeera /cumin
small piece  cinnamon /dalchini 
3 cloves /lavang
 2 cardamom / elaichi


Method

  • Heat oil in a pressure cooker .
  • Crackle the cumin seeds ,followed by the whole spices until you get a nice aroma of fried spices .Take care to roast over low flame,that is the key to bring out the essence from the whole spices. 
  • Add in the onions and green chillies ,saute till the onions turn pinkish .
  • Add in the tomatoes , turmeric powder, chilli powder, salt and cook until the tomatoes turn mushy and soft. 
  • Once,the tomatoes become soft, add the ginger garlic paste and cook till the raw flavor is lost.
  • Slowly ,add in the potato cubes ,green peas and mix it well.Adjust salt if needed and pour 3/4 cup water. 
  • Pressure cook on medium flame for 4 whistles .
  • Let the pressure release naturally.  Open the lid and gently mix the gravy while you roughly mash a few potatoes here and there.
  • Mashing of potatoes will give a nice volume to the gravy.If you find the gravy thick,you can add some hot water and adjust the consistency.
  • Lastly add the kasuri methi and fresh corriander.  Serve hot with rotis ,naan, steamed rice etc.

Some winter special recipes which you must try

Aloo Gobhi 

Lauki Channa Dal (video)

Palak Paneer 

Sabz Hariyali (video)

Gajar Halwa

Doodhi Halwa 

Gajar Mooli sabji 

Corn peas pulao 


Pin me up 

https://pin.it/36dUF7yJa


November 18, 2024

Carrot Radish Stir fry | Mullangi Carrot Poriyal | गाजर मूली सब्जी


Share with friends and family 8 comments:

 Carrots and radish ,both are delicious and healthy vegetables .I am a huge fan of both these and can have it all round the year without a fuss .

To be honest,combination of radish and carrots is a very new thing for me.  I use carrots in combination with many other veggies for making poriyal ,but never attempted to use with radish as I always felt that the smell and taste of radish will be over powering in the poriyal.

Carrot Mullangi curry , carrot radish poriyal,  radish poriyal , mullangi carrot curry , mulangi poriyal , mulangi carrot curry , gajar mooli sabji , mooli gajar , radish carrots stir fry

Radish always gets made into sambar ,popularly called as mullangi sambar or as mooli paratha . As I write this post ,I realized I haven't blogged Mullangi Sambar and am setting reminder to myself, that I must blog it very soon. 

Well,now coming back to Carrot Radish curry,this was purely dear hubby's idea and as always I wasn't very convinced but he assured me that it will taste yummy . As I wasn't very comfortable with the combo,I told him to make this poriyal and that I would only taste it when it is done.  As opposed to the usual diced chopping ,hubby grated the carrots and radish for making this delightful stir fry.

Carrot Mullangi curry , carrot radish poriyal,  radish poriyal , mullangi carrot curry , mulangi poriyal , mulangi carrot curry , gajar mooli sabji , mooli gajar , radish carrots stir fry

So ,this poriyal is made by him and photography is by me . The recipe that I am penning below is just as he told me what he did . When I was asked to taste after he prepared the curry, I was totally floored . It was a riot of flavor explosion. Subtle sweetness from the carrots and mild pungent flavor from the radish was a perfect match with the occasional crunch from the green peas . The garnish from fresh corriander is an added flavor booster . Do not compromise on the use of freshly chopped coriander ,it adds up to the taste to the Nth level. Pair it with any sambar or Vethakolambu or even have it as a plain salad.

Winter is slowly setting in and now is the best time to enjoy fresh and tender carrots, radish, cauliflower , fresh green peas .

Piping hot Gajar halwa, Aloo Gobhi sabji and fulkas will be an absolute treat to the taste buds on a chill winter night. Do check out all those recipes on my blog. 


Check out the Winter Special Veg Hariyali video on my You tube channel .


Pinterest Link

https://pin.it/3AME6ZKyY


Preparation Time- 15 mins
Cooking Time - 20 mins
Complexity - simple 
Serves  - 3 to 4

Ingredients 
2 medium sized radish grated
2 medium sized carrots grated 
Handful of green peas 
1 medium onion chopped
2 to 3 green chillies chopped
2 tsp oil 
Mustard seeds + curry leaves 
Pinch of asafoetida 
Salt as needed 
Fresh corriander 

Method 

  • Squeeze out the water from the grated radish . After grating the carrots and radish don't let the vegetables sit for a long time,else they will become soggy. 
  • In a thick bottomed kadai,heat oil and crackle the mustard seeds, curry leaves, green chillies .
  • Saute the onions until transparent .
  • Stir in the carrots, radish and green peas and season with salt.  
  • Mix well and cook covered for 4 to 5 mins until the radish and carrots are well cooked .
  • Garnish with fresh corriander and serve hot.

Pin me up


October 27, 2024

Vegetable Brinji | Brinji - Tamil Nadu Special


Share with friends and family 5 comments:

All this while, I was always under the impression that Biryani was colloquially called as Brinji in Tamil Nadu . Not sure, how I got that into my head ;well am thinking still ! 

Coming to my encounter with Brinji; recently on our way back from Chennai ,we had a lunch stop over at famous restaurant near Kanjivaram and that's where I first tasted this Brinji . I had ordered a mini thali which had 3 flavored rice along with some Poori and curry . One of the flavored rice looked like pulao,but it was garnished with bread crumbs . 

Intrigued by that presentation, I asked the waiter what's that and he replied "Akka adhu Brinji". That was my first taste of Brinji a.k.a Birinji .

Brinji, Tamil Nadu style veg Brinji , Birinji , jeera samba Brinji , Brinji saadham , how to make vegtable Brinji , one pot veg Brinji , Brinji is not Biryani , veg Biryani

Without wasting a moment ,I took a spoonful and I must tell you; I totally fell in love with the flavors . That's when my myth was broken and I realized that Brinji is not Biryani and also it is a vegetarian recipe and has no meat .

It was a riot of flavor explosion.  The essence from fennel;sombu as it is called in Tamil and slightly over powering flavor of ginger, garlic ,bay leaf mint along with the vegetables was a treat to the taste buds. 

What is Brinji ?

Brinji is  made using Jeera Samba rice which is a native rice used for Biryanis in TN . A melange of flavors from whole spices , fresh mint , ginger garlic paste along with fresh vegetables is what makes Brinji a delight .

The other main flavor enhancer is the use of coconut milk to cook the rice. The subtle sweetness from the coconut milk lends a wonderful balance of flavors to the palate with every mouthful .Served with a slightly watery onion raita and a veg kurma, the Brinji is a whole meal by itself and keeps us full .

I wanted to try this Brinji ever since I tasted it,but somehow it kept getting delayed, but today we wanted to eat something different for lunch and I immediately told hubby I am making Brinji that too with my own recipe trying to replicate what I ate remembering the taste . 

I am told that Brinji is a very common in the vegetarian menu during Christmas and New Year parties in Tamil Nadu . So for the upcoming year end parties, you could also make it for your office potluck or friends' get together .


Brinji, Tamil Nadu style veg Brinji , Birinji , jeera samba Brinji , Brinji saadham , how to make vegtable Brinji , one pot veg Brinji , Brinji is not Biryani , veg Biryani


Preparation Time - 30 mins
Cooking Time- 30 mins
Complexity - medium 
Serves - 3 to 4 

Ingredients 

1.5 cups Basmati rice 
1 cup coconut milk (canned or home made)
2 cups water 
1 carrot cut into long strips 
2 small potatoes cut into long strips
8 to 10 French beans cut into 1 " strips
1 medium onion cut length wise 
3 to 4 green chillies slit 
2 tbsp ginger garlic paste
2 bay leaves /tej patta/ birinji elai
3 to 4 cloves/lavang
1 inch stick cinnamon/dalchini/pattai
2 to 3 cardamom/elaichi /elakkai
1.5 tsp fennel /saunf /sombu
Handful of chopped mint leaves 
Handful of chopped corriander leaves 
Salt as needed
2 tbsp cooking oil
3 tbsp ghee 

Method 

  • Wash the basmati rice and soak it in water for 20 mins and then drain it .
  • Heat the pressure cooker vessel with oil and ghee .
  • Crackle the fennel seeds and the whole spices until they turn aromatic. 
  • Saute the onions until transparent followed by the mint leaves , ginger garlic paste and vegetables.
  • Let the fat coat the vegetables and saute ginger garlic  until the raw flavor is lost . This will prevent the ginger garlic paste from burning and sticking to the pan's base .
  • Add required salt ,coconut milk and water . Bring  it to a boil .
  • Add the drained Basmati rice. Check for salt and adjust if needed.  Add the fresh corriander and close the cooker lid .
  • Pressure cook for 2 whistles on high flame and turn off. Let the pressure release naturally. 
  • Open it and wait for 5 mins before you can fluff it . Trying to fluff immediately will make it mushy .
  • Roast cashews in ghee and add it to the brinji . You may also add some fried or toasted bread crumbs for extra taste.  
  • Serve hot with onion raita and a gravy of your choice.  

📍 Pin me up 


Brinji, Tamil Nadu style veg Brinji , Birinji , jeera samba Brinji , Brinji saadham , how to make vegtable Brinji , one pot veg Brinji , Brinji is not Biryani , veg Biryani


October 05, 2023

Aloo Gobhi Sabji / Potato Cauliflower gravy - No onion No garlic sabzi


Share with friends and family 13 comments:

 Aloo Gobhi is a classic winter delicacy . Piping hot phulkas/ rotis and a bowl of delicious Aloo Gobhi curry is an absolute bliss on a chill winter night . 

Very simple to make with just basic spices ,Alu Gobhi sabji can be prepared in less than 15mins. I saute the basic spices with tomato ,potato and cauliflower and cook it in a pressure cooker for 1 whistle.  This way it gets done quickly and perfectly . 

The final garnish with fresh corriander is the icing on the cake,the smell of fine chopped kothmir when mixed with the curry kindles the appetite instantly.  Those of who you like a little extra zing, you may squeeze some lime juice over the gravy.

Aloo Gobhi is a very popular side dish ordered in most restaurants and dhabas for all those who love typical North Indian flavors. We can make a dry curry like a stir fry using Aloo and Gobhi or even as a semi liquid gravy . 

We love the gravy type curry at home ,so I prefer to make this for my family . A perfect choice for Vegans as well as those who don't prefer to include Onions and Garlic in their meal .

I chose this recipe for our ongoing No Garlic No  Onion recipes theme in Shhh cooking secretly  group. Theme  suggested by Priya Iyer ,a versatile blogger .I was partnered with Sujata Ji for this theme who has dished out a creamy and delectable Paneer Malai Curry.


Preparation Time - 15 mins
Cooking Time - 20 mins
Complexity - simple
Serves - 2 to 3

Ingredients 

1 medium sized Cauliflower 
2 medium Potatoes 
3 medium Tomatoes
2 Green chillies finely chopped
1/2 inch Ginger finely chopped
1/2 tsp Red chilli powder
1tsp Dhaniya jeera powder 
1/4 tsp Haldi/turmeric 
1 tsp garam masala
1/2 tsp jeera
1/4 tsp saunf
Salt as required 
Corriander leaves finely chopped
2tsp Oil
Pinch of sugar

Method 


  • Cut out the florets from the main flower and soak it in salt and turmeric water.  This enables to clean up some hidden worms which are usually hidden inside the cauliflower.  Discard the water after rinsing the florets well .
  • Cut the potatoes into small cubes and tomatoes into medium Chunks.
  • Heat the oil in the pressure cooker and splutter the jeera and saunf . Once it crackles, fry the chopped ginger and chillies .
  • Add the spices (turmeric, chilli powder, dhaniya jeera powder  and garam masala) and fry it on low flame without burning the masalas.
  • Add the tomatoes and cook it well until it turns mushy.
  • Add the potatoes, cauliflower mix it well .Adjust salt ,sugar, 1/2 cup water and pressure cook for 1 whistle on medium flame.
  • Release the pressure naturally,  give it a nice stir . Take 1 tbsp of the curry in a bowl and lightly mash it. Add it back to the gravy and give a quick boil for 1 or 2 mins. This mashed portion gives the gravy some thickness and volume to the curry.
  • Garnish with fresh corriander and squeeze some lime just before serving and serve hot .

Pin it up


September 07, 2023

Keerai (greens) Kootu - vegan south Indian accompaniment


Share with friends and family 11 comments:

 Keerai is the Tamil name for Green Leafy vegetables in general . Spinach is known as palak keerai , fenugreek is known as Vendhiya Keerai , Amaranthus is known as Arai Keerai , Dill Leaves is known as Soi Keerai ,Drumstick leaves as Murunga keerai so on and so forth.

We all know how healthy and beneficial is the inclusion of greens in our daily diet . So pls do make it a point to include greens as a part of diet atleast once or twice a week  . Of course please exercise caution and consult your Doctor if greens need to be  avoided due to underlying medical conditions.

Keerai kootu , spinach kootu , how to make palak kootu, keerai molagootal, south indian style dal palak, how to make kootu with keerai

I am very fond of keerai sambar, keerai masiyal and keerai kootu in south indian cuisine whereas in North Indian cuisine my favorites are Dal Palak,Palak Paneer , Methi theplas, Palak Paratha which feature frequently on our meals regularly. 

Keerai kootu has been my childhood favorite and I would eat this almost everyday as a little girl . The mild sweetness from the cooked moong dal blends well with the coconut jeera paste and cooked palak and the final tempering of mustard in coconut oil simply elevates the flavor profile of the kootu.  You can pair it with some delicious sambar rice or mix this kootu with some steamed rice and ghee and enjoy as is.   You can use any variety of keerai for this kootu,but I personally love palak.  I don't like Methi in kootu as it imparts a slightly bitter taste to the kootu which puts me off.

Keerai kootu , spinach kootu , how to make palak kootu, keerai molagootal, south indian style dal palak, how to make kootu with keerai

The green Leafy vegetables need to be cleaned very well before using.  There may be a chance of lot of weeds or some rotten leaves hidden in the bunch . I am sharing a detailed video on how to clean the green Leafy vegetables at ease.  If the stems are tender,I chop them finely and use it too while making the kootu.

If you are a lover of exotic greens, then Baby Bokchoy and Shitaake stir fry by Preethi will be the best choice.  I was paired with Preethi for August's Theme of Leafy Greens theme suggested by Seema of Mildly Indian.

A simple lunch platter of keerai kootu, jeera pepper rasam and beetroot curry with fried papads. (Pic updated on Nov 5th 2024)

Keerai kootu , spinach kootu , how to make palak kootu, keerai molagootal, south indian style dal palak, how to make kootu with keerai


Preparation Time - 15 mins
Cooking Time - 20 mins
Serves - 2 to 3 
Complexity - easy

Ingredients 

2 small bunch spinach/palak 
1.5 cup cooked moong dhall
1/4 cup grated coconut 
1tsp jeera
1/2 tsp pepper
2 to 3 dry red chillies / 1 tsp red chilli powder 
2 tsp coconut oil
1 tsp mustard seeds 
1/2 tsp udad dhall
Pinch of asafoetida
Salt as needed 

Method 

  • Clean and wash the spinach  bunch well . Finely chop the palak and cook it well . No need to pressure cook .you can cook it in regular open pot until the raw flavor is lost. Use a heavy bottomed pan always.
  • Grind the coconut, jeera ,pepper, red chillies to a fine paste with sufficient water.
  • Once the palak is cooked, add this coconut paste,bring it to a rolling boil and then add the cooked moong dhall .
  • Ensure the cooking is on medium flame and you are stirring constantly to avoid burning . Moong dhall and coconut paste will stick to the pan very quickly.
  • Once the kootu reaches a rolling boil,turn off and prepare a tempering of mustard, udad dhall and asafoetida in coconut oil and pour it over the kootu . Relish the kootu with rice and papads. 

August 03, 2023

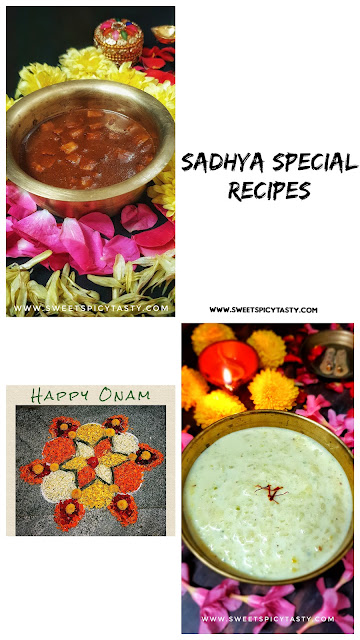
Vendakka Kichadi (Pachadi) | Fried ladies finger (okra) in coconut yogurt sauce - Sadhya special


Share with friends and family 13 comments:

 Kichadi (Pachadi) is an integral part of a festive meal (Sadhya) in Kerala. Kerala style kichadi must not be confused with the North Indian Khichdi which is a rice based main course recipe. 

 Onam and Vishu Sadhya is incomplete without serving a kichadi . Kichadi also known as Pachadi in few regions of Kerala,is a yogurt based side dish often made from various vegetables like Okra/ladies finger ,ginger ,tomato, Cucumbers, ash gourd etc .

Kichadi pairs well with Sambar Rice and a coconut based vegetable stir fry . One can even make it as a part of day to day meal as well. Why wait for a special occasion to savor such a healthy delicacy ? 

Vendakkai Thayir Kichadi/Pachadi   is made from okra/ladies finger . Ladies finger is known as Vendakka or Vendakkai in Malayalam/ Tamil.

Chopped ladies finger is shallow fried in coconut oil and then added to the coconut chilli paste mixed in yogurt. The yogurt must not be spur, else it will ruin the taste of the kichadi /pachadi.

Some recipes call for cooking the coconut chilli paste + yogurt ,but in this recipe I am not cooking the yogurt mixture . I am going to just add the fried Okra to the yogurt mix along with the tempering. 

Some popular kichadi /pachadi served as part of Sadhya 

Inji (Ginger) Thayir  Kichadi 

Thakali (Tomato) Kichadi 

Vellarikai Inji (Cucumber Ginger )Thayir 

Vellarikai (Cucumber) kichadi


This month in our SHHH Secretly Cooking Challenge food group,we are celebrating Sadhya special hosted by me . My fellow bloggers have come up with amazing and authentic Kerala Sadhya recipes . My partner for this month ,Radha Rajagopalan has dished out the traditional Ada Pradhaman ,which is a classic dessert from Kerala. Do check out her recipe for Ada Pradhaman without fail .  

To know more about the dishes served in a typical Sadhya for Onam / Vishu, check out the list soon after the recipe of Vendakkai Kichadi. I am giving you a complete list of authentic recipes.


Preparation Time - 10mins
Cooking Time- 5 mins
Complexity - simple
Serves - 2 to 3 

Ingredients

1/4 cup fresh grated coconut 
2 green chillies
1/2 tsp jeera/cumin
8 to 10 tender ladies finger/okra/vendakkai
200ml  thick yogurt/dahi/thayir
Salt as needed
2 tsp coconut oil
1/2 tsp mustard seeds
1 dry red chilli
Few curry leaves 

Method

  • Wash and dry the ladies finger. Cut into medium sized roundels. 
  • Whisk the yogurt well and make it lump free and smooth. 
  • Grind the green chillies, coconut,jeera with 1tbsp yogurt and some water  into a smooth paste.
  • Add this paste to the yogurt and mix it well with adequate salt.
  • In a frying pan,heat 1tsp of coconut oil and roast the ladies finger until it crispy  ,add a little salt to the roasted ladies finger in the end .
  • Prepare a tempering of mustard seeds,red chilli and curry leaves in the remaining coconut oil .
  • Add the roasted ladies finger ,tempering to the yogurt mixture and mix it well .Delicious and tasty vendakkai kichadi is ready to be served .

Sadhya recipes on the blog. Click on the individual items below to get detailed recipe


Pin me up


June 06, 2023

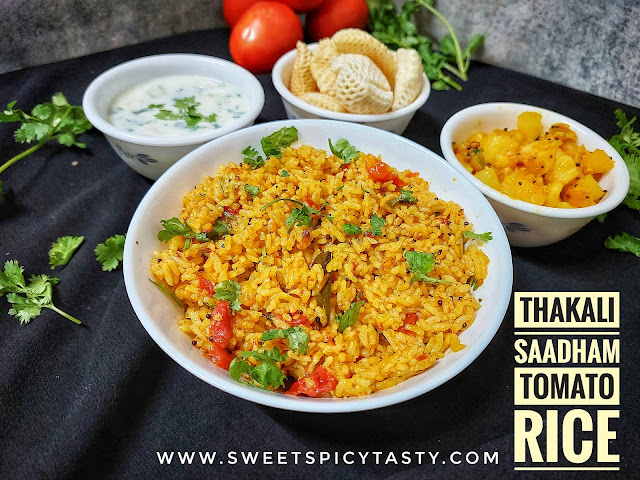
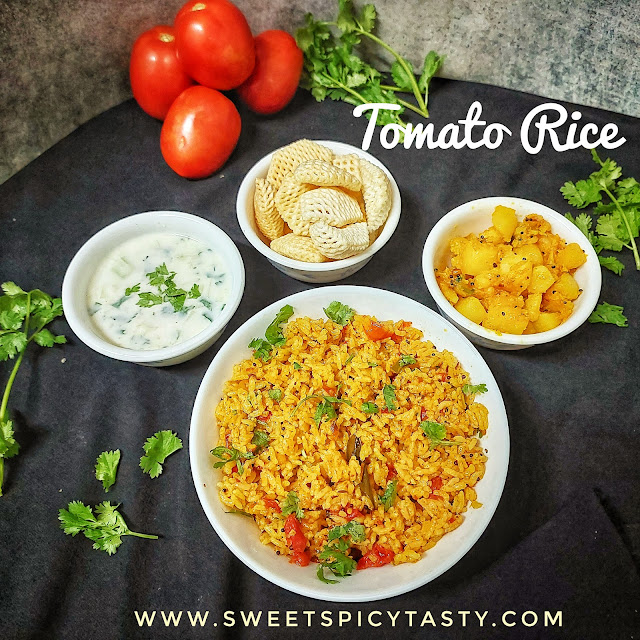
Tomato Rice | Thakaali Saadham - Quick one pot vegan recipe


Share with friends and family 14 comments:

 Thakali Saadham / Tomato Rice is a simple and delicious recipe from South India . It makes for a Quick fix lunch or dinner option and also apt to pack for lunch boxes . 

It is not a traditional recipe, hence each household may have different recipes to dish out this yummy Thakali saadham .

The main ingredient for this recipe are juicy and slightly tangy tomatoes for the extra punch. I use just basic spices and not much whole masalas/ garam masala . I like the rice to soak in the taste and flavor of tomatoes and chillies . 

If you like you may add some fried cashews or boiled peas while preparing the tomato rice . I add them depending on my family's request . 

My hubby loves to have his tomato rice with either Pattani (Peas) Masala or Potato Curry and some chilled raita/pachadi . Papads or fryums are an excellent addition as well . 

If packing for lunch , make sure you cool the rice completely and then pack it . If you pack it very hot ,there is a chance the rice may go bad especially in summer.  

I often make thakali saadham for dinner as it is a quick fix and I wont see fussy faces at home . As always, I realised that this delicious tomato rice wasn't on my blog and as a matter of coincidence our gourmet food group theme for this month was "cook what you like " .. Viola !! I got an opportunity to publish this recipe.  My partner Rafeeda has dished out a baked Pasta recipe and if you are a pasta lover, you must try it for sure .

Preparation Time- 10 mins
Cooking Time - 20 mins
Complexity - simple
Serves  - 2 to 3

Ingredients 

2 cups rice (Basmati / Sona Masuri / any short grained rice ) 
3 to 4 medium sized tomatoes 
1 onion chopped (optional) [skip for jain and no onions no garlic recipe ] 
3 green chillies slit 
Few curry leaves 
Fresh corriander 
1 tsp mustard seeds 
1 tsp channa dal 
1 tsp udad dhal 
2 tsp corriander powder 
1/2 tsp jeera powder 
1/2 tsp chilli powder 
Pinch of turmeric powder 
Salt as  needed
2 tbsp cooking oil 
Pinch of sugar 

Method 

  • Wash the rice well and soak it for 10mins and then drain the water through a colander. 
  • Chop the tomatoes into medium sized chunks and finely chop the green chillies .
  • Heat the oil in a pressure cooker or pressure pan and crackle the mustard seeds followed by channa dal and udad dal until they turn crisp and golden brown . Saute onions if using until pick and translucent. 
  • Fry the green chillies,  curry leaves . Keep the flame on low and add the chopped tomatoes and  spice powders (haldi, red chilli powder, jeera powder and corriander powder ).
  • Saute the tomatoes well and sprinkle some water ..cook covered until the tomatoes turn mushy and soft . Continue cooking until the oil begins to separate.Add salt at this  stage along with some chopped corriander. 
  • Add water and bring to a boil . If using basmati rice use 1.5 cups water for 1 cup rice and if using sona masuri rice use 2 cups water for 1 cup rice.
  • Once the water begins to boil,add the drained rice,  Pinch of sugar and adjust salt if needed .
  • Close the pressure cooker and cook on medium flame for 2 whistles.  Let the pressure release naturally. 
  • Fluff it with a fork and add some ghee if not vegan and serve hot with raita ,papads and some gravy or curry . 


April 14, 2023

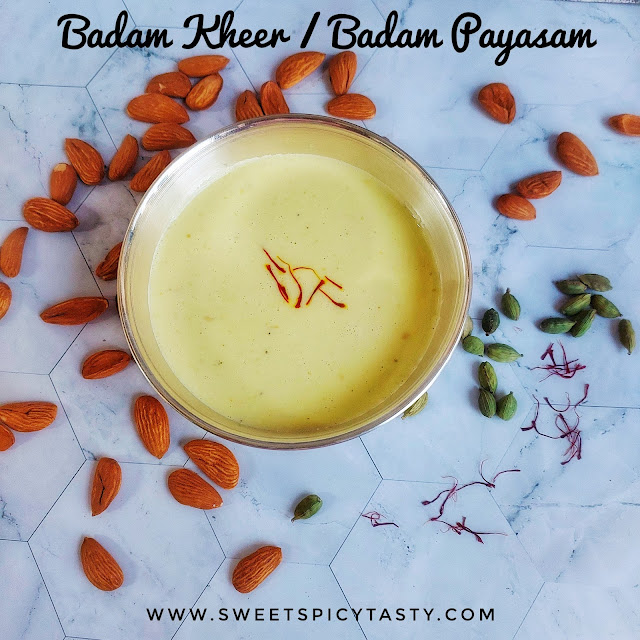
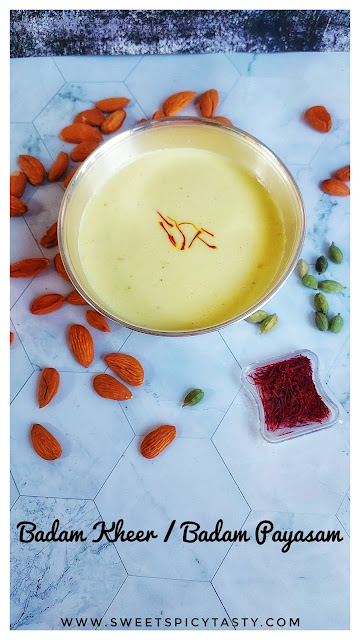
Badam Kheer | Badam Payasam | बादाम खीर


Share with friends and family 8 comments:

 Badam Kheer / Payasam is an exotic festive dish which is loaded with lots of richness and flavor .

It is very easy to make and has no fancy ingredients except almonds ,cardamom, milk and saffron strands.  Sugar is used as a sweetener.   Soaked almonds are ground to a fine paste with saffron and cardamom and simmered in boiling milk .

Badam kheer , how to make badam payasam , baadam payasam , badam payasa , badam kheer at home , almond pudding , badam geer , badam gheer

Mom used to stock up home made badam powder and I used to drink Badam milk during my school days as I was not a fan of malt based drinks . Badam payasam is an extension of Badam Doodh or Badam milk and a perfect dessert for all festive occasions or even get togethers .

Even beginners can easily make  badam Kheer due to the ease involved in the making of this payasam. I prepared this yummy and aromatic badam Kheer for our Tamil New Year's festival today .

To know more about ,how we celebrate Tamil New Year (Puthaandu) and the delicious spread we prepare ,check this post here .


Badam kheer , how to make badam payasam , baadam payasam , badam payasa , badam kheer at home , almond pudding , badam geer , badam gheer


Preparation Time - 1 hr
Cooking Time - 30 mins
Complexity- easy 
Serves - 3 to 4 

Ingredients 

1/2 cup badams /almonds soaked in hot boiling water 
1/2 litre milk (preferably use 2% fat or full fat milk) 
1/4 cup sugar 
3 to 4 cardamoms
Few strands of saffron

Method

  • Soak the almonds in hot boiling water for mini1 hr . You can soak for 2 to 3 hours also. Deskin the badams and discard the skin.
  • In a blender add the badams, cardamoms,  saffron ,1/2 cup milk and grind to a fine paste .
  • Boil the 1/2 litre milk in a thick bottomed vessel . As the milk reaches its boiling point ,slowly add this badam paste and keep stirring on low flame and continue cooking until the raw flavor of almonds is lost .
  • Lastly, add the sugar and continue to simmer till the kheer thickens .  You can add some saffron strands while the kheer is simmering. Turn off the stove and let it come to room temperature. 
  • Serve this badam Kheer warm or chilled . 

Pin me up !!

Badam kheer , how to make badam payasam , baadam payasam , badam payasa , badam kheer at home , almond pudding , badam geer , badam gheer


April 02, 2023

Gulkand (Gulqand) Milkshake


Share with friends and family 17 comments:

 Gulkand is a sweet preserve made from the rose petals . Rose petals are slow cooked in sugar syrup until it reaches a jam like consistency.  This when stored in an air tight container has a very long shelf life and can be used in various ways . 

The most common use of gulkand is in the making of meetha paan (beeda) . I. love to eat spoonfuls of gulkand as is because it is really very tasty and it has been my favorite since childhood . I am sure most kids love to eat gulkand.

 Gulkand is also beneficial from health point of view as it has cooling properties and helps reduce body heat and also rich in proteins . Gulkand mixed with milk is useful to give relief from acidity or gastric reflux. 

Gulkand Milkshake is a delicious summer time treat ,which will be loved by one and all  . Best way to give fussy kids their daily dose of milk is by adding this gulkand to their milk and serving it nice and chill . Kids would love to sip on this chill gulkand shake . 

Gulkand Milkshake can be served as a welcome drink for your summer barbecue parties or match get togethers . Make a huge pitcher of gulkandh milk shake in advance and refrigerate it.Serve it chilled when your guests arrive.

You may use rose essence in case you don't have rose syrup readily available. 

 If you love the flavor of rose ,you can also try Rose Kulfi , Rose milk, Rose Thandai   as Summer special treats. 

In our food bloggers' group Shhh cooking secretly challenge ,Sasmita was the host for this month. She suggested we make healthy summer Coolers sans the use of soda or fizzy drink . 

Coincidentally ,I was paired with Sasmita for the theme and she suggested I use ,gulkand and rose syrup as my secret ingredients.  With such exotic ingredients, I whipped up this delicious and healthy milk shake and Sasmita has made a lemonade using sabja seeds .


Preparation Time - 5 mins 
Cooking Time - Nil 
Complexity - easy
Serves - 4 glasses 

Ingredients 

3 tbsp gulkand 
2 teaspoon rose syrup 
4 cups milk
5 to 6 icecubes 

Method 

  • Put all the ingredients in a blender and blend it until it is creamy and frothy .
  • Pour it equally in 4 serving glasses  and serve chilled. 
  • For added deliciousness , you may add a scoop of vanilla ice cream while serving .

Pin me up 


February 06, 2023

Strawberry Lemon Soda (Mocktail)


Share with friends and family 7 comments:

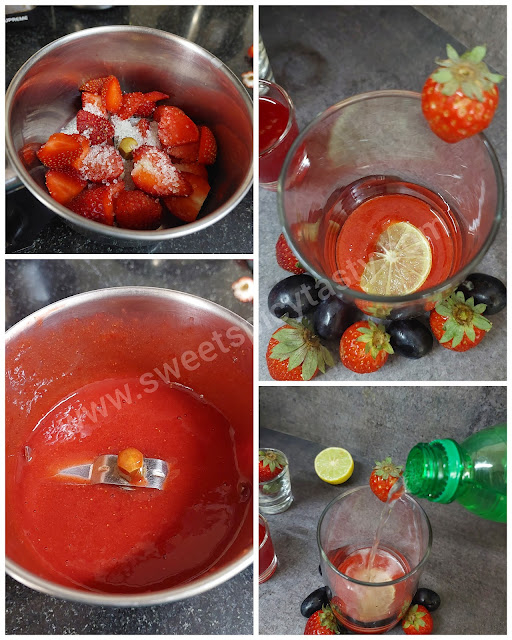
 Strawberry lemon soda is a very refreshing mocktail drink that can be served at any party.

Made from fresh strawberries ,flavored with fresh lemon juice and spiked up with either club soda or sprite ,this drink gives a nice zing with every sip. If using plain club soda we will need to add some sugar or sugar syrup to give the sweetness while we don't need extra sweetener if using sprite or 7Up. 

Preparing Strawberry Lemon Soda is actually a child's play as there is not much complexity involved.  Though at home we are a huge fan of Strawberry Milk shake , this refreshing mocktail was a welcome change and we all simply loved it . I have used sprite in my recipe, hence no extra sweetener added .

If serving for a large party ,you can mix the Strawberry syrup ,lemon juice along with some ice cubes and lemon slices in  a jar and keep it ready ..pour the Strawberry mix onto serving glasses and add in the soda /sprite just before serving along with some crushed ice .

If you love to spread some Strawberry Jam on  a warm slice of toasted bread,then Priya's Strawberry Chilli Jam is a must try .


Preparation Time  - 10 mins
Cooking Time - Nil
Complexity - easy 
Serves - 2 glasses 

Ingredients 

8 to 12 strawberries 
2 tsp sugar 
1 tbsp lemon juice 
Few lemon slices 
250 ml soda /sprite 

Method 


  • Trim off the top part of the Strawberries and roughly chop them.
  • Add them to a blender with 2 tsp sugar and blend it to a smooth puree .
  • Divide the puree equally into 2 serving glasses , add 1/2 tsp lemon juice and a slice of lemon to each . Add some crushed ice before adding sprite/ soda .
  • Slowly pour in the chilled sprite in both the glasses and serve immediately. 

Refreshing and classic welcome drinks on my blog 


Pin me up 


February 03, 2023

Matar Poha | Peas Poha - Vegan breakfast


Share with friends and family 11 comments:

 Poha (Flattened rice) is a versatile ingredient used for breakfast or a quick evening snack all over India. 

During winters fresh green peas are available in plenty and I use them in my cooking a lot.

Peas Poha is one such favorite breakfast at home where lot of fresh tender peas are used as a part of the recipe. Poha is seasoned and tempered with simple Indian spices that makes it very tasty and flavorful .


Choora Matar or Chooda Matar is a variant of Peas Poha that is very popular in Northern India especially UP and Bihar and is a purely No Onion No Garlic snack .

Matar Poha can be made with or without onions depending on your taste . If using onions, saute them after you splutter the mustard seeds and curry leaves until the onions turn soft and then add in the poha .

Some delicious Poha variants which can be easily prepared for breakfast / lunch boxes and also as Prasadam .


Puli Aval /Gojju Avalakki (Karnataka Special)
Gopalkaala / Dahi Poha (Janmashtami Special)


Preparation Time - 10mins
Cooking Time - 8 to 10mins
Complexity - Simple 
Serves  - 2 to 3

Ingredients 
2 cups medium thick Poha/Flattened rice 
2 to 3 green chillies 
1/2 cup boiled peas 
Small piece ginger finely chopped 
1 tsp mustard seeds
Pinch of asafoetida
Pinch of turmeric 
2 tsp lemon juice
Salt as needed 
Pinch of sugar
2 tbsp oil
Few curry leaves 

Method 

  • First and foremost ,sieve the poha and get rid of small dust and other unwanted particles.
  • Wash the Poha under running water in a colander and let it sit for 5 to 6 mins . This step is very important.  If there is too much water in the poha ,it will become a mushy mass and we don't want that .
  • Meanwhile, heat the oil in a thick kadai /wok.
  • Splutter the mustard seeds ,followed by curry leaves, ginger ,turmeric powder and asafoetida. 
  • Mix in the washed poha ,sprinkle salt and mix it well .
  • Add in the boiled peas, sprinkle some water and cook covered for 3 to 4 mins till the poha becomes soft and well cooked. 
  • Turn off ,open the lid, add sugar ,lemon juice and give it a quick mix ,serve hot with a garnish of freshly chopped corriander. 
  • You can sprinkle some namkeen farsan/crispies for an added crunch .

Pin me up 


Month of January we are going "Vegan" in our food bloggers' group Shhh Secretly Cooking Challenge . A wonderful theme suggested by Radha as January is also celebrated as a Vegan Month in some parts of the world .  My partner for this month is Preethi of Preethi's cuisine. Preethi gave me lemon juice and ginger as secret ingredients which was used in this flavorful aromatic Matar Poha while Preethi made a yummy  and healthy Tofu Bean Stir fry with sesame oil and rice flour being the secret ingredients I suggested to her. 
Radha has prepared a lipsmacking Jackfruit Kofta Curry which is a classic innovative recipe and that too purely plant based ..


December 07, 2022

Veg Pizza - Stove Top version


Share with friends and family 9 comments:

 Pizza is the most loved quick bite that's enjoyed by all ..Be it kids or adults ,there is something in Pizza that makes it everyone's favorite. 

Kids find the long string of hot melted cheese  while they take a bite as an attraction while elders love the various toppings that are used on the Pizza to make it tasty and enjoyable .

As much as many consider pizza as a junk food or a overload of fat due to cheese,I would say we can make it really healthy by using the whole wheat or multi grain pizza base , loads of vegetables and very minimal cheese or no cheese at all . 

One of the best ways to get the kids eat as much as veggies as possible.  I keep trying various toppings and this time I used even some grated carrots and it was a very nice welcome change.  

Nowadays markets are flooded with a variety of ready made pizza base breads and I was super impressed with the thin crust multigrain base which I have used in the recipe. Though we can bake our own pizza bread at home, for sudden pizza cravings I pick up the pizza base from the nearby organic store. 

Cheese was used very minimally and a mix of cheddar and mozzarella from my favorite brand Amul . Amul is a very famous brand which is widely used in India and known for its superior quality of diary products ,ice creams and chocolates.

This flavor packed and tasty pizza was  prepared for the World Street Food Theme on our food group Shhh Cooking Secretly Challenge.  I was partnered with the amazing blogger Preethi who was also the host for this month's theme. She gave me the secret ingredients Oregano and Tofu while I gave her Yeast and icing sugar with which she has made delicious Firi Firi


Preparation Time - 15 - 20 mins
Cooking Time - 5 to 10 mins
Complexity - easy 
Serves - 2 to 3

Ingredients 

2 multigrain pizza base bread 
1/2 cup finely chopped assorted bell peppers 
1/4 cup boiled sweet corn 
1 medium onion chopped 
100 gms tofu /paneer diced into cubes 
1 medium carrot finely grated
Chilli flakes 
Oregano flakes 
1/4 cup tomato sauce / pizza sauce
50 gms grated mozzarella cheese
50 gms grated cheddar cheese 

Method 

  • Take a pizza base , spread some sauce over and layer it with some cheese. 
  • Add the toppings one by one as you wish .
  • Sprinkle Chilli flakes and Oregano all over the toppings .
  • Spread some more cheese as you like.
  • Place the pizza base on a heated tava/griddle ,and roast on slow flame until the cheese on top melts .
  • Cut into wedges and serve hot .