December 28, 2020

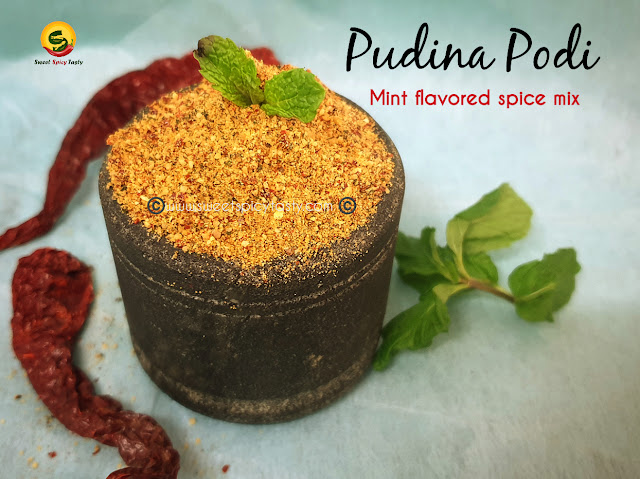
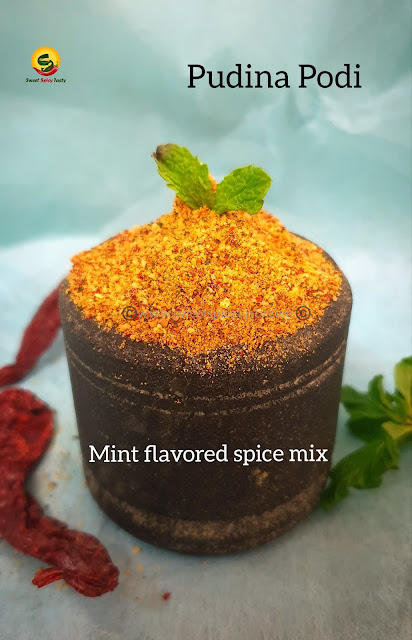
Pudina Podi | Mint flavored spice mix - Vegan & GF


Share with friends and family
8 comments:

 Mint or pudina is a very flavorful and aromatic herb with a lot of medicinal benefits.  Pudina / mint aids in digestion and helps in preventing flatulence and acidity.  It is also used as a mouth freshner and keeps us free from bad breath . Preparing a concoction of pudina leaves helps in managing indigestion. 

Indian cooking makes use of pudina in a variety of ways .Biryanis , gravies and  pulao are always flavored with this delicious herb and the taste is absolutely delectable. In South indian cooking, pudina is widely used in chutneys, podis and thuvayals (thick form of chutney).

Pudina podi is an aromatic and flavorful spice mix made by roasting and blending udad dhall , chillies and fresh mint leaves. Pudina pudi ,mint podi , pudina karram podi , mint flavored spice blend , mint masala , pudina masala

I have already given the recipe of Pudina Thogayal , a typical recipe in a Tamil home on my blog.  Pudina flavored buttermilk is another lip smacking drink which is very soothing after a heavy festive meal . It can be savored on a hot sunny day to keep the body cool and hydrated . If you are a pulao loving person, then you must try out my Chutney Pulao and serve it with some thick chilled yogurt .

I frequently make pudina parathas and also pudina podi  in winter when fresh mint is available in abundance.  This week when Aruna suggested the theme for the 278th Foodie Monday Bloghop event as #SpiceMixSecrets , it was then that I realized how silly of me to have missed to blog this lipsmacking spice mix which is a regular in my pantry . Head to Aruna's blog for some authentic tongue tickling Andhra special recipes and donot miss to check on the traditional Gongura Pulihora on her blog .

Pudina podi can be served with idlis , dosas , spread on rotis with a generous spread of ghee or mix it with piping hot rice and enjoy it as the first course of your lunch.  I am sure it will tickle your taste buds and increase your appetite to enjoy the rest of your meal.  

Make sure you use only fresh pudina as when the leaves begin to wilt they will start to turn bitter.  Also, donot over roast or grind the mint leaves too much because it will start releasing the oil and the taste will be very different and not as desired . You will just have to pulse the roasted pudina to ensure that you don't go over board grinding the leaves .


Pin it for future

Pudina podi is an aromatic and flavorful spice mix made by roasting and blending udad dhall , chillies and fresh mint leaves.

Preparation Time - 15 mins
Cooking Time - 10 mins
Complexity - simple
Serves - 3 to 4 

Ingredients 

1/2 cup udad dhall /black gram /ulutham paruppu 
2 handfuls cleaned pudina leaves 
4 to 5 byadgi chillies  or 2 to 3 guntur chillies 
1 tsp pepper corns
Salt as  needed 
Pinch of asafoetida (skip for Gluten-free)
1/4 tsp sugar 
1 tsp oil

Method 


  • Clean the mint leaves under running water and pat dry them on a kitchen towel and set aside. Use only the leaves and very tender stems . 
  • In a pan , heat oil and start roasting the udad dhall on medium flame. 
  • When the dhall begins to turn crisp add the pepper corns and the dry chillies and continue roasting till the udad dhall turns golden brown and crunchy . Transfer to a plate and let it cool for a while .
  • In the same pan, roast the pudina leaves till they turn crisp . Donot over roast or burn the leaves.  Transfer the roasted leaves  on a plate and let it cool.
  • In a blender, transfer the roasted dhal ,chillies ,pepper corns along with some salt , sugar and asafoetida. Skip the asafoetida if you are following gluten free diet .
  • Blend the ingredients till they turn into a semi coarse powder , now add the roasted pudina and quickly pulse 2 to 3 times just enough to blend with the dhall mixture .
  • Let it cool down and then transfer to an air tight container and keep away from moisture..always use a dry spoon. 
Pudina podi is an aromatic and flavorful spice mix made by roasting and blending udad dhall , chillies and fresh mint leaves. Pudina pudi ,mint podi , pudina karram podi , mint flavored spice blend , mint masala , pudina masala


November 30, 2020

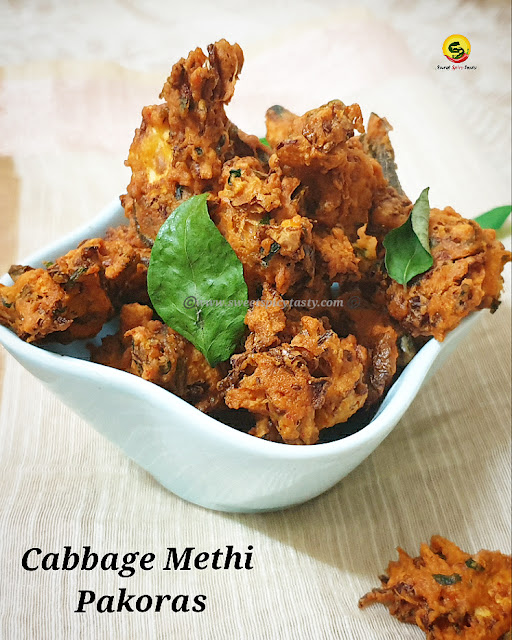
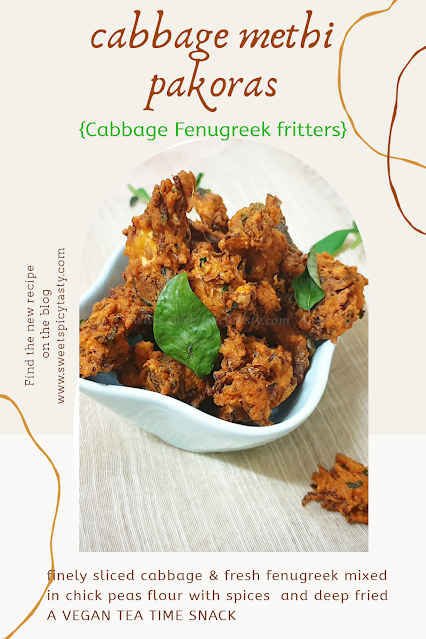
Cabbage Methi Pakoras | Cabbage fenugreek fritters - Vegan


Share with friends and family
9 comments:

 Winters and fresh vegetables are always a treat to eyes and taste buds . Last few days have been pretty cold in my city and we also experienced mild showers owing to a cyclonic depression.  Cold weather coupled with rains definitely calls for some crispy bites and is it not a pleasure to indulge into some fried snacks keeping the guilt aside for a day?
Deep fried snack prepared by mixing fenugreek, cabbage with gram flour and spices.  Pakoras are a winter or rainy special snack loved by all.

I had some fresh cabbage and methi /fenugreek leaves in my fridge and this time I prepared pakoras or Fritters using them . This was the first time, I combined the two veggies and made pakoras . Generally I make either only cabbage pakoras or methi pakoras, but this mix veg pakoras were just out of the world and it just flew out of the pan soon after I made them. You can add some chopped capsicum also to this .

By now you all must be aware about our weekly themes in Foodie Monday Bloghop and this time we are celebrating Winter vegetables as suggested by Sasmita for the 274th week.  The next soup on my mind is Beetroot Carrot Soup which Sas has on her blog "First timer cook" .


Preparation Time- 15 mins

Frying time - 20 mins

Serves- 3 to 4

Complexity- medium


Video recipe of Pakoras on my channel 


Ingredients 

1 cup finely chopped cabbage 
1/2 cup finely chopped methi /fenugreek leaves
2 to 3 green chillies finely chopped 
2 cups besan/gram flour 
1/2 cup rice flour 
2 tsp red chilli powder
1 tsp ajwain /carom seeds 
Finely chopped corriander 
Salt as needed 
Asafoetida as needed  
Oil for frying 

Method 

  • In a wide mixing bowl, take the cabbage , methi Leaves , corriander, salt , red chilli powder , ajwain,chillies ,asafoetida and mix it well with your fingers . Let it sit for 5 to 10 mins for the veggies and spices release their flavor. 
  • Add the gram flour and rice flour and mix it with the vegetable mixture.  Rub it well with your fingers such that you get a crumbly texture.  The salt and spices would have released water which will be enough to mix the dough for pakora . Incase you find it dry , sprinkle water little by little and make a tight but moist dough. 
  • Heat oil and drop little bits of the dough into hot oil and fry them on medium flame until the hissing sound of the oil stops and the pakoras feel crispy and golden brown .
  • Repeat this step until the dough is over . Always fry in small batches so that the pakoras are evenly fried and turn crisp .

Pin it for future 

Deep fried snack prepared by mixing fenugreek, cabbage with gram flour and spices.  Pakoras are a winter or rainy special snack loved by all.

Some more deep fried nibbles  on my blog which will interest you 


November 27, 2020

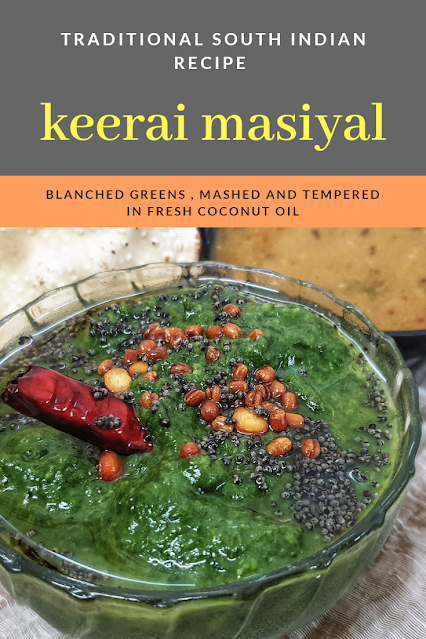
Keerai Masiyal | Blanched & Mashed greens - Vegan , Satvik & GF


Share with friends and family
13 comments:

 Keerai Masiyal is a typical Tamil Brahmin recipe and is almost loved by everyone .  In Tamil Keerai is used to refer to Green leafy vegetable and Masiyal means mashed, in short Keerai Masiyal means Mashed Greens.

Winter is the time when  we get fresh greens of all sorts and we all like to use them as much as possible in our cooking. Keerai Masiyal is a common recipe and will feature regularly in many homes .

I have used spinach/palak in my recipe while this can be made with "Mullai keerai"  "Arai keerai" as well..these greens are available in plenty in Southern India.  

Keerai Masiyal means Mashed Greens, keerai kadassal , tambrahm keerai Masiyal, how to make keerai masiyal , palak keerai masiyal , palak masiyal , pasala keerai masiyal , pasala keerai

Just as Khichdi, Achar  papad & dahi  is a sought after combination and a soulful meal for North Indians, Tamilians swear by Vethakuzhambu , Sutta Appalam & Keerai Masiyal . The essence and emotional feel will be lost if I go into the depth of translation, but for the benefit of my readers , it is a combination of roasted papads , a tamarind based gravy and blanched mashed greens.   Do try this combination and I promise you will fall in love with this delicacy .

Keerai Masiyal is power packed with all nutrients and doesn't involve too much oil or cooking . The best part of the recipe which infuses and adds a whole lot of aroma and flavor to this dish is the tempering made out of coconut oil . So pls do not skip on this coconut oil tempering if you want to experience the original taste of how it is savored and relished in a typical TamBrahm home.  

This is a perfect home style simple meal which we crave for and relish when we are back home after vacationing and eating lot of outside food .Helps in detox of the gut . In winters this rustic meal is frequently prepared as it is easy to digest and also keeps the immune system boosted up. 

Traditionally the blanched greens used to be mashed using a hand masher which used to be a special tool in every household to mash the greens or even cooked dhall.  It would take a while to mash the greens manually as the process was relatively laborious and time consuming.  In modern times , we can use the pulse mode in our blenders or food processors and achieve the same texture in no time .

Pin it up for future 

Keerai Masiyal means Mashed Greens, keerai kadassal , tambrahm keerai Masiyal, how to make keerai masiyal , palak keerai masiyal , palak masiyal , pasala keerai masiyal , pasala keerai


With winter setting in the Northern hemisphere, Preethi suggested we share Winter delicacies for our monthly Shhh Secret cooking challenge foodie group and stay tuned to have a virtual treat of lipsmacking winter special recipes from my co bloggers . Preethi has  recently shared her family favorite delicious Gongura  Koora (sorrel leaves curry) which is a must try if you relish the slight tanginess present in the Gongura.  This month my partner was Anu Kollon who blogs at "Entethattukada" and I must say her blog has some unique traditional kerala recipes.  She gave me spinach and green chillies as secret ingredients for the theme.  With the secret ingredients that I shared with her , Anu has dished out a lipsmacking radish chutney using radish and mustard ; the secret ingredients that I gave her .


Preparation Time - 15 mins
Cooking Time - 10 mins
Serves 2 to 3 
Complexity - simple

Ingredients 
3 medium bunches of spinach/palak
2 green chillies 
1/4 tsp jeera 
2 tablespoon fresh grated coconut 
2 tsp coconut oil
1 tsp mustard seeds
1/2 tsp udad dhall 
1/2 tsp chana dhall 
1 dry red chilli 
Salt as needed 

Method 

  • Chop the roots of the spinach and remove all the weeds , rotten leaves and stems . Wash them under running water multiple times to remove all the mud . You can also soak them in salt and turmeric water for a while to clean .
  • If the stems are very tender and soft use it along with the leaves for blanching else discard the hard stems because they will be very chewy.

  • Roughly chop the leaves , add sufficient water , pinch of salt , green chillies, jeera and blanch the spinach until it is soft and the raw smell is lost . Cool it completely. 
  • Strain the water and add these blanched leaves to a mixie /blender alongwith the grated coconut and pulse it till it appears coarse . Donot grind it to a fine paste.  The strained water can be used in any other cooking instead of discarding. 
  • Prepare a tempering of mustard,  channa dhall , udad dhall in coconut oil and lastly fry the red chilli and pour it over the mashed spinach. Delicious keerai Masiyal is ready .

Keerai Masiyal means Mashed Greens, keerai kadassal , tambrahm keerai Masiyal, how to make keerai masiyal , palak keerai masiyal , palak masiyal , pasala keerai masiyal , pasala keerai

Some more healthy recipes using Spinach which you may want to try 


November 24, 2020

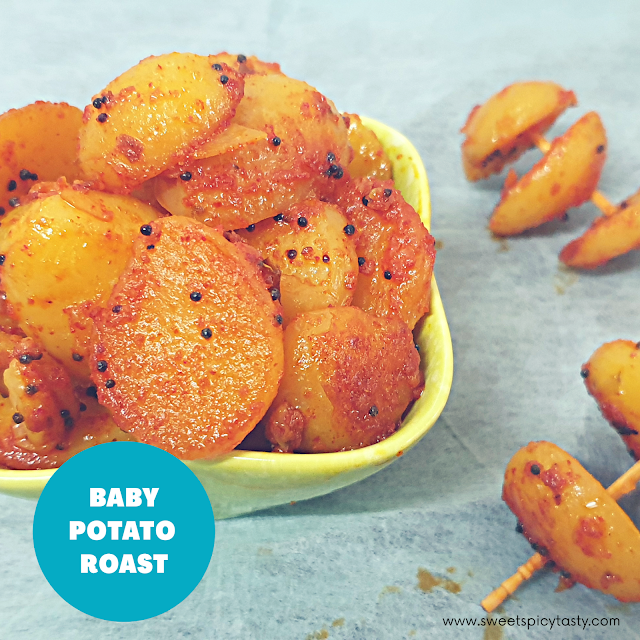
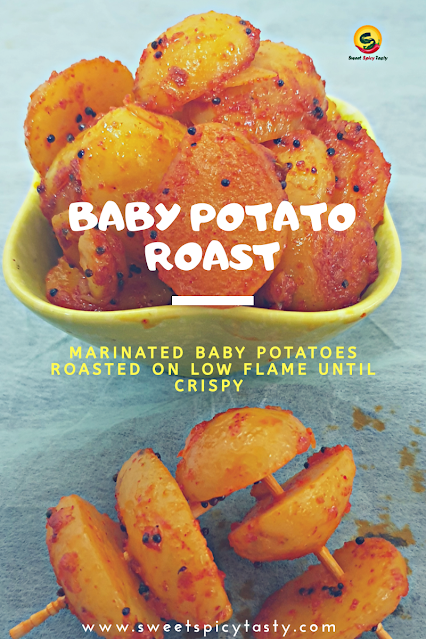
Baby Potato Roast- Vegan & GF


Share with friends and family
3 comments:

There will hardly be anyone who doesn't like potatoes.  Potatoes have something in them that attracts everyone right from children to adults. 

  A simple home style delicious baby potatoes stir fry sauteed on slow flame with basic spices . The baby potatoes are pressure cooked first and then further sauteed with basic spices until they turn crisp.

A simple home style delicious baby potatoes stir fry sauteed on slow flame with basic spices, baby potato fry , chinna urulai roast, baby potato roast , south indian style baby potato , basic baby potato fry , simple baby potato fry

Today's recipe is a common feature in my kitchen and as always these every day recipes never made it to the blog, so I decided to share this today .  If you are a beginner in cooking or a bachelor who wants to have home food , this is a very simple and hassle free recipe . You just need red chilli powder, turmeric , salt and oil . No fancy spices or masalas are used. 

This baby potato roast is a perfect accompaniment with dal fry , gujarati kadhi ,simple tomato rasam or the ever green curd rice.  This afternoon we relished this with kadhi and roasted papads .

Preparation time - 30 mins

Cooking Time - 15 mins

Complexity - simple

Serves - 3 to 4

A simple home style delicious baby potatoes stir fry sauteed on slow flame with basic spices, baby potato fry , chinna urulai roast, baby potato roast , south indian style baby potato , basic baby potato fry , simple baby potato fry


Ingredients 

500gms baby potatoes 
2 tsp red chilli powder 
1/2 tsp turmeric powder 
1 tbsp oil
Salt as needed
Pinch of asafoetida (skip for GF)
1/2 tsp mustard seeds

Method 

  • Wash and clean the baby potatoes under running water till all the mud is washed off .
  • In a pressure cooker , take sufficient water such that all the potatoes are immersed well and pressure cook on high flame for 2 whistles.  Let the pressure release normally.
  • Drain the water from the potatoes and run it under cold water . This will stop the potatoes from getting cooked further due to the heat. We need well cooked but firm potatoes not mushy ones .
  • Slowly peel the skin and cut them into half and keep aside . You can use them as whole potatoes, but when cut into half the marinade will get absorbed nicely into the potatoes. 
  • In a wide mixing bowl , add the chilli powder , turmeric,salt and asafoetida and make a thick paste by adding water.  To this add the cut baby potatoes and coat it well with the masala paste.  Use your hands to coat the masala . Using and fork or spoon can break the potatoes.  Do it very gently.  Keep these coated potatoes in the fridge for 10 to 15 mins .
  • Heat oil in a kadai or non stick pan and temper the mustard seeds , add the marinated potatoes and toss them gently and cook on low flame till they turn crispy . Keep tossing occasionally to prevent burning of potatoes.  
  • Serve hot with rice and dhall or whatever is your preference. 
Pin it up for later 

A simple home style delicious baby potatoes stir fry sauteed on slow flame with basic spices, baby potato fry , chinna urulai roast, baby potato roast , south indian style baby potato , basic baby potato fry , simple baby potato fry


November 23, 2020

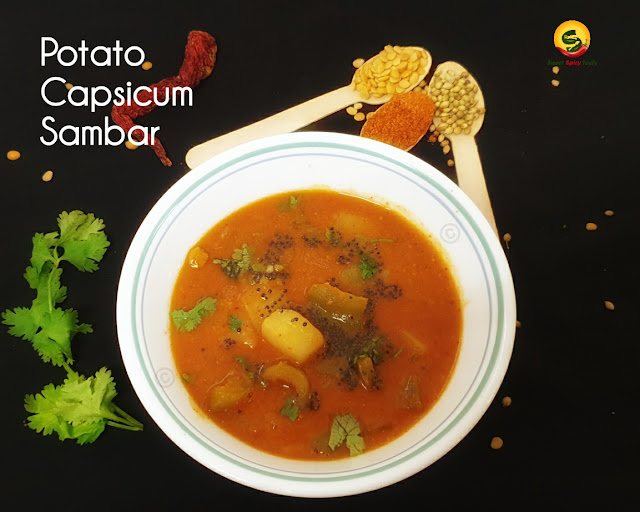
Potato Capsicum Sambar | Urulai Kudamilagai Sambar


Share with friends and family
14 comments:

We love sambar in our family and I make different varities of sambar as part of my daily menu . 

Potato and capsicum are an eternal match made in heaven and when we use this combination in any recipe, it is always the show stopper . Aloo Simla Mirchi sabji is another favorite at home and we love it with piping hot dhall and rotis. Likewise , Potato capsicum sambar is one that I make very frequently.  The distinct flavor of  the capsicum lends a very nice aroma to the sambar when simmered in tamarind extract and freshly ground sambar powder .

Potato capsicum sambar is very delicious .The distinct flavor of  the capsicum lends a very nice aroma to the sambar . Urulai kudamilagai sambar , kodamilagai sambar , capsicum sambar , urulai kuzhambu , kudamilagai kozhambu , urulai kodamilagai kuzhambu, kudamilagai , urulai kilangu

Traditionally sambar used to be prepared using native vegetables like various tubers ,brinjal, flat beans,and gourds like snake gourd, ash gourd etc since other vegetables were not so easily available. But now a days, as there is easy reach to all sorts of vegetables, we can use variety of vegetables and prepare sambar .  

I have heard and seen many of my friends make sambar with zuchiini, cauliflower,broccoli. If you are someone who loves to experiment with flavors you may also try ,but I prefer to stick to regular and local Vegetables. 

We love Drumstick Sambar , okra (lady's finger) sambar , Keerai  (Greens) Sambar a lot though I also make sambar with other vegetables like ashgourd , pumpkin , chayote (chou chou) , beans ,carrot  as well. 

Piping hot sambar, rice and ghee accompanied with some fried papad , a mildly spiced coconut based curry and some South Indian style raita is the perfect combination and wholesome meal . We relished this sambar with Tomato Pachadi and Carrot Chow Chow curry today.

This is the 273rd week in our FMBH and it was my turn to suggest the theme . While I was thinking of what to suggest, it struck to me why not share our family's favorite recipe even if it is a simple one.  End of the day we cook for our family and enjoy the satisfied look on their faces when they relish a meal cooked by us . The joy doubles up when there is a repeat request for the same recipe. 

So ,stay tuned my dear friends for a family special culinary journey from our blogger friends . 


Pin it up for later 
Potato capsicum sambar is very delicious .The distinct flavor of  the capsicum lends a very nice aroma to the sambar .

Preparation Time - 30 mins
Cooking time - 20 mins
Complexity- simple 
Serves - 2 to 3 

Ingredients 
3 medium sized potatoes 
1 medium capsicum /green bell pepper 
3 tablespoon sambar powder 
1/2 cup thoor dhall/pigeon peas /thuvaram paruppu
3 to 4 tbsp fresh grated coconut 
1/4  tsp turmeric powder 
1 cup tamarind extract 
Salt as needed 
Few curry leaves 
Fresh corriander chopped 
2 tsp oil 
1 tsp mustard seeds
Pinch of asafoetida (skip for GF)

Method 

Sambar powder recipe click here 


Potato capsicum sambar is very delicious .The distinct flavor of  the capsicum lends a very nice aroma to the sambar .

  • Grind the coconut and sambar powder using some water to a fine paste. 
  • Wash the thoor dhall until it is clear of any dust and pressure cook it with a little turmeric and sufficient water until soft and mushy. 
  • Peel the potatoes, wash them clean and cut them into big cubes.  De seed the capsicum and cut them also in to big pieces .
  • Soak lemon sized tamarind in hot water and extract the juice from it.  If it is very thick add some water to it and keep ready in a heavy bottom deep vessel.
  • In a pan , heat 1 tsp oil , splutter 1/4 tsp mustard and saute the potatoes and capsicum for a few mins in the tempering.  This step ensures that the veggies don't become too soft in the sambar .
  • Add the sauteed veggies to the tamarind extract with some salt and boil until the raw flavor of tamarind is lost and the potatoes are 3/4th cooked.
  • Add the ground coconut paste , mix it well and let it come to a rolling boil before adding the cooked thoor dhall.
  • After adding the thoor dhall , adjust salt and water if needed . At this stage you can add some sambar powder if you want your sambar to be a little spicy .
  • Let the sambar boil well for 3 to 4 mins . Turn it off a pour a fresh tempering of mustard in hot oil over the sambar and garnish with fresh curry leaves and corriander .
  • Immediately cover it with a lid for the flavor of tempered mustard seeds and asafoetida get infused into the sambar .

Tips 
  • If you don't follow vegan diet , add a tsp of fresh ghee in the end after preparing the tempering. 
  • Skip the asafoetida for gluten free cooking. 
  • Add a spoonful of jaggery when the sambar is boiling.  It further enhances the taste of the sambar .
  • Mash the cooked dhall nicely and then add it to the sambar ,this way the dhall and the ground spice paste will mix well and give a smooth texture to the sambar.

Pair this lipsmacking sambar with a mildly spiced Chou Chou carrot curry and enjoy your meal .

Pin it for later


November 21, 2020

Chou chou carrot poriyal | Chayote Carrot Stir fry - Vegan & GF


Share with friends and family
6 comments:

After binge eating during festive season, we all yearn for a simple home cooked meal . We are no exception to this and our stomach friendly meal after Diwali festivities was a tongue tickling Karvepillai Kuzhambu (curry leaves in tamarind gravy) , soothing Tomato Rasam and this mildly spiced chou chou carrot curry with a liberal garnish of fresh coconut. 

A simple home style south indian poriyal using carrots , chow chow (chayote) and fresh peas , chou chou karamindh , karmindh, chow chow karamedhu, chou chou poriyal , south indian style coconut poriyal , carrot chayote stir fry , indian style chayote squash curry

Chou chou or chayote as it is known in most parts of the world is available in Bangalore almost all round the year.  Also known as Bangalore Kathrikai(Tamil) or Seeme Badnekaai (Kannada) . 

Kathrikaai in Tamil means Brinjal / Eggplant , since this resembles a big size brinjal and as it is more often available in Bangalore or Karnataka, people probably began to refer as Bangalore Kathrikaai but in reality this belongs to the squash family and not Eggplant family. 

 Badnekaai also means Brinjal in Kannada and Seeme means "foreign or across boundary " .Since this vegetable was introduced by the westerners the name of "Foreign Brinjal" got stuck to this as this is not a native Indian vegetable. 

Winter is the time when this vegetable is available abundantly very tender fresh . I love to use this chou chou in my cooking a lot . We can use this in Sambar , more kuzhambu and even kootu. 

Chou chou kootu recipe can be accessed via this link

Pin it up for later

A simple home style south indian poriyal using carrots , chow chow (chayote) and fresh peas , chou chou karamindh , karmindh, chow chow karamedhu, chou chou poriyal , south indian style coconut poriyal , carrot chayote stir fry , indian style chayote squash curry

Preparation Time - 10 mins
Cooking Time - 15 to 20 mins
Complexity - simple 
Serves - 2 to 3

Ingredients 

2 medium sized chayote /chow chow 
2 medium sized carrots
Handful of frozen/fresh peas (optional)
1 green chilli chopped 
Few fresh curry leaves 
1 tsp oil
1/2 tsp mustard seeds 
4 to 5 tbsp fresh grated coconut 
Salt as needed 
Pinch of asafoetida (skip for GF)

Method 

A simple home style south indian poriyal using carrots , chow chow (chayote) and fresh peas , chou chou karamindh , karmindh, chow chow karamedhu, chou chou poriyal , south indian style coconut poriyal , carrot chayote stir fry , indian style chayote squash curry


  • Peel the chayote and carrots and  cut them into small cubes. 
  • If using fresh peas, blanch them in water until tender.
  • In a pan heat the oil and splutter the mustard, asafoetida along with chillies and curry leaves .
  • Sautee the chopped carrots ,peas and chayote with some salt ,sprinkle some water and close with a lid .
  • We will do a covered cooking as it retains the nutrients of the vegetables and also the crunch .
  • Occasionally open the lid and stir /toss so that they don't get burnt . Sprinkle water if there is a need and continue covered cooking until the chou chou and carrots are well cooked .
  • Open the lid and add fresh grated coconut,mix well and turn off the stove.  


November 09, 2020

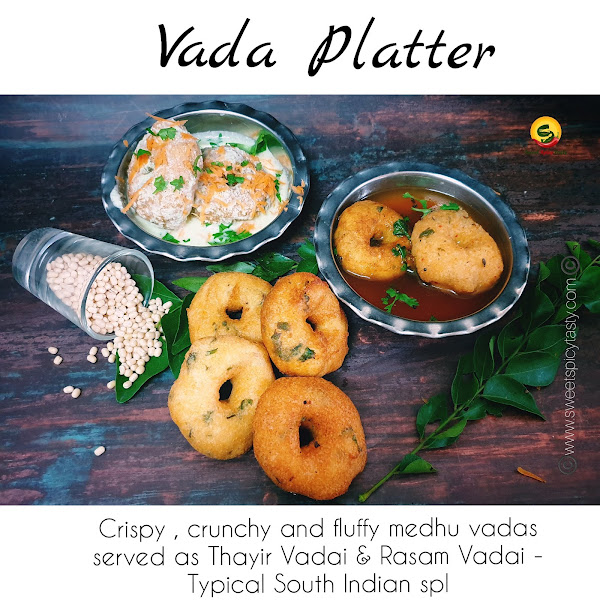
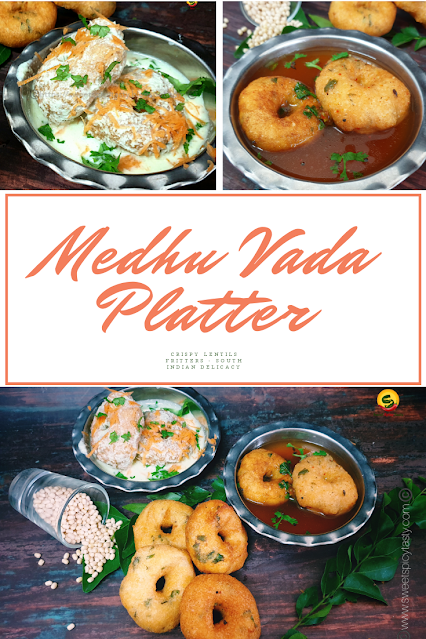
Medhu Vada Platter - South Indian Delicacy


Share with friends and family
18 comments:

Medhu Vada is a traditional South Indian fritter or deep fried snack prepared using Black gram / Udad dhall / Ulutham Paruppu . Uddina Vade (Kannada) , Medhu Vadai(Tamil) , Garelu(Telegu) , Uzhunu vada(Malayalam) , Urad dal Vada (Hindi) are the various other names used in different parts of India .
 
 Medhu in Tamil means Soft and Vadai means Fritters , so it translates to Soft Fritters but colloquially it is often known just as Vadas .

In a south indian home, these vadas are made during many special occassions like marriages , birthday celebrations, festivals and as prasad during Varalakshmi Pooja , Ganesh Chaturthi, Krishna Janmashtami. 


Chutney and Sambar are the perfect accompaniments for piping hot and crispy vadas . If you happen to attend any Tamil wedding, you will be treated to sumptous soft Idli , Medhu Vada, Pongal and Kesari  as breakfast along with chutney, sambar and piping hot filter coffee .

The other famous variants are 
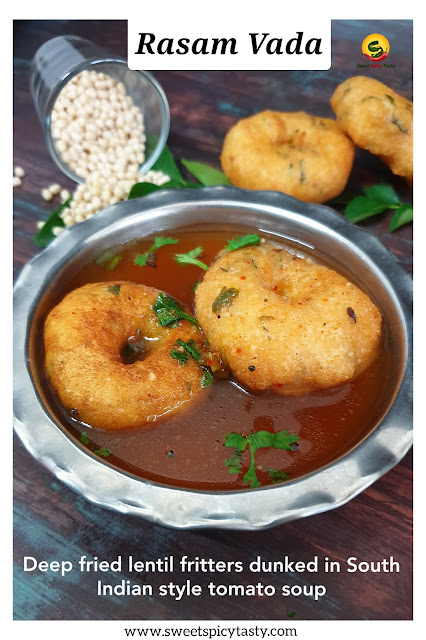
  •  Rasam Vada - Crispy vadas are dunked in hot & tasty tomato rasam.
  •  Sambar Vada - Crispy vadas dunked in piping hot Tiffin Sambar and topped with some coconut chutney. 
  • Thayir Vada - Crispy Vadas are dunked in flavored yogurt spiced with coconut chilly mixture . The south indian style Dahi wada is slightly spicy from the North Indian Dahi Bhalla which is flavored using Sweetened yogurt alongwith variety of chutneys.


Click on individual names for detailed recipes 


Medhu Vada is a traditional South Indian fritter made using black gram/udad dhall.uddina vade, garelu,uzhunnu vada ,vadai, urad vada, how to make rasam vada , dahi vada , thayir Vadai, thayir vada ,dahi bhalla

Diwali, is round the corner and this is the most rejoiced Hindu festival and celebrations are always vibrant and colorful.  Living up to the joy and cheer , we at FMBH are celebrating Diwali for our 272 week theme . So all of you enjoy this wonderful virtual Diwali with us and stay tuned for some exciting ,innovative and classic recipes from all my blogger friends. 


How is Medhu Vada prepared? 
  • Simply put, a batter is prepared using soaked black gram / udad dhall and then the vadas are shaped and dropped into hot oil & fried until crisp and golden brown. 
  • Simple as it may sound, there are certain tips and tricks to be followed which will help you get the perfect & crisp texture of the vadas as you taste at the restaurants . 
  • The main challenge is preparing a fluffy batter using the soaked udad dhall . If the batter is ground to perfect consistency, then it is easy to shape the vadas . 
  •  In this post, I have tried to cover maximum possible tips and videos to help you prepare tasty and crunchy medhu vadas at the comfort of your home. 
Medhu Vada is a traditional South Indian fritter made using black gram/udad dhall.uddina vade, garelu,uzhunnu vada ,vadai, urad vada, how to make rasam vada , dahi vada , thayir Vadai, thayir vada ,dahi bhalla


 Ingredients 
 1 cup udad dhall (split / full )
 1 tablespoon rice
 salt as needed 
 2 to 3 green chillies
 few fresh curry leaves 
fresh corriander chopped
 pinch of asafoetida ( Skip for GF) 
Oil for frying the vadas

For Thayir vada / Dahi vada 
3 tablespoons fresh grated coconut
1 green chilli
1/2 tsp jeera/cumin 
fresh corriander 
2 cups fresh curd / yogurt 
salt as needed
1 grated carrot 

For Rasam Vada 
Piping hot tomato rasam 
Fresh corriander leaves chopped

 Method 
  • Wash the udad dal multiple times until the water appears clean . 
  • Soak the udad dhall and rice for maximum 2hours and then drain the water & grind . Donot soak for more time . It will give sour taste . 
  • When grinding batter for vadas,be it in mixie or the wet grinder,add water little by little and grind with patience. The batter will double in volume and feel very light. 
  • Take a small blob of batter and drop it in a cup of water. It should float and not settle down like a blob. That is the right consistency. 
  • When grinding in mixie use cold water as mixie jar tends to get heated up ,when you stop grinding and open the lid ,you can see the trapped air bubbles releasing one by one . This indicates good aeration.
  • Once the batter is ground,add salt and beat it well with your hands.Using hands to beat the batter induces aeration which is most important for fluffy vadas.
  • Mix finely chopped green chillies,curry leaves, corriander and asafoetida to the batter and keep in the fridge for 20 mins or until the oil is heated up well. 
Pro tips 
  • Salt should always be added only after grinding the udad dhall else the batter won't double up
  • If you are unable to grind for some reason , drain the water from the soaked udad dhall and refrigerate it . Grind it before 24hrs else it will give a foul smell . Also , rinse it nicely before grinding to remove the slimy coating.
  • Keeping the batter in the fridge, helps to hold the shape of vada while patting it .
  • Be very careful while adding water at the time of grinding . Too much water will make the batter watery and vadas can't be shaped properly. 


Pin it up for future

Medhu Vada is a traditional South Indian fritter made using black gram/udad dhall.uddina vade, garelu,uzhunnu vada ,vadai, urad vada, how to make rasam vada , dahi vada , thayir Vadai, thayir vada ,dahi bhalla


How to shape the medhu vadas like donuts? 


  • Wet your palms each time before shaping the vadas .
  • Take some batter ,bounce them , flatten it , make a hole and drop it carefully in the hot oil.
  • Donot add too many vadas in the oil, there must be space for flipping the vadas and even frying. 
  • Fry on medium flame until it turns golden brown . this way the wadas will be soft and spongy from inside but crunchy and crispy from outside. 
  • Frying on high flame will cook only from outside and the inside will remain undone and turn hard.

Thayir Vadai - South Indian style Dahi wada


                            Pin it up for future

Medhu Vada is a traditional South Indian fritter made using black gram/udad dhall.uddina vade, garelu,uzhunnu vada ,vadai, urad vada, how to make rasam vada , dahi vada , thayir Vadai, thayir vada ,dahi bhalla

  • Grind the coconut,jeera,chillies and little corriander to a fine paste .
  • Whisk the yogurt /dahi/curd well until it is smooth and silky. Add this coconut mixture to the whisked dahi and add salt as needed. 
  • In a wide bowl take some warm water and add 2 tbsp of this yogurt mixture to it and mix well .
  • Dip the fried hot vadas into this warm water mixture for 1 to 2 mins and then transfer it to the yogurt mixture and let the yogurt coat the vadas nicely .
  • Garnish with chopped corriander, grated carrots and put it in the refrigerator until serving.  You may also garnish with crisp boondis before serving .

Rasam Vadai

  •  Prepare tomato rasam and keep ready. 
  •  Dunk the freshly fried medhu vadas in piping hot tomato rasam such that the vadas are immersed well and serve hot . 
  • Rasam vada always needs to be served piping hot .
  • Incase the rasam has turned cold, remember to reheat in a microwave before you soak the vadas . 
  • Never reheat or reboil rasam on a stove top, it will lose its flavor .
  • If you do not have microwave , heat water in a wide pan and place the rasam vessel into that to get heated up . Works on the principle of double boiler .
Pin it up for future 

Medhu Vada is a traditional South Indian fritter made using black gram/udad dhall.uddina vade, garelu,uzhunnu vada ,vadai, urad vada, how to make rasam vada , dahi vada , thayir Vadai, thayir vada ,dahi bhalla


.

November 06, 2020

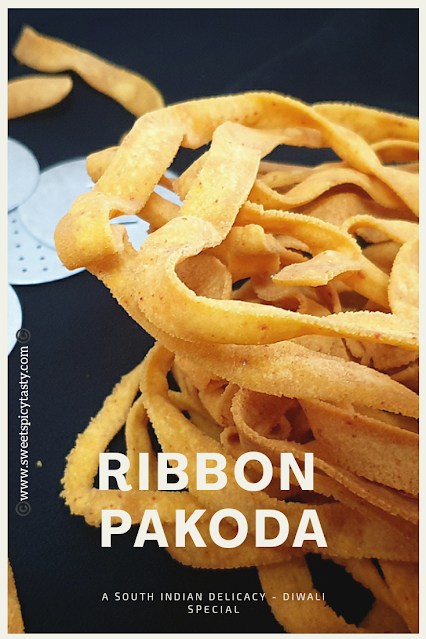
Ribbon Pakoda | Ottu Pakoda | Naada - Diwali special snack


Share with friends and family
14 comments:

 Diwali is just a few days away and all of you must be getting geared up in your own way to celebrate this bright and joyous festival with family .

When we talk of Diwali , it is obvious that we all will prepare our family's favorite sweets and snacks . Also, most of us love to experiment with new snacks and varieties. 

If you are someone like me who tries some new snack every Diwali , then you must go ahead and try Ribbon Pakoda -a tasty snack from Tamil Nadu .  Other names for this crunchy snack is Ottu Pakoda , Naada , Ribbon,  Pakkodam.

Ottu pakoda ,ribbon pakoda , naada pakoda , pakodam , ribbon , दिवाली special , south indian ribbon pakoda , pakodam

This recipe is special to me in many ways but  most importantly this is my Grandmother's recipe and it never fails me . It took me a lot of trials to achieve the perfection and to reach  a stage close as my grandmom's.  Still, we all miss her taste and her love .

My family has fond memories of my paati a.k.a grandmom who would dish out all these munchies with so much love , care and affection and would serve it all who come home with a cup of hot filter coffee. 

 Especially, if she was visiting us or we visiting her , she would make it a point to keep all my favorite snacks ready and treat me to all these goodies .  At any given point in time she would be stocked up with these tea time nibbles. 

Making of ribbon pakoda is not new in any Tamil home, infact it is a traditional and an age old recipe handed over by generations . So , needless to say the proportions to make the dough will vary from home to home . Today I shall share with you my grandmom's signature recipe.

Why is it called Ribbon Pakoda ? 

Well , the dough is passed through a Murukku Press using a slotted plate/mould and when squeezed in hot oil , the outcome resembles beautifully twisted ribbons 🎀. Hence, the name ribbon pakodam

What are the ingredients used to prepare Ribbon/Ottu Pakoda?

The basic ingredients remain the same which is gramflour, rice flour, red chilli powder , salt & unsalted butter . Some of them use hot oil in place of butter, this can be the perfect option for Vegans

What is a murukku maker / murukku press ? 

Murukku in Tamil means "Twisted" . Murukku maker is like a noodle press with a dough holder, dough press and various plates with different designs to choose from to get the desired shape of twisted crispies when squeezed in hot oil.

Sharing an image below of a traditional murukku maker with different plates. 

There are different styles and varities of murukku makers available in the market now . One can choose what ever is comfortable and convenient for easy use.


Preparation Time - 15 mins
Frying time - 30 to 40 mins 
Makes - 3 to 4 big flat murukkus
Complexity - medium 

Video demonstration 

Ingredients 

3 cups besan/gram flour 
2 cups rice flour /arisi maav
1.5 tsp red chilli powder 
Pinch of asafoetida  (skip for GF)
Salt as needed
3 tbsp soft unsalted butter  (or) hot oil 

Ottu pakoda ,ribbon pakoda , naada pakoda , pakodam , ribbon , दिवाली special , south indian ribbon pakoda , pakodam


Method 

  • In a wide mixing bowl, add the besan , rice flour, salt , red chilli powder , Asafoetida and mix it nicely with a spoon or your hand.
  • Now add the butter and rub it well into the flour to form a crumbly mixture. If using hot oil for vegan version, then pour the oil over the flour mixture and slowly mix it to get crumbly texture ..adjust butter or oil.if you feel.the four is too dry.
  • Add water little by little and knead a soft but pliable dough . 
  • Grease the murukku maker with oil inside . Take a small  portion of the dough and pass it through the mould in hot oil and fry on both sides till they turn crisp and golden brown.
  • Drain it and store in an airtight container.

Tips

  • The oil has to be heated well and then reduce it to medium while frying. 
  • The sizzling has to stop completely before you can drain it out .
  • The dough may appear sticky due to the texture of gramflour, as long as you are able to press the murukku maker effortlessly then the consistency is perfect. 
  • Incase you find it too hard to press the dough through the murukku apparatus ,sprinkle a little water and loosen the dough by kneading again. 
  • The ribbon may appear soft soon after removing from oil but with time it will become crisp . Donot close the container lid soon after removing from hot oil .

Pin 📌  it up for future 

Ottu pakoda ,ribbon pakoda , naada pakoda , pakodam , ribbon , दिवाली special , south indian ribbon pakoda , pakodam


November 02, 2020

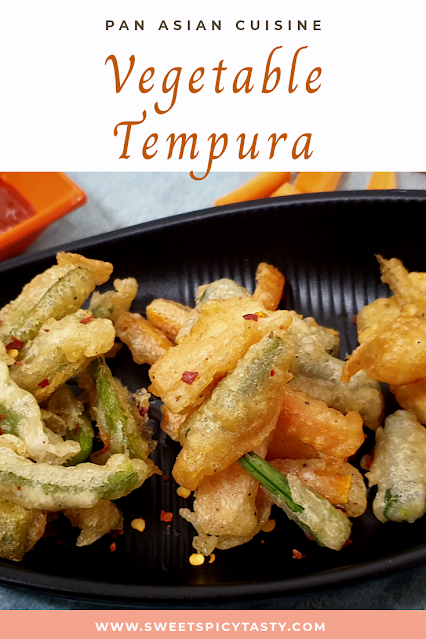
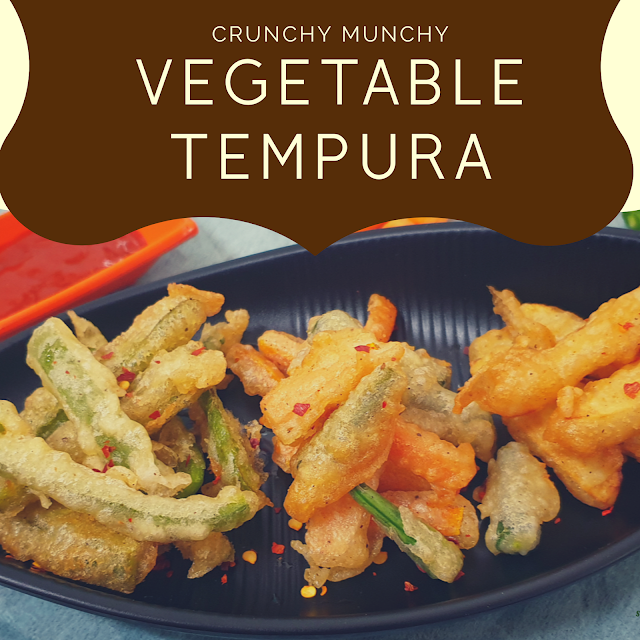
Vegetable Tempura - Japanese fritters


Share with friends and family
7 comments:

 I was craving for some crunchy vegetarian starter on a cold winter night and that is when the waitress at a Thai Restaurant suggested I try the tempura as that is the only thing they could customize to a vegetarian option . She got the chef to make it with the veggies of my choice and I really loved it . My  reaction after taking the first bite was "Hey they taste almost like our veg bajjiya/pakora " - hubby and me had a hearty laugh over the tempura platter. 

That is how I was introduced to the crunchy munchy Japanese spl Tempura at a Thai Restaurant in the USA ... Global Spirit in the true sense . 😃😃

Perfect tempura batter at home , is tempura vegetarian? , can we make tempura at home ? , what are the vegetables to be used in tempura , jain tempura, tempuras, japanese special tempuras


  • Tempura is a classic Japanese dish that dates back to 16th century.  Yes , you read it right... it is a recipe that is almost 500yrs old approximately.  (Source : Wikipedia) 
  • It is also mentioned in Wiki that it was the Portuguese residing in Nagasaki who introduced this recipe to the Japanese. 
  • Tempura is made using meat, vegetables and sea food which have been coated in a batter and deep fried . 
  • There are certain techniques to be followed in preparation of the batter which will give us crispy tempuras.
  • The batter uses all purpose flour,eggs , baking soda and cold water which helps retain the fluffiness , also the most important point is to mix the batter in small batches so that the gluten from the flour doesn't over react and turn into a lumpy mass which will make the tempura soggy and over coated with batter . Eggs can be easily omitted for the vegan/vegetarian variant as I have done in my recipe today. 
  • The batter can be mildly spiced using pepper powder or chilli flakes . 
  • Traditionally sesame oil (til oil/nalla ennai) was used to fry the tempuras but now any cooking oil like canola or vegetable oil which can withstand good heating point are used to fry. 
  • Almost all vegetables like okra, green beans, carrots, yam, potato, bell peppers, sweet potato,onion, broccoli,egg plant ,bamboo shoots can be used in the preparation of tempuras . Mushrooms and tofu are also used in the vegetarian version of tempura. 

Some fun facts

  • What we call as Choora while frying our Bajjiya, pakodas or bonda, the bits of tempura batter dropped in oil is called Tenkasu. Interesting name isn't it ?
  • These tenkasu bits are used as topping over some other recipes for the crunchy bite just as we use the choora to make a spicy chutney to go with the vada pav .

Perfect tempura batter at home , is tempura vegetarian? , can we make tempura at home ? , what are the vegetables to be used in tempura , jain tempura, tempuras, japanese special tempuras

This week Priya suggested we explore the Asian Cuisine for the 271st Foodie Monday bloghop weekly theme challenge. It indeed was a nice theme where she wanted us to explore something beyond the Indian, Chinese & Indo Chinese range of recipes which are most popular in Asian Cuisine . Priya's love for Pan Asian Cuisine is reflected in her recent recipe of Nasi Kuning- an Indonesian special.

Week 271  - #AsianFoodDelights 

Preparation Time - 15 mins
Frying Time - 20 mins
Complexity - Medium 
Serves - 2 to 3

Ingredients 

1/4 cup APF / maida 
1/4 cup rice flour 
1 cup chilled water 
Pinch of baking soda 
Salt as needed 
1/2 tsp pepper powder 
1/2  tsp chilli powder / chilli flakes 
Oil to deep fry
Assorted vegetables of your choice .

(**refer the tips below for the vegetables to use in jain version)

Method 
Cut the vegetables length wise . Don't make them as thin stripes . They need to be a little thick so that the batter coats them and they retain the crunch after frying.  If using cauliflower or broccoli ,parboil them in hot water and then use . I have used green bell pepper , potato, carrots & French beans.  


To prepare the tempura batter, sift the APF , rice flour ,baking soda and salt into a mixing bowl . 
Take a small batch of this flour mix and add chilled water to make a batter of dropping consistency just thick enough to lightly coat the vegetables when dipped .  Watch the video below to know the consistency.  
It shouldn't be very thick like the Pakoda or bonda batter . )


Dip the chopped vegetables one by one into the tempura batter , lightly coat it and deep fry them in hot oil until they appear crisp and golden brown . Fry them on medium flame once the oil has been heated well else the batter will get cooked first and the vegetable will remain uncooked . We do not want that . So adjust the oil temperature as you keep frying .


 Tips to help 

  •  Donot make a huge batch of tempura batter in the first instance, make small batches as and when needed else the tempuras will turn out soggy and lumpy when dipped in batter .
  • Use only chilled water to prepare the batter .
  • Keep the chopped vegetables also in the fridge until you make the tempuras. This helps it turn out crispier.
  • In one batch of batter I mixed pepper powder for spice while in the next batch I used red chilli flakes .You can see the difference in the fried tempuras.
  • For the jain version  - use bell peppers , cauliflower,brinjal/egg plant , French beans , tofu/paneer,okra /bhindi ,broccoli,cucumber , any squash variety 


⬇️ Pin 📌 it up for future ⬇️ 

Perfect tempura batter at home , is tempura vegetarian? , can we make tempura at home ? , what are the vegetables to be used in tempura , jain tempura, tempuras, japanese special tempuras


October 31, 2020

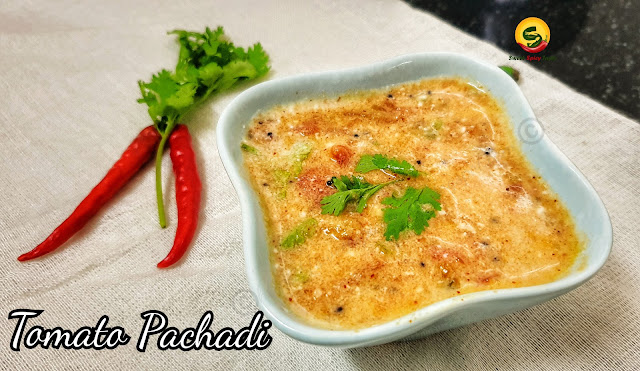
Thakali Thayir Pachadi | Tomato Yogurt dip - South Indian spl


Share with friends and family
8 comments:

 Tomato is known as "thakali" in Tamil .  As a part of any South Indian festive spread , a yogurt based dip known as pachadi in Tamil and Malayalam is a must.  It is a vegetable based yogurt dip and most commonly used vegetables are cucumber, tomato ,ladies finger, sweet potato . As it is part of festive meal and is sans onion and garlic , onion is not included which otherwise is the most loved raita by all .

You must try the lipsmacking Sweet Potato Pachadi on my blog .

Thakali pachadi , thayir pachadi , onam pachadi , tomato raita, tomato thayir pachadi, tomato dip,thakali thayir pachadi

Pachadi in Andhra cuisine means a chutney type dip sans the yogurt . So please do not confuse the Andhra style spicy Tomato Chutney often called as tomato pachadi with this one .

There is another variant of pachadi made using tamarind concoction which is also a part of the festive menu . Maanga Pachadi (Raw mango dip) is a very popular and lipsmacking dip which is tangy, sweet as well as spicy . Likewise, Pineapple pachadi is also an important recipe for Onam or Vishu Sadhya . It has been on my to do list for quite sometime, hopefully I prepare it at the earliest. 

Today's recipe refers to the Tamil or Kerala style raita using yogurt /curd which is served as a part of Banana leaf meal without fail . This raita goes well even with mildly spiced pulao or even a spicy biryani . Very easy recipe and can be put together in less than 15 mins .  We love to have this pachadi with piping hot Bisi bele baath any day.

⬇️ Pin it up for future ⬇️

Thakali pachadi , thayir pachadi , onam pachadi , tomato raita, tomato thayir pachadi, tomato dip,thakali thayir pachadi

Preparation Time - 10 mins
Cooking Time - 5 mins
Serves- 3 to 4
Complexity - easy 

Ingredients 
2 medium sized tomatoes 
1 green chilli 
3 tablespoon fresh grated coconut 
1/2 tsp jeera /cumin
1 small piece ginger (skip for jain variant) 
3 cups thick yogurt/dahi 
1 tsp oil 
1/2 tsp mustard seeds
Salt as needed 
Few fresh curry leaves
Finely chopped corriander 
Pinch of asafoetida (skip for gluten free)

Method 

  • Grind the coconut, jeera , green chilli and ginger with a little water to a fine paste .
  • Whisk the curd until it creamy and lump free. 
  • Add salt and this ground coconut paste to the whisked yogurt and mix it well.
  • In a pan , heat the oil and splutter the mustard seeds followed by curry leaves and asafoetida. 
  • Saute the chopped tomatoes with a pinch of salt until it turns soft and mushy . Let this cool down completely. 
  • Add the sauteed tomato to the curd/yogurt mixture along with freshly chopped corriander and mix it well . Keep it refrigerated till you serve else it might turn sour .
Tips to keep in mind
  1. Donot add the tomatoes when they are hot .It will make the pachadi very sour.
  2. This stays well for only a day , so use it immediately. 
  3. Make sure you keep it refrigerated until you serve if there is a long time gap between preparing and serving.