Showing posts with label tomatoes. Show all posts

June 06, 2023

Tomato Rice | Thakaali Saadham - Quick one pot vegan recipe


Share with friends and family 14 comments:

 Thakali Saadham / Tomato Rice is a simple and delicious recipe from South India . It makes for a Quick fix lunch or dinner option and also apt to pack for lunch boxes . 

It is not a traditional recipe, hence each household may have different recipes to dish out this yummy Thakali saadham .

The main ingredient for this recipe are juicy and slightly tangy tomatoes for the extra punch. I use just basic spices and not much whole masalas/ garam masala . I like the rice to soak in the taste and flavor of tomatoes and chillies . 

If you like you may add some fried cashews or boiled peas while preparing the tomato rice . I add them depending on my family's request . 

My hubby loves to have his tomato rice with either Pattani (Peas) Masala or Potato Curry and some chilled raita/pachadi . Papads or fryums are an excellent addition as well . 

If packing for lunch , make sure you cool the rice completely and then pack it . If you pack it very hot ,there is a chance the rice may go bad especially in summer.  

I often make thakali saadham for dinner as it is a quick fix and I wont see fussy faces at home . As always, I realised that this delicious tomato rice wasn't on my blog and as a matter of coincidence our gourmet food group theme for this month was "cook what you like " .. Viola !! I got an opportunity to publish this recipe.  My partner Rafeeda has dished out a baked Pasta recipe and if you are a pasta lover, you must try it for sure .

Preparation Time- 10 mins
Cooking Time - 20 mins
Complexity - simple
Serves  - 2 to 3

Ingredients 

2 cups rice (Basmati / Sona Masuri / any short grained rice ) 
3 to 4 medium sized tomatoes 
1 onion chopped (optional) [skip for jain and no onions no garlic recipe ] 
3 green chillies slit 
Few curry leaves 
Fresh corriander 
1 tsp mustard seeds 
1 tsp channa dal 
1 tsp udad dhal 
2 tsp corriander powder 
1/2 tsp jeera powder 
1/2 tsp chilli powder 
Pinch of turmeric powder 
Salt as  needed
2 tbsp cooking oil 
Pinch of sugar 

Method 

  • Wash the rice well and soak it for 10mins and then drain the water through a colander. 
  • Chop the tomatoes into medium sized chunks and finely chop the green chillies .
  • Heat the oil in a pressure cooker or pressure pan and crackle the mustard seeds followed by channa dal and udad dal until they turn crisp and golden brown . Saute onions if using until pick and translucent. 
  • Fry the green chillies,  curry leaves . Keep the flame on low and add the chopped tomatoes and  spice powders (haldi, red chilli powder, jeera powder and corriander powder ).
  • Saute the tomatoes well and sprinkle some water ..cook covered until the tomatoes turn mushy and soft . Continue cooking until the oil begins to separate.Add salt at this  stage along with some chopped corriander. 
  • Add water and bring to a boil . If using basmati rice use 1.5 cups water for 1 cup rice and if using sona masuri rice use 2 cups water for 1 cup rice.
  • Once the water begins to boil,add the drained rice,  Pinch of sugar and adjust salt if needed .
  • Close the pressure cooker and cook on medium flame for 2 whistles.  Let the pressure release naturally. 
  • Fluff it with a fork and add some ghee if not vegan and serve hot with raita ,papads and some gravy or curry . 


June 28, 2022

Paneer Tomato Grilled Sandwiches


Share with friends and family 5 comments:

 Paneer Tomato grilled sandwiches are a perfect choice for packing in kids' lunch box or even for adults when you want to carry something filling at the same time  not messy to eat on the desk .

You can also serve this as an after school snack or even makes for a perfect light dinner when paired with some warm Italian style Tomato soup . (Recipe source - Priya Iyer's blog)

Paneer takes care of the protein quotient for the day and the tomatoes keep the sandwiches moist and don't let it get too dry and stuffy.  Adding some mozzarella chees gives a nice gooey and melt in mouth texture. 


I love to work with different fillings that go into the sandwich and this is yet another successful attempt as my family loved the flavor and the crisp grilled bread. 

For the spice, I have used only red chilli powder and 1 small green chilli chopped.  Some boiled corn was added for the crunch and tomatoes used were firm and deseeded to prevent the sandwiches from getting soggy .

Some sandwich varieties from my blog that you must definitely try 

Classic Veg Cheese Grill Sandwich 

Peanut Butter Cheese Sandwich 

Paneer Cheese Corn Grill Sandwich 

Chutney Cheese Sandwich 

Mumbai Special Toast Sandwich 


Preparation Time - 10 mins
Grilling Time - 3 to 4 mins per sandwich 
Complexity - simple 
Makes 3 sandwiches 

Ingredients 

6 slices of bread 
100 gms paneer 
2 medium firm tomatoes
3/4th cup boiled sweet corn
1 tsp Chilli powder /chilli flakes
Salt as needed 
Fresh corriander chopped 
1 green chilli
Grated mozzarella cheese as needed 
Butter to apply on bread 

Method 


  • Firstly grate the paneer, crush 3 tbsp of corn kernels with green chilli in a blender and de seed the tomatoes and dice into small cubes. 
  • In a mixing bowl mix the Tomatoes, crushed corn , paneer, boiled corn ,chilli powder ,salt, chopped corriander and mix it all well . Let it rest for 5 to 10mins . Our filling is ready .
  • Donot let the filling sit for extra time because the tomatoes will release water when mixed with salt and the filling will become soggy .we don't want that 
  • Heat the grilling pan,  apply butter on one side of the bread , place some filling on it ,spread grated mozzarella cheese as per your wish ..close using the other slice of bread . 
  • Apply some butter to the grilling pan and grill the sandwich on both sides until crisp and golden brown .
  • Cut the sandwich into wedges and enjoy .
  • If packing for lunch, then place foil paper in the inside of the lunch box ,place the cut sandwiches once they have cooled down .this will prevent the sandwiches from getting soggy .

Pin up for later 


April 25, 2022

Home made Tomato Puree - Preservative free (Vegan)


Share with friends and family 8 comments:

 Tomato Puree is a very handy ingredient in our kitchen pantry.  This puree is used in making off soups , gravies and various sauces . We do get a lot of branded and canned purees in the market ,but there is always an upside to making it at home as we can keep it free from preservatives and artificial colors .

Adding tomato puree to curries gives a nice volume and taste to the final recipe.  When we get a good produce of tomatoes in the market ,we can make this puree in bulk and freeze it in small batches .The frozen puree has a shelf life of 2 to 3 months and under normal refrigeration, the shelf life is 10 to 15 days. Make sure the container in which the puree is stored is properly sterilized and there is no external moisture . With just water and tomatoes ,we can make this silky smooth tomato puree at home. 

If you love to experiment  with tomatoes like me,then this Tomato Pizza from Preethi's blog will definitely grab your attention and it is a very healthy recipe for kids and adults. 


Preparation Time- 5 mins
Cooking Time - 10 mins
Complexity - easy
 

Ingredients 

3 ripe Tomatoes 
4 glasses of water
1/2 tsp salt
1/4 tsp sugar 

Note - I have mentioned the measure for 3 tomatoes but you can increase the no of tomatoes as per your need .  For 3 tomatoes i got 150ml puree.

Method 


  • Scoop out the eyes (top portion) from all the tomatoes using a knife and make a criss cross cut in the base of the tomatoes. 
  • Boil the water on a stove top and drop the tomatoes carefully when the water starts boiling. 
  • Continue to boil the tomatoes in water for 3 to 4 mins until it gets cooked well and the skin appears to peel out . Turn off the stove. 
  • Remove the boiled tomatoes using a big ladle and drop into cold water in another big vessel . This method is called shocking.  In this process the boiled tomatoes will undergo sudden cooling and the skin will peel off automatically. 
  • Peel the skin from the tomatoes and roughly chop the tomatoes.  Let it cool for a few mins. 
  • Blend these chopped tomatoes to a fine puree in the blender with the salt and sugar . This wil act as a natural preservative. 
  • Pass this puree through a sieve and collect the silky smooth puree in another bowl .
  • Store this puree in a sterilized dry container and refrigerate it . If you want to freeze it ,then pour this puree in an ice tray and freeze them.  Once frozen ,remove the tomato puree cubes and store in a ziploc cover until use in the freezer . Use the cubes as desired in the recipe that calls for tomato puree.

Pin me up


February 09, 2022

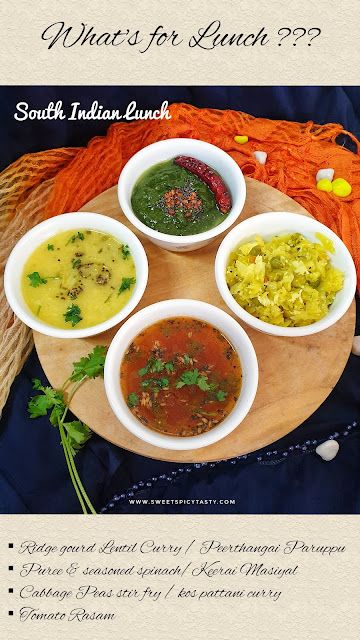
South Indian Lunch - Thali #5


Share with friends and family No comments:

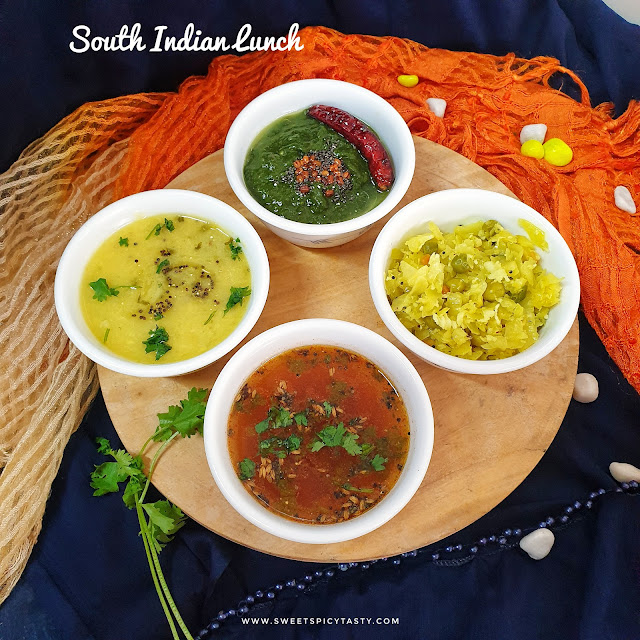
 A wholesome and piping hot lunch is always a pure bliss on a weekend day. 

Today's menu is a family favorite and no one will fuss over any item and I also don't have to think of different options to please everyone at home .

I got some really fresh and tender veggies delivered through Deep Rooted Co , an online app and I was excited and tempted to use all the veggies especially the Spinach which was just too good . I am very happy to get such tasty vegetables and the best part was the Spinach was so clean and I dint have to spend a lot of time cleaning the roots and removing weeds. This is not a sponsored post ,but if you are looking for farms fresh vegetables and fruits to be delivered at door step,pls do try this app.

So the lunch menu was planned in  the best possible way to include all our family favorite vegetables

Peerthangai Paruppu | Ridge gourd lentil curry 

Kos Pattani Poriyal | Cabbage Peas Stir fry

Keerai Masiyal / Blanched & mashed Spinach 

Tomato Rasam  served with  piping hot rice and  usual accompaniment of curd or buttermilk.


Have you pinned me yet ??


October 31, 2020

Thakali Thayir Pachadi | Tomato Yogurt dip - South Indian spl


Share with friends and family 8 comments:

 Tomato is known as "thakali" in Tamil .  As a part of any South Indian festive spread , a yogurt based dip known as pachadi in Tamil and Malayalam is a must.  It is a vegetable based yogurt dip and most commonly used vegetables are cucumber, tomato ,ladies finger, sweet potato . As it is part of festive meal and is sans onion and garlic , onion is not included which otherwise is the most loved raita by all .

You must try the lipsmacking Sweet Potato Pachadi on my blog .

Thakali pachadi , thayir pachadi , onam pachadi , tomato raita, tomato thayir pachadi, tomato dip,thakali thayir pachadi

Pachadi in Andhra cuisine means a chutney type dip sans the yogurt . So please do not confuse the Andhra style spicy Tomato Chutney often called as tomato pachadi with this one .

There is another variant of pachadi made using tamarind concoction which is also a part of the festive menu . Maanga Pachadi (Raw mango dip) is a very popular and lipsmacking dip which is tangy, sweet as well as spicy . Likewise, Pineapple pachadi is also an important recipe for Onam or Vishu Sadhya . It has been on my to do list for quite sometime, hopefully I prepare it at the earliest. 

Today's recipe refers to the Tamil or Kerala style raita using yogurt /curd which is served as a part of Banana leaf meal without fail . This raita goes well even with mildly spiced pulao or even a spicy biryani . Very easy recipe and can be put together in less than 15 mins .  We love to have this pachadi with piping hot Bisi bele baath any day.

⬇️ Pin it up for future ⬇️

Thakali pachadi , thayir pachadi , onam pachadi , tomato raita, tomato thayir pachadi, tomato dip,thakali thayir pachadi

Preparation Time - 10 mins
Cooking Time - 5 mins
Serves- 3 to 4
Complexity - easy 

Ingredients 
2 medium sized tomatoes 
1 green chilli 
3 tablespoon fresh grated coconut 
1/2 tsp jeera /cumin
1 small piece ginger (skip for jain variant) 
3 cups thick yogurt/dahi 
1 tsp oil 
1/2 tsp mustard seeds
Salt as needed 
Few fresh curry leaves
Finely chopped corriander 
Pinch of asafoetida (skip for gluten free)

Method 

  • Grind the coconut, jeera , green chilli and ginger with a little water to a fine paste .
  • Whisk the curd until it creamy and lump free. 
  • Add salt and this ground coconut paste to the whisked yogurt and mix it well.
  • In a pan , heat the oil and splutter the mustard seeds followed by curry leaves and asafoetida. 
  • Saute the chopped tomatoes with a pinch of salt until it turns soft and mushy . Let this cool down completely. 
  • Add the sauteed tomato to the curd/yogurt mixture along with freshly chopped corriander and mix it well . Keep it refrigerated till you serve else it might turn sour .
Tips to keep in mind
  1. Donot add the tomatoes when they are hot .It will make the pachadi very sour.
  2. This stays well for only a day , so use it immediately. 
  3. Make sure you keep it refrigerated until you serve if there is a long time gap between preparing and serving. 

April 22, 2020

Pasta in Red Sauce - No Onion No Garlic


Share with friends and family 5 comments:

I am not a great fan of pasta but V loves pasta to the core especially when it is loaded with a lot of cheese and flavored with chilli flakes and oregano .
Pasta would always be on his menu when we dined out as I wouldn't make it at home since I was skeptical about the outcome and flavors


Now with the ongoing lockdown , all restaurant outings and dinners have taken a back seat and I thought this was the time to overcome my inhibition and try to satisfy V's craving of a cheesy pasta and I was  very happy with the texture and taste of the pasta and so was V , except for his comment was "some more cheese would have made it top class" ....hahaha that is because the health freak inside me uses cheese sparingly..
So for all the first timers who are skeptical about trying, go ahead and give it a try, it is easy and yummy .

Preparation Time : 20 mins
Cooking Time : 40 mins
Serves : 1
Complexity: Medium

Pasta , red sauce pasta , Jain pasta , how to make pasta without garlic, red sauce without garlic, can we make pasta without onion and garlic, penne , elbow pasta , fusselli,Italian pasta , cheesy pasta , penne in red sauce

Ingredients
1 cup pasta
3 medium sized tomatoes
1/2 capsicum
2 small green chillies finely chopped
1 tsp oregano
1 tsp chilli flakes
1 olive oil
Basil/parsley/cilantro for garnish
Cheese as needed
Salt
Pinch of sugar

Method

  • Boil the pasta al dente (until soft) as per the instructions on the back of the pack . I have used penne pasta here, you could use elbow,fusseli,twisted pasta anything that you like .
  • Drain the water through a colander and run cold water over the pasta and let it cool down.
  • Grind two tomatoes into a fine puree and keep aside . Chop the other tomato and capsicum into small pieces .
  • In a pan , heat the olive oil and saute the green chillies,tomatoes, capsicum .Add some salt and let it cook until the tomatoes get mushy. 
  • Add in the puree , oregano and chilli flakes and mix it well along with some sugar .adjust the spice level as per your taste .
  • Let the mixture boil and reach a saucy consistency and the raw flavor of the tomato must not be there .
  • Switch off the sauce when the desired consistency is reached .
  • Arrange the cooked pasta in a bowl, pour this sauce over it , generously grate some cheese and garnish with basil /parsley or thyme .
  • I had to use cilantro (kothmir) as basil was unavailable due to the lockdown .
  • Serve it hot with some warm toasted bread and enjoy your dinner . 


Notes

If you like garlic ,then saute some finely chopped garlic in olive oil along with the chillies and tomatoes.

Italian seasoning of mixed herbs can also be used instead of just chilli and oregano flakes .
If olive oil isn't available handy you can make use of unsalted butter or any cooking oil like rice bran or sunflower oil .

Pin me up


July 23, 2019

Tomato Gojju | South Indian Tomato Curry


Share with friends and family 1 comment:

Tomato Gojju is a delicacy from Southern India which goes well with steamed rice,Pongal , Arisi Upma , Dosa , Idli or any breakfast item . It is one of the easiest side dish that can be made quickly without much fuss and preparation.  The curry has a mix of all flavors like tangy , spicy , sweet which tickles your taste buds and increases your palate .
The most favorite combination is Pongal Gojju also called as Gothsu .

Preparation Time : 5 mins
Cooking Time : 20 mins
Serves: 3-4
Complexity  : simple


Ingredients
3-4 ripe tomatoes chopped
2 tsp sambar powder
1 tsp red chilli powder
1/2 tsp haldi powder
1/2 cup tamarind extract
2 tsp oil
1/2 tsp mustard seeds
1/2 tsp channa dhall (bengal gram )
1/2 tsp udad dhall (black gram)
Salt as needed
1 tsp powdered jaggery
Few curry leaves
Asafoetida as needed

Method

  • In a pan heat the oil and splutter the mustard,udad dhall,channa dhall along with asafoetida.  The dhalls must turn slightly brown.
  • Add the chopped tomatoes, curry leaves,turmeric , red chilli powder, sambar powder and saute well .
  • Add 1/2 cup water and cook until the tomatoes turn mushy.
  • Add the tamarind extract, 1.5 cups water , salt and jaggery and bring to a nice boil until the raw flavor of tamarind is lost . Add some fresh chopped coriander for extra flavor .
  • Turn off the stove once the curry slightly thickens . You can adjust the salt if needed .
  • This curry is generally a little thick but you can keep it diluted if that is how you prefer .


July 22, 2018

Base gravy for curries - no onion & garlic


Share with friends and family No comments:

The moment we think of paneer butter masala ,mattar paneer ,malai kofta ,Vegetable makhanwala etc , we can immediately visualise a lovely bright orangish  gravy with the perfect blend of spices and a hint of ginger garlic paste sautéed in tomatoes and onion .

What if I tell you , the same texture and taste can be achieved when you prepare without onion and garlic ?? Cannot believe your eyes ... worry not , I shall present to you the recipe for a basic gravy that you can prepare and modify it into any classic North Indian gravy .

Preparation time : 15 mins
Cooking time : 20 mins
Serves :2-3
Complexity :simple


February 23, 2017

Jain Tawa Pulao


Share with friends and family No comments:

I donot think Tawa Pulao needs any introduction.Its a very famous street food of Mumbai . The regular version of Tawa Pulao is already posted on this blog .You can check it here.

This is a customised version catering to the food lovers of the Jain Community or those who donot include onion/garlic as a part of their daily meals.

If someone wondered how a food would taste without the inclusion of onion or garlic or any root vegetables like potato,carrots,ginger,beetroot etc,then you all are mistaken my friends...I suggest you must make a visit to any restaurant or for that matter even a road side eatery in Mumbai  and you will be amazed to find Jain variation of every other item on the menu. Believe me dear ones its all without the compromise on taste and quality.
You can get Jain Lasagna,Jain Pizza,Jain Quesedillas,Jain Falafels,Jain Fried Rice,Jain Hakka Noodles and the list is endless..
All my Non Jain friends and readers do try this out and I am sure you just won't be dissappointed .

Preparation Time : 10mins
Cooking Time : 30 mins
Serves : 2-3 generously
Complexity Medium.

©Sweet Spicy Tasty©

February 13, 2017

Thakkali / Tomato Chutney (No Onion No Garlic version)


Share with friends and family No comments:

Tomato Chutney is a spicy tangy chutney/dip made out of ripe tomatoes .

A perfect accompaniment for any south indian breakfast or even curd rice. You can pair this chutney with theplas or parathas and will be ideal for packing in lunch boxes .

A good alternative to coconut chutney when you have run out of fresh coconut or want to reduce the usage of coconut due to health reasons. 

There are various ways in which we can prepare tomato chutney,this is a No Onion No garlic version of preparation.

Don't miss to try out some flavorful Phalli Chutney (groundnut chutney) which is also a coconut less chutney from Andhra Pradesh published on my blog.

Preparation Time : 5 mins
Cooking Time : 10 mins
Serves : 3-4
Complexity: Simple


Ingredients

3-4 medium ripe tomatoes
2-3 green chillies
small piece of ginger (skip for jain version)
few curry leaves
pinch of asafoetida
pinch of turmeric
salt to taste
1/2 tsp mustard seeds
1 tsp oil
1 tsp jaggery powder 

To temper /Thadka
1 tsp oil 
1/2 tsp mustard seeds 
1/2 tsp channa dhall
1/2 tsp udad dhall


Method

  • Roughly chop the tomatoes.
  • In a kadai,heat oil and temper the mustard seeds.
  • Add the green chillies,ginger,curry leaves,asafoetida,haldi and saute well.
  • Add the chopped tomatoes and saute well till the tomatoes become mushy and cooked well.
  • Let the tomatoes cool ,add jaggery,salt and grind it well into chutney consistency.
  • Prepare a tempering using mustard ,channa dhal,udad dhall and pour it over the chutney. 
  • Relish it with idlis, dosas or chilled curd rice. Goes well with upma and pongal too.


©Sweet Spicy Tasty©

February 09, 2017

Aloo Tamatar sabji | Potato Tomato Gravy | आलू टमाटर सब्जी (Easy cooker method)


Share with friends and family 3 comments:


Aloo Tamatar Sabji  is very simple to put together and makes for a perfect meal . Pairs well with rotis,puris and even simple veg pulao or Peas Pulao

One can hardly go wrong with this recipe.  Potatoes and tomatoes are the most versatile and staple ingredients used in Indian cuisine and they are very easy to handle.  For me at home,I always ensure that there is enough stock of potatoes, tomatoes, green chillies and corriander at home . With just these 4 main ingredients you can create magic in your kitchen.

easy aloo tomato gravy,pressure cooker potato gravy,quick aloo tamatar sabji,easy alu tamatar gravy,potato tomato gravy

This particular recipe is made in cooker in one shot with very basic and minimal spices .
Hardly takes 20 mins and you will have a delicious curry to serve . If you are expecting guests at a very short notice this one definitely come to your rescue.

Guests or no guests, I make this delicious curry very frequently at home . At home,it is mostly paired with either rotis or puris .  

Aloo tamatar sabji is made sans onion and garlic hence making it a perfect choice to make and serve as prasad on special days or Vrat days and not to forget ,this recipe is Vegan friendly. You can even pack this for lunch box for office /school .

easy aloo tomato gravy,pressure cooker potato gravy,quick aloo tamatar sabji,easy alu tamatar gravy,potato tomato gravy

Few days back,I had prepared this delicious Aloo tomato curry and served it with fluffy Puris and Gulkand Shrikand

I took this opportunity of shooting some good photos and updating my post (17 june 2023) which was originally published in September 2017 . 

easy aloo tomato gravy,pressure cooker potato gravy,quick aloo tamatar sabji,easy alu tamatar gravy,potato tomato gravy

Preparation Time : 5mins
Cooking time: 20mins
Serves : 2-3
Complexity: Simple

Ingredients

3-4 medium sized potatoes
3 medium sized tomatoes
1-2 green chilles slit
1 tsp grated ginger / ginger paste.
1 tsp red chilli powder
1/2 tsp turmeric
1 tsp garam masala powder
few curry leaves
1 tsp cumin/jeera
1/2 tsp mustard seeds
salt to taste
2-3 tsp oil
chopped fresh corriander.

©Sweet Spicy Tasty©

Method 
  • Heat the oil in the pressure cooker / pressure pan.
  • Splutter the mustard, jeera,curry leaves,green chillies,ginger/ginger  paste and saute well.
  • Add the haldi,chilli powder and tomatoes and saute well.
  • To this add the potatoes and stir well ,add 1 cup water ,salt and close the lid.
  • Pressure cook on medium flame for 2 whistles and let the pressure release naturally.
  • Open the lid,mash the potatoes and mix well.
  • Garnish with fresh corriander and serve with rotis,puris or even dal and rice.


February 06, 2017

Thakkali/Tomato Rasam | Saathuamudhu


Share with friends and family 5 comments:

Rasam (Tamil),Saaru (Kannada) ,Chaaru (Telugu) is always a part of the main course meal served soon after Sambar Rice and just before Curd rice .It can also be sipped as an appetiser as well.

The Iyengars call this as SaatruAmudhu / SaathuAmudhu literally meaning Nectar to Rice (Amudhu - Nectar and Saatru/Saatham - Rice)


In Tamil Rasam actually means "The Juice".

 Juice can mean anything like how pazha rasam means Fruit Juice .Rasam is now synonymous to the soup prepared with Tamarind juice or Tomato juice as the base or even a combination of the two in set proportion. along with a spice powder (Rasam Powder) made of cumin (jeera),pepper(milagu),red chillies,corriander seeds(dhaniya) and turmeric.

Rasam rice with Paruppu Usili,  Spicy potato curry or raw banana roast with some papads is my preferred way of relishing rasam saadham . 
Piping hot rasam rice is my favorite meal when I fighting seasonal flu or severe bout of cold/stuffy nose .
The pepper in the rasam helps treat the sore throat and feels very soothing.


This Rasam Powder can be made in advance and stored in air tight container and used as and when required. Click here for recipe of the rasam powder

Preparation Time : 10 mins
Cooking Time : 15 mins
Serves : 2-3 generously
Complexity : medium

Ingredients

2 medium sized ripe tomatoes
tamarind- size of 1/2 small lemon
3 teaspoons Rasam powder
Salt to taste
1/2 teaspoon mustard seeds
1/2 teaspoon jeera/cumin
a pinch of asafoetida/hing
1 tsp ghee
fresh corriander leaves chopped
5-6 curry leaves chopped

Method
  • Cut the eye of the tomato and make a cross type slit at the bottom of the tomato 
  • Boil the tomatoes and the tamarind in about 1 cup water until soft .
  • (Alternatively you can also pressure cook the tomatoes in a separate vessel while cooking rice or anything else).
  • Allow it cool and mash well and extract the juice out of the tomatoes + tamarind. 
  • In a vessel,add this extract ,rasam powder,salt and 2 cups of water and bring it to a nice boil.
  • Add the curry leaves when the rasam starts to boil. 
  • Boil until the raw flavor of tomato is lost and you get a nice aroma .Adjust salt if needed.
  • Temper the mustard and jeera in ghee and pour it on the rasam and garnish with corriander.
  • Serve hot with steamed rice paired with some roasted papad and Potato Stir fry.
RASAM POWDER


Ingredients
1 cup dhaniya /corriander seeds
15-20 dry red chillies ( Paandi / gunturu variety - medium spiced)
15-20 dry red chillies (Bedgi/Byadgi variety - mild spice ,mainly for color)
3-4 teaspoons jeera
2 teaspoons pepper corns
handful of curry leaves
1/2 teaspoon methi seeds.
1 tsp haldi powder
1/2 teaspoon hing/asafoetida

Method

  • In a kadai/wok,heat about 1/2 tsp oil and when the oil is heated well splutter the methi seeds.
  • Soon after you get a nice aroma of methi seeds,add the jeera,pepper and curry leaves and roast well till the jeera becomes crisp.
  • Add the dhaniya seeds an saute for about a min or so and then add the chillies and roast well for about 2 min or until the chillies become crisp.
  • (you can cut the chillies with scissors for ease of roasting and grinding)
  • Add the haldi and asafoetida and turn off the stove.
  • Let the spices cool down a bit ,put into the grinder and make a fine powder of it.
  • Store it in an air tight container and always use a dry spoon for increased shelf life.

Pin me up 


February 01, 2017

Semia /Vermicelli Upma - Shavigge Uppit


Share with friends and family 4 comments:

Upma is one of the staple breakfast menus in most of the households.Its quick and easy to make at the same time , sumptuous and filling when you add vegetables to it.

Rava Upma,Sabudana Upma,Variations of Poha - Tamarind Poha,Aloo Poha,Vegetable poha ,Broken Rice Upma etc etc are some of the varieties of upma you can try.


Semia Upma is made using vermicelli. You can use any variety of vermicelli that you like . Now a days we get millet based vermicelli too which can be used . Today's recipe, I have used the traditional normal non roasted vermicelli. 

The tip to get perfect Semia upma is to roast the vermicelli to perfection and the proportion of water . For 1 cup vermicelli I always use 1.75 cups of water. This ratio gives me the perfect semiya upma.

This version of semia upma has tomatoes and peas ,while you can even make the vegetable version following the same procedure by adding extra veggies of your choice.

I use the non roasted vermicelli of MTR Brand  and do the roasting at the time of preparation.In case you use the roasted vermicelli,the steps remain the same except that you save time on roasting the semia.

These upma varieties can also be packed for lunch box for kids as well as adults.

Preparation Time : 5 mins
Cooking Time : 20 mins
Serves : 2-3
Cooking Complexity : medium
Water ratio : 1 cup vermicelli : 13/4th cup water.


Ingredients

1.5 cups unroasted semia/vermicellii
2 medium sized tomatoes finely chopped
handful of frozen/fresh peas
2-3 green chillies chopped
6-7 curry leaves finely chopped
1/2 tsp mustard seeds
1 tsp udad dhall + channa dal
pinch of asafoetda/hing
pinch of turmeric
3 - 4 teaspoons oil
salt as needed

Method
  • ©Sweet Spicy Tasty©
  • In a frying pan ,add about 1/2 tsp oil and add roast the vermicelli until it turns golden
  • brown.Saute occassionally to prevent the burning of vermicelli.Keep aside.
    • If using pre roasted vermicelli,skip the above step
  • In a kadai/wok,heat some oil,splutter mustard,the udad dal,channa dal ,the green chillies and curry leaves.Saute once.
  • Add the tomatoes,green peas ,haldi,asafoetida,salt and saute and let the tomatoes cook until soft.
    •       Tip : Incase of adding vegetables,saute them also at this stage,add about half cup water  and let the vegetables cook.
  • Add about 21/2 cups of water and bring it to a boil
  • Add the roasted vermicelli and quickly stir it to avoid formation of lumps and set the flame to medium.
  • Close a lid and cook for about 5-7mins or until the water is absorbed into the vermicelli completely.
  • Open the lid and let it cook for another 2 mins.
  • Turn off the stove ,close the lid and let it rest for about 5mins . This will make the upma turn fluffy and the vermicelli will remain separate.  
  • Vermicelli upma is now ready to be served with any accomapniment of curd ,chutney ,pickle of your choice.

Notes

  1. You can a tablespoon of freshly grated coconut in the end for extra flavor and taste.
  2. Finely chopped mint can be added at the time of boiling water,this gives a minty flavor to the upma.
  3. You can serve it with some mixture or boondi for added crunch .


February 19, 2013

Pav Bhaji / पाव भाजी - Street Food Delicacy


Share with friends and family 3 comments:

Having grown up in AAMCHI MUMBAI..(this is how we MUMBAIKARS refer to MUMBAI) for 25yrs of my life,this yummy street food delicacy has been a part and parcel of my childhood. Pav bhaji is an inseparable part of any Mumbaikar.

If you are wondering what is this pav bhaji ? It is very simple, pav is a colloquial and local term used to refer to dinner roll / bread shaped as square buns and bhaji is a vegetable gravy served along side . The pav is roasted in butter and served with the bhaji with a dash of lime and diced onions.


The story how pav bhaji came into existence is very interesting... Bombay was once a city with a lot of textile mills all around which would be buzzing with action round the clock. So during one such time,it seems the food cart owners ran out of their usual supply of food and in order to serve the hungry mill workers ,they put in all the veggies ,spices and masala on hand and served with pav . Thus was born the world famous Pav Bhaji . 

Each locality will have its own famous pav bhaji center and a set of regulars who flock their at every single pretext. Our area too had 2 or 3 such pavbhaji special joints and I have had my share of enjoying it with oodles of butter .Yes,that's how the restaurants serve pavbhaji.  


Pav bhaji is eternal favorite at home which I make it various ways ,an elaborate version ,a quick fix version using pressure cooker and also a No Onion No Garlic version when I am making for dad . 
This recipe of making pav bhaji is how my mom would make ,so undoubtedly it is one of my most cherished versions .

Offlate ,in the name of pavbhaji people add all sorts of vegetables like beans , doodhi (bottle gourd), Raw papaya and what not, but traditionally it has always been tomatoes, potatoes, cauliflower, onions, garlic, capsicum and peas that have gone into the making of bhaji.


As kids,our summer holidays would revolve around playing with friends and on many occasions we would just plan a luncheon or dinner meet at a friend's house impromptu. Our friendly mommies would dish out their best recipes for us kids and we would all happily enjoy a yummy finger licking meal . At my home,it was mostly pav bhaji request from my friends second after Idlis ,wada and chutney .

The restaurants mostly use edible food color to get the deep red color of the bhaji ,but mom would add a small portion of beetroot while making pav bhaji which will give it the deep red color naturally. 


This recipe is very close to my heart and is one of the most visited posts on my blog. I had posted this in my initial days of blogging which is almost 8-9 years ago . Today (13 Aug 2023) ,I have updated the photos and write up with some of my fond memories.  Hope you all like it and continue to support my blogging journey .


Preparation Time : 15 mins
Cooking Time : 45 mins
Serves : 3-4

Ingredients

10-15 cauliflower florets (boiled and mashed)
2-3 medium sized potatoes (boiled and mashed)
2-3 medium sized tomatoes - blend into a puree
1 onion-finely chopped
1 capsicum - finely chopped
1 cup fresh/frozen peas
2 tsp grated Beetroot (to get a natural red color )
2 tsp  red chilli powder
4 tsp Pavbhaji masala ( any brand ..Everest, Baadshah, MDH, MTR etc)
Salt to taste
4tbsp salted butter
corriander/cilantro for garnishing
1 slab of pav.

(Note : In India its available as PAV BHAJI Buns and for people living in foreign lands you get them at Indian grocery stores. If any of these options are unavailable you can use sandwich bread for the same.)

 Method

  • Heat 2 tbsp of butter in a thick bottom vessel.
  • Add the onions when the butter melts and is heated up.Saute until onion turns light pink.
  • Add the chopped capsicums.
  • Close the lid and cook for some time.
  • Add the tomato puree,grated beetroot and green peas.To this add the red chilli powder,salt and pav bhaji masala.
  • Note : In case you desire a spicy bhaji,you can add some more pav bhaji masala / red chilli powder.
  • Let the mixture come to a boil so that the raw taste of the tomato puree is lost. 
  • Now add the mashed potato and cauliflower florets.
  • Stir the mixture so that all the contents get mixed properly and let the mixture cook .
  • Use a potato masher and mash the contents well while the bhaji is getting cooked .
  • The bhaji must be of flowing consistency and resemble a porridge.  There should not be huge Chunks of any vegetables.  Hence, this step is very important.
  • By the time the mixture is cooked,heat a tava / griddle to roast the bread /pav to be served along with the bhaji
  • Serve the roasted bread/pav and bhaji by garnishing with some raw onions,cilantro and a dollop of butter over the bhaji.


Pin me up !!


Chole Masala / Channa Masala - Chickpeas Curry (vegan)


Share with friends and family 3 comments:

Who doesn't love the spicy tangy flavored channa/chole with hot hot Puris,bhatoora,naan or simple phulka rotis.. Ohh..just heavenly !!! I am no exception either. I love to enjoy chole any day.  This is one recipe you can never go wrong ! 


Channa / chole/ chick peas are used widely across South Indian , North Indian Cuisine as well as globally too .At our home we enjoy all delicacies made from chick peas .
You can check out the collection of recipes on my blog where I have used chickpeas in various ways.

Coming to this delicious channa masala or chole masala ,call it the way you like , there are so many different recipes to follow and enjoy the preparation. The channa masala is a classic accompaniment for hot pooris or bhaturas . 


If you are preparing channa or chole masala during Navratri or some festive meal as prasad ,you would want to try my Jain Chole Masala or Chataka chole - both of which are recipes sans Onion and garlic. 

During the mango season , pair some piping hot puris with chole and chilled Aam Ras which is a heavenly combination.  


Just like Poori Bhaji Aamras , Poori Chole and Aamras is another match made in heaven . 


Preparation Time : 10 hours
Cooking time : 45 mins
Serves : 3-4

Ingredients
100 grams kabuli channa/chick peas/garbanzo beans
2-3 tomatoes
1 medium sized onion finely chopped
2 tbsp channa/chole masala (Everest,Badshah,MDH ..any brand)
1 tsp ginger garlic paste
2 cardamoms/elaichi
2 lavang / cloves
1 tsp saunf
1 tsp jeera/cumin seeds
2-3 green chillies
pinch of turmeric
corriander/cilantro - garnish

Method
  • Soak the chick peas/kabuli channa overnight
  • Pressure cook the soaked beans with a pinch of salt until soft.
  • Make a puree of the tomatoes,green chillies and saunf.
  • Heat oil in a wok,add the jeera,cardamoms and elaichi.
  • Saute the onion until light pink.
  • Add the ginger garlic paste and saute until the raw smell is lost.
  • Pour in the tomato puree,turmeric,salt,chole masala and cook until oil separates from the gravy.
  • Add the cooked chole into the gravy,if the gravy feels too thick,you may add some water.
  • Allow it to boil ,till you get very good aroma.
  • Turn off the stove,garnish with cilantro,raw onions and serve with rotis,naan,puri,flavored rice or bhatoora.
  • If you like a little tangy flavor,you may squeeze a dash of lime juice.

Pin me up 


Channa Masala was one of the initially recipes I had posted when I started blogging in 2013. Over the years,the recipe got made several times but sadly the post never got a face-lift.  As the mango season is drawing to a close, we at home enjoyed this lipsmacking dinner and also the old post got a makeover in terms of photos and write up. Do check out this recipe and share your views and thoughts!! 


February 18, 2013

Cheesy Bread Bites


Share with friends and family No comments:


This recipe ended up as a substitute for sumptuous Bread Upma .I had less number of bread slices in my fridge which would not be enough for making bread upma.Hence I cooked up this tasty yummy bread bites.
Can be a very good starter for any get together, kid's birthday parties or even a lunch box menu for school :)
Do try this and impress your friends or kids at the next upcoming  party.

Preparation Time : 15 mins
Cooking Time : 15 mins
Serves : 3-4

Cheesy Bread Bites

February 15, 2013

Peas (matar) Masala / Pattani Masala - Vegan Curry


Share with friends and family 6 comments:

Green peas are frequently used in Indian Cooking and in various ways ranging from starters to main course . I have also read about Green peas halwa and Green peas kheer also being prepared ,which makes it a part of dessert recipes too.
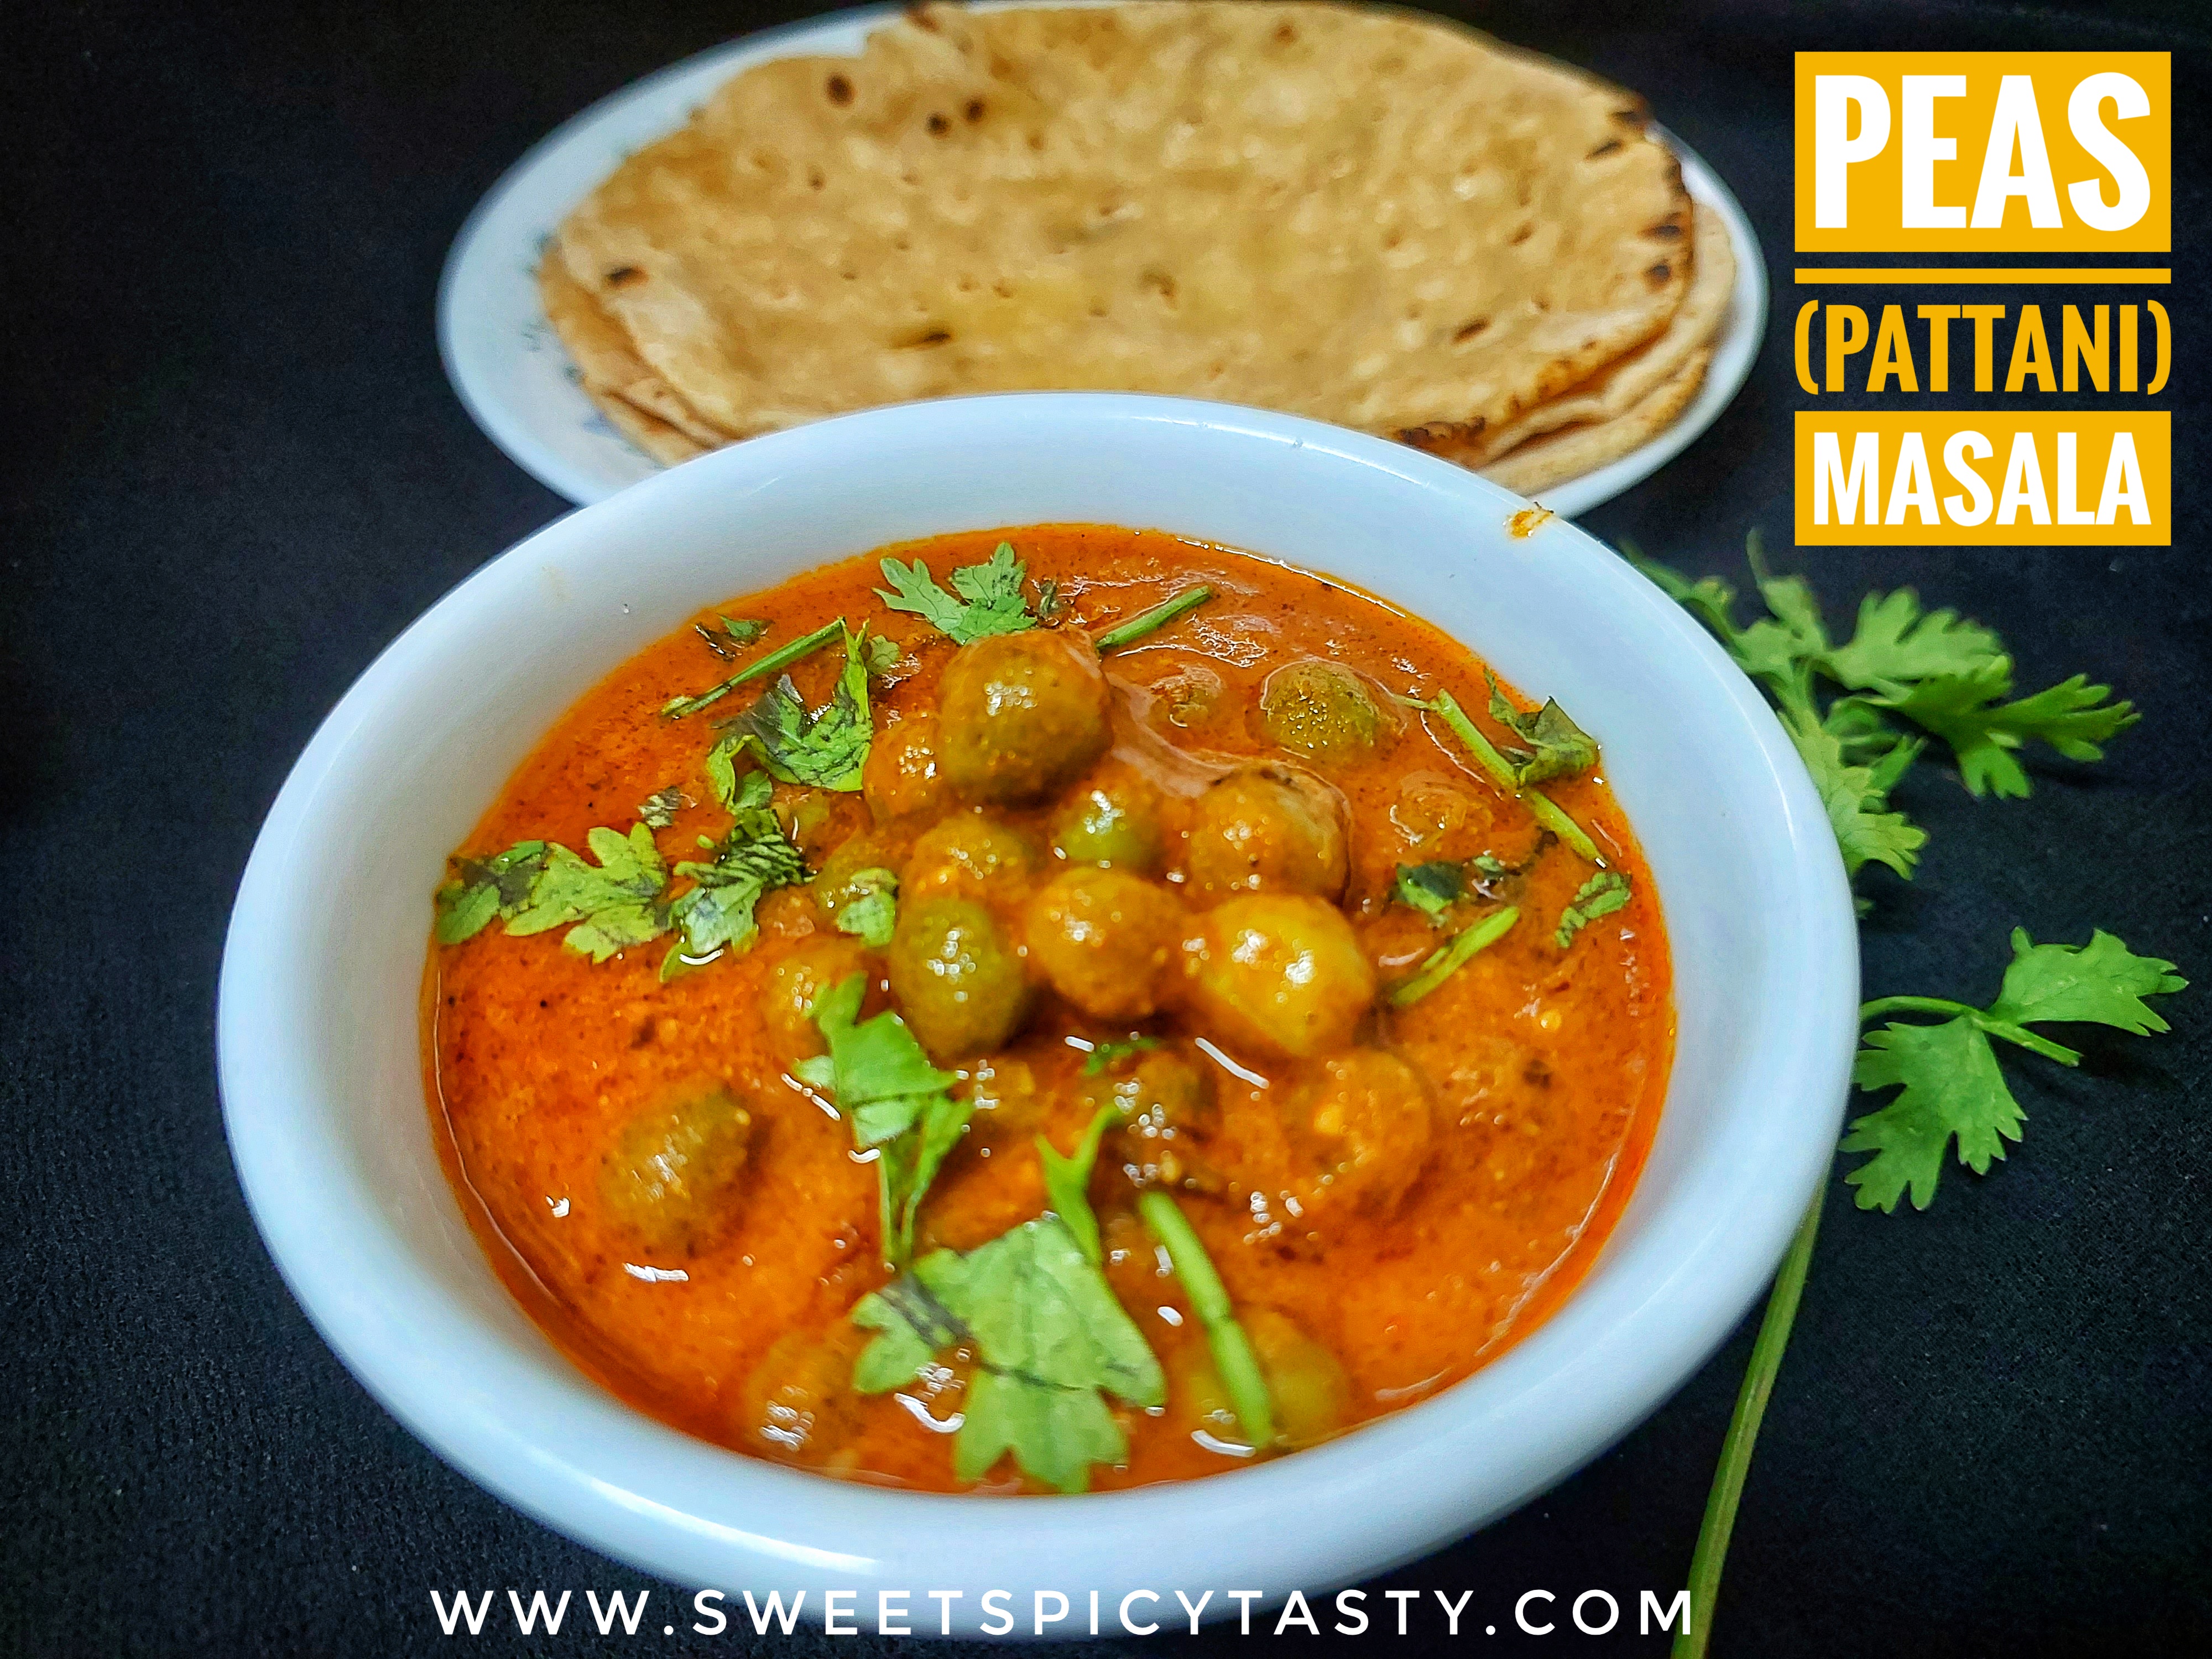
I have eaten and prepared various types of gravy using Green Peas,but this is an entirely different recipe that was roughly told to me by my hubby . He loves to have this Peas Masala or pattani masala as we call in Tamil with his favorite Tomato rice a.k.a Thakali Saadham.

peas masala/pattani Kurma/ pattani Masala.- a delicious and creamy gravy . Perfect accompaniment for main course. Pattani Kurma , pattani Masaal, matar masala, mattar masala, gurma ,pattani gurma


It seems during his initial days of work Vj would carry this for lunch very frequently. 
Once he migrated to Bangalore for work, the dabba culture vanished and this recipe was long forgotten .
One day all of a sudden ,when we were discussing about our favorite food ,Vj spoke about this pattani masala and vaguely told me how it would taste.  Basis that, I prepared a gravy my style and he was super elated to relish as it took him down the memory lane .

I use peas a lot in my day today cooking and some of my favorite recipes with Peas as the star ingredient are 
peas masala/pattani Kurma/ pattani Masala.- a delicious and creamy gravy . Perfect accompaniment for main course. Pattani Kurma , pattani Masaal, matar masala, mattar masala, gurma ,pattani gurma

Preparation Time : 10 mins
Cooking Time : 30 mins
Serves : 2

Ingredients
2 Ripe tomatoes - cut into cubes
1 medium sized onion - cut into big slices (optional) 
250 gms fresh/frozen green peas.
3-4 green chillies
2 tsps red chilli powder
1 tsp dhania / corriander powder
1/4 tsp haldi / turmeric powder
1/2 tsp garam masala
1 tsp cumin/jeera seeds.
chopped ginger
1 stick of cinnamon
1/4 tsp saunf
4 tbsp cooking oil
salt to taste.

Notes : 

  • If fresh/frozen peas is not available you can soak the green peas overnight and then pressure cook.
  • Skip the onions and follow the recipe as is for a No Onion No Garlic version
  • Skip the Ginger and onions for a pure Jain version. 
Method
  • Take a kadai with 2 tbsp cooking oil and heat on medium flame.
  • When the oil is hot,add the jeera and allow it to crackle.
  • Add the cinnamon stick,chopped onions,green chilli,chooped ginger,haldi and saute until onion turns light pink.
  • Add the chopped tomatoes and red chilli powder and cook until the tomato turns mushy.
  • Allow this to cool and then grind this in the blender into a smooth paste.While grinding add the saunf also.
  • Heat the kadai with some oil and crackle the cumin seeds.
  • Add the tomato paste ,salt , dhania powder and cook the paste.
  • When the paste starts boiling,add the fresh peas or the cooked peas to this mixture.
  • Close with a lid and cook until peas is nicely cooked and the paste starts leaving the sides of the oil is seen floating on the top of the gravy.
  • Garnish with corriander leaves and serve hot with any flavored rice,chapathi,poori ,naan etc.

Pin me up

 https://pin.it/5kOdHHPD2


peas masala/pattani Kurma/ pattani Masala.- a delicious and creamy gravy . Perfect accompaniment for main course. Pattani Kurma , pattani Masaal, matar masala, mattar masala, gurma ,pattani gurma