February 28, 2013

Paddu / Kuzhi Paniyaram / Rice Lentil Dumplings


Share with friends and family
No comments:

A traditional South Indian cuisine known by various names viz Paddu (Karnataka),Kuzhi Paniyaram(Tamil Nadu),Guntha Punugalu(Andhra Pradesh) is a very sumptuous and a healthy breakfast.

 Prepared by steaming a batter prepared using Rice and Black lentils (Udad dhall) using a specific mould (Kuzhi Paniyaram Pan).
The Mould generally is made of Cast Iron and has about 7 holes to pour the batter and steam.Off late,there is non stick mould available with 7 or 12 holes.

The savoury version is prepared using the Dosa-Idli batter tempered with mustard seeds,onions,cilantro and green chutney.Served with tomato-onion dip/chutney or Coconut Chutney.

The sweet version is made for festive occasions and also as an offering to God during Auspicious days.The batter is prepared from Rice/Wheat flour,Jaggery,Cardamom powder.

Jain Version : Skip the ginger and onions from the recipe and follow the rest of the recipe as is.
No Onion No Garlic : Skip the onions and replace with grated carrots for added flavor

Preparation Time : 10 -15 mins
Cooking Time : 15 mins
Serves : 3-4


(Image updated on 30 May'19)

Palak Paratha /Spinach Flat Bread


Share with friends and family
No comments:

For all the Paratha lovers out there,another simple,tasty,colorful and healthy version of parathas. A great hit among kids who don't like to have greens as a part of their meal,this is the best way to incorporate it in their lunch or dinner . Good for people with Diabetes as it contains just wheat flour and spinach. This can also be a part of lunch box for kids with curd or some ketchup.

" Sending this to HITS – Diabetic friendly and HITS page"  

Preparation Time : 15 mins
Cooking Time : 10 mins
Serves : 2-3

Jain Version : Skip the ginger and follow the recipe as is


palak Paratha/Spinach Flat Bread

February 26, 2013

Dal Khichdi | दाल खिचड़ी (सात्विक) - One pot Saatvik Meal


Share with friends and family
7 comments:

The Dal Khichdi is a very sumptuous one pot meal. Protein rich and loaded with carbs, it has the power to keep you full and energized.
Simple to make and light on the tummy. This preparation basically is made using rice ,toor dhaal (yellow pigeon peas) and a few mild Indian spices.You can add up some veggies to it to make it all the more filling especially if you want to feed your kids who are a little fussy about eating veggies.
An instant hit in my home,both me and my hubby have a liking for this.


 As goes the popular hindi saying " खिचड़ी के  हैं 4 यार- दही, पापड, घी ,अचार " ,  meaning this khichdi has 4 best accompaniments which are yogurt,  papads , clarified butter/ghee and pickle , a piping hot bowl of dal khichdi with all of these accompaniments is soul satisfying on a chill winter day or a cozy rainy evening. 

Dal khichdi is also served to patients who are recovering from viral fever or surgery and need to have light food . When serving to patients we can skip the garam masala and other whole spices and keep it plain and simple for ease of digestion. You may add up veggies which are suitable for patients .


(Photos and text updated on 1st October 2021)

Preparation Time : 10-15 mins
Cooking Time : 30 mins
Serves : 2-3

Ingredients

1 cup raw rice
1/2 cup toor dhall (yellow pigeon peas)
1/4 cup moong dhall (split yellow peas)
1 potato cut into big cubes (optional)
1 carrot cut into big cubes (optional)
Few French beans cut length wise (optional)
50 gms fresh green peas (optional)
1 bay leaf/ tej patta
2-3 lavang / cloves
1 small stick dalchini / cinnamon
2 tsp cumin seeds/jeera
1 inch piece Ginger /adrak
3-4 green chillies
few curry leaves
Turmeric powder
2 tsp garam masala powder
salt
1 tbsp oil
Ghee for serving (skip for vegan) 

** Jain version- omit Ginger ,potato, carrots and garlic 

Method
  • Wash and soak the rice and dal for about 10 mins.
  • Grind the ginger and chillies into a fine paste in a blender.
  • Heat the pressure cooker with some oil in it and temper the jeera,cloves,dalchini,bay leaf and curry leaves.
  • Add in the ginger chilli paste and saute well. If you please,you may add some garlic paste at this stage and saute well.
  • Add in the veggies,turmeric powder,garam masala, salt and saute well till the oil coats the veggies.
  • Add the rice,lentil and pour  4-5 cups of water and pressure cook for about 3 whistles.
  • Once the pressure from the cooker settles,release the lid,you will see that the khichdi is all done and will be slightly mushy with a nice aroma enveloping your kitchen.
  • Pour in about 2-3 tablespoons of ghee,mix well ,garnish with corriander and serve hot.
  • If you feel the khichdi is mushy but slighlty tight,pour in some warm water and loosen it.Khichdi is generally a little loose and mushy,unlike the pulavs or biryanis which are dry and grainy in texture.
  • Enjoy hot khichdi with your favorite accompaniment like kadhi , plain yogurt and some papads.
 Pin it up for future 


February 25, 2013

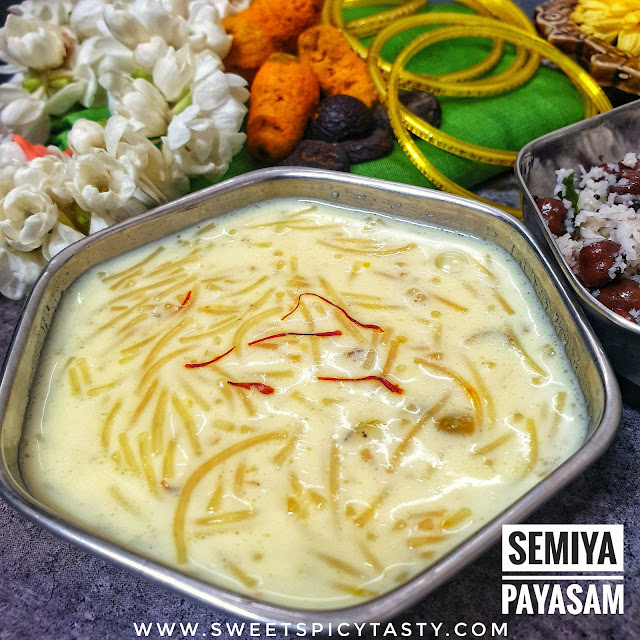
Semiya (Shaavige) Payasam / Sevayyan Kheer / Vermicelli Pudding


Share with friends and family
5 comments:

Semia Payasam (tamil) / Sevaiyan Kheer (Hindi) is a traditional sweet dish made using milk and vermicelli.Seasoned with ghee roasted cashewnuts and flavored with fresh saffron.

Semiya, Shaavige , Sevayyan refer to vermicelli and Payasam or kheer means pudding . 

Semiya Payasam is the first sweet which I learnt to make when I was trying my hands at cooking .
I always loved the Semiya payasam that amma would make and hence I was insistent that she taught me how to make it . Needless to say ,this shavige payasam (sevayyan kheer) is very close to my heart .

Sevayyan kheer , kheer , shavige payasam , shaavige payasa , payasa  , semiya payasam , semia paysam , payasam , vermicelli pudding , vermicelly kheer , vermicelly payasam , vermicelli payasam

As simple as it may sound to make Semiya Payasam, we need to take care of a few things while making the payasam which will help you make the best kheer .Mom taught me these simple ,yet efficient tips and I can proudly say that Semiya Payasam never fails me and there is a huge fan following for the payasam I make . So here I am,sharing those tips and tricks with you all.

  • Always use the non roasted vermicelli that is available in the market to make Semiya Payasam.  When we roast the semiya in ghee ,make sure you donot over roast it . The vermicelli will appear translucent and you will feel light while roasting, this is the perfect texture of the semiya to make kheer .
  • Use pre boiled milk while making kheer as this will cut down the risk of milk curdling and also saves a lot of time waiting for the milk to Simmer along with the semiya .
  • Soak the saffron in warm milk and rub it with your fingers gently before you add it to the paysam . This will give you maximum flavor of saffron and a subtle yellow color to the payasam. 
  • You can dry roast a couple of almonds and pistachios to make a coarse powder and add it to the simmering payasam for added richness and taste.
  • Semiya payasam will turn a little thick on cooling down , so before serving you can dilute it by adding some warm milk .
Sevayyan kheer , kheer , shavige payasam , shaavige payasa , payasa  , semiya payasam , semia paysam , payasam , vermicelli pudding , vermicelly kheer , vermicelly payasam , vermicelli payasam

This week (6th May 2023) we have achieved a milestone in our Foodies_Redoingoldposts Facebook group.  This is our 100th week and we are celebrating it by redoing one of our favorite sweet post . I chose to update the write up and photos of my favorite Vermicelli Kheer for this wonderful achievement. 


Preparation time : 5 mins
Cooking Time : 20 to 30mins
Serves: 3-4
Complexity: simple

Ingredients
1 /2 cup vermicelli
1/2 litre full fat or  2% fat milk  boiled 
4-5 cardamoms/elaichi powdered
Few cashew nuts
Roughly chopped almonds and pistachios
Few saffron strands / kesar soaked in warm milk
2 tbsp ghee
1/2 cup sugar + extra if you need more sweetness.

Method

  • Heat the ghee in a thick bottomed vessel.
  • First fry the cashewnuts in ghee until golden brown and keep aside.
  • In the same vessel,add the vermicelli and fry it in ghee until it turns crisp.
  • Now slowly add the milk and keep stirring the mixture.
  • The milk will slowly start boling and as you keep stirring will begin to get thicker and will turn light pinkish on simmering.
  • Donot let the milk to get very thick. 
  • Reduce the flame,add the sugar,cardamom powder,saffron and fried cashews to the kheer and simmer for 3-4 mins till the sugar dissolves well into the kheer. The paysam will appear a little diluted after adding sugar , but contine to simmer for 4-5 mins and then the consistency will be perfect.
  •  Add chopped badams and pista to the kheer
  • Serve hot or cold.
  • Incase the kheer/payasam feels too thick,you can add some warm boiled milk and dilute it.

Pin me up

Sevayyan kheer , kheer , shavige payasam , shaavige payasa , payasa  , semiya payasam , semia paysam , payasam , vermicelli pudding , vermicelly kheer , vermicelly payasam , vermicelli payasam


February 22, 2013

Gajar Halwa / Carrot Halwa - Microwave method


Share with friends and family
8 comments:

My mom had magic in her hands when she made gajar ka halwa. I try to make like her and have succeeded to a great extent.Amma always made carrot  halwa the traditional way where the carrots are cooked in milk until all the milk is absorbed and then simmered further with ghee and sugar . The traditional recipe is on my YouTube Channel and you can get the recipe here .

I customized the traditional recipe of slow cooking to make it in the microwave oven so that busy office goers or even bachelors can easily make it at home and enjoy the delicious halwa .
Taste wise I did not make out any difference between the two methods,just that the microwave method  gave me the Gajar Halwa quickly to please my Taste buds. 


Gajar halwa is mainly made in winters as the availability of Delhi carrots popularly known as Laal gajar or red carrots is abundant. But ,you can also make gajar halwa with the Ooty carrots or Orange carrots and they also taste yummy .In my home, Hubby is a fan on ooty carrot halwa while I relish both equally . I personally haven't found any stark differences between the two varieties of carrots used for preparing the halwa ,think its all personal preference and acquired taste.
I love to have warm gajar halwa with a scoop of vanilla icecream. This combination was introduced by my maternal grandpa who was a die hard sweet lover . Needless to say ,me being a fan of icecream as well as gajar halwa, this combo was a super hit with me .


This recipe was posted way back in 2013 on the occasion of V's birthday and after so many years it saw the light again today (13/1/2023) by way of which the photos and write up was updated for our fortnightly activity of Redoing Old posts ,an initiative by my fellow blogger Renu. This is the 92nd edition of Redoing old posts . I am hoping to be consistent with this activity so that many of my old posts get their desired face lift :-) 


Preparation Time : 15 mins
Cooking Time : 20-25 mins
Serves : 2-3

Ingredients
250 gms carrot grated
1 cup milk
2 cups sugar
3tbsp ghee
cardamom powder

For Garnishing

cashews - 4/5 pieces
almonds - 4/5 pieces
raisins  - 3/4 pieces
Unsalted pistachios 

Method
  • Peel and wash the carrots.
  • Grate them using a grater .Grate them just before you start making the halwa.
  • Take a microwave safe container,add the grated carrots,milk and cook in the oven for 15 mins.
  • After about  7-8 mins,take the container out of the oven,stir the mixture and place it back for the remaining time.
  • Once the carrots are cooked,add the ghee and sugar and place it again for another 10 mins.
  • Stir again, once after 5-6 mins and add the garnishing items and cardamom powder to the mixture and place it in the oven for balance time. 
  • After adding the sugar don't cook for a long time as there is a tendency for the halwa to turn hard and rubbery.  Incase due to oversight such a mishap happens,add some milk and mix well .This will help salvage the halwa .
  • The halwa starts leaving the sides of the container and you can see the ghee on top of the mixture. Yummy halwa is ready !!!
  • Serve hot or cold..Both taste yummy !

Note :
  • If the carrots are too juicy,squeeze out the juice with your hands before you put them for cooking.
  • In case you feel the carrots are not cooked in the first 15 mins,you can increase the time and check at intervals until the carrot is completely cooked. 

Serving Suggestions :

A scoop of vanilla ice cream with the halwa is an excellent combination.

Pin me up !!


February 21, 2013

Poha / Aval Pakoras


Share with friends and family
1 comment:


Poha (Hindi) / Aval (Tamil) / Avalakki (Kannada) is generally a part of the breakfast menu. Simple,delicious and a  healthy breakfast.

Here is another yummy dish made using poha.. Enjoyed by one and all.A perfect starter or an evening snack with a cup of piping hot Filter Coffee or Masala Chaai

Try and enjoy too...

Poha Pakoras  / Aval Pakoras

February 20, 2013

Bisi Bele Baath - Karnataka Special


Share with friends and family
2 comments:

Bisi Bele Baath,a signature dish of Karnataka,India primarily made out of rice and lentils literally translates to
(Bisi)- Hot
(Bele)-Lentil
(Baath)-Rice

  A slightly lengthy method of preparation,but the end result is delectable.There are various recipes used in different households for the preparation of Bisi Bele Baath.The recipe which I am going to share with you,is the one that I learnt from my Mom.


Preparation Time : 30 mins
Cooking Time : 45 mins
Serves : 3-4


Ingredients

For the Bisi Bele Baath Masala
1 tbsp Channa Dhall / Yellow Bengal Gram dhall
2 tbsp Dhania / Corriander seeds
10-15 dry red chillies (the spicy variety)
3-4 dry dry byadgi red chilli (no spice color yielding chilli)
1 tsp methi/fenugreek seeds 
1 small stick cinnamon
2-3 cloves 
Curry leaves - few 
turmeric powder
asafoetida

Main Dish
1 cup rice
1/2 cup thoor dhall
1 potato- chopped as cubes
1 onion - chopped as cubes
2 carrots- chopped as cubes
1 drumstick - chopped lengthwise 
50 gms french beans - chopped lengthwise
50 gms green peas
lemon sized tamarind - soak in hot water and extract thick pulp
Jaggery
1/2 cup grated coconut 

Tempering
2 tsp Mustard Seeds
2-3 dry red chillies
curry leaves
asafoetida

Method
Preparation of the Masala
1. Heat a little oil in a pan,add in the dry red chillies and roast until the pungent flavor  of the chillies is lost and they turn crisp and keep it aside.Take care not to burn them.
2. In the same pan,now add the channa dhall and roast it until it turns golden brown,keep aside.
3. Add in the corriander seeds,methi seeds,curry leaves,asafoetida and turmeric powder and roast them until the corriander seeds give out a nice aroma.Methi seeds should not turn brown.It will become bitter.
4.Lastly ,just dry roast the cinnamon and cloves.
5.Grind all of these into a dry spice powder.
6.This powder can be stored in a container and can be used later also.

Preparation of Bisi Bele Baath
  • Pressure cook the rice and lentil with a little turmeric powder and 3 cups of water.
  • Take about 3 tbsp of the masala and wet grind it with the grated coconut into a fine paste.
  • In a deep heavy bottomed vessel,heat a little oil and temper it with mustard seeds,curry leaves and dry chillies.
  • Saute the onions until pink,add in the rest of the veggies and saute till the oil coats around them.
  • Add in salt,asafoetida and pour in the tamarind extract and some water ,enough to cook the vegetables.
  • Add small amount of jaggery and 1 tbsp of the masala and let the veggies cook well.
  • Add the masala paste prepared using coconut,when the vegetables are half cooked.
  • Mean while,slightly mash the cooked rice and lentil so that it blends well when added to the cooked vegetable mixture.
  • Once the vegetables are cooked well ,add in the rice and stir well and allow the entire mixture to slightly come to a boil.
  • You may add a little water,if you find difficulty in stirring the mixture and it seems too thick.
  • Check for the spice and salt and add salt accordingly.If you need more spicy you can add in the dry masala and stir well.
  • Before serving,garnish with roasted cashewnuts or groundnuts and drizzle some ghee over it and serve hot with Papad,potato chips and curd.
Note :
  • For those who dont like the taste of onions,it can be omitted while preparing.
  • Vegetables such as capsicum,ash gourd(white pumpkin),Chou Chou (Chayote) can also be added.
  • Instead of green peas,boiled chick peas /chole can be added


February 19, 2013

Pav Bhaji / पाव भाजी - Street Food Delicacy


Share with friends and family
3 comments:

Having grown up in AAMCHI MUMBAI..(this is how we MUMBAIKARS refer to MUMBAI) for 25yrs of my life,this yummy street food delicacy has been a part and parcel of my childhood. Pav bhaji is an inseparable part of any Mumbaikar.

If you are wondering what is this pav bhaji ? It is very simple, pav is a colloquial and local term used to refer to dinner roll / bread shaped as square buns and bhaji is a vegetable gravy served along side . The pav is roasted in butter and served with the bhaji with a dash of lime and diced onions.


The story how pav bhaji came into existence is very interesting... Bombay was once a city with a lot of textile mills all around which would be buzzing with action round the clock. So during one such time,it seems the food cart owners ran out of their usual supply of food and in order to serve the hungry mill workers ,they put in all the veggies ,spices and masala on hand and served with pav . Thus was born the world famous Pav Bhaji . 

Each locality will have its own famous pav bhaji center and a set of regulars who flock their at every single pretext. Our area too had 2 or 3 such pavbhaji special joints and I have had my share of enjoying it with oodles of butter .Yes,that's how the restaurants serve pavbhaji.  


Pav bhaji is eternal favorite at home which I make it various ways ,an elaborate version ,a quick fix version using pressure cooker and also a No Onion No Garlic version when I am making for dad . 
This recipe of making pav bhaji is how my mom would make ,so undoubtedly it is one of my most cherished versions .

Offlate ,in the name of pavbhaji people add all sorts of vegetables like beans , doodhi (bottle gourd), Raw papaya and what not, but traditionally it has always been tomatoes, potatoes, cauliflower, onions, garlic, capsicum and peas that have gone into the making of bhaji.


As kids,our summer holidays would revolve around playing with friends and on many occasions we would just plan a luncheon or dinner meet at a friend's house impromptu. Our friendly mommies would dish out their best recipes for us kids and we would all happily enjoy a yummy finger licking meal . At my home,it was mostly pav bhaji request from my friends second after Idlis ,wada and chutney .

The restaurants mostly use edible food color to get the deep red color of the bhaji ,but mom would add a small portion of beetroot while making pav bhaji which will give it the deep red color naturally. 


This recipe is very close to my heart and is one of the most visited posts on my blog. I had posted this in my initial days of blogging which is almost 8-9 years ago . Today (13 Aug 2023) ,I have updated the photos and write up with some of my fond memories.  Hope you all like it and continue to support my blogging journey .


Preparation Time : 15 mins
Cooking Time : 45 mins
Serves : 3-4

Ingredients

10-15 cauliflower florets (boiled and mashed)
2-3 medium sized potatoes (boiled and mashed)
2-3 medium sized tomatoes - blend into a puree
1 onion-finely chopped
1 capsicum - finely chopped
1 cup fresh/frozen peas
2 tsp grated Beetroot (to get a natural red color )
2 tsp  red chilli powder
4 tsp Pavbhaji masala ( any brand ..Everest, Baadshah, MDH, MTR etc)
Salt to taste
4tbsp salted butter
corriander/cilantro for garnishing
1 slab of pav.

(Note : In India its available as PAV BHAJI Buns and for people living in foreign lands you get them at Indian grocery stores. If any of these options are unavailable you can use sandwich bread for the same.)

 Method

  • Heat 2 tbsp of butter in a thick bottom vessel.
  • Add the onions when the butter melts and is heated up.Saute until onion turns light pink.
  • Add the chopped capsicums.
  • Close the lid and cook for some time.
  • Add the tomato puree,grated beetroot and green peas.To this add the red chilli powder,salt and pav bhaji masala.
  • Note : In case you desire a spicy bhaji,you can add some more pav bhaji masala / red chilli powder.
  • Let the mixture come to a boil so that the raw taste of the tomato puree is lost. 
  • Now add the mashed potato and cauliflower florets.
  • Stir the mixture so that all the contents get mixed properly and let the mixture cook .
  • Use a potato masher and mash the contents well while the bhaji is getting cooked .
  • The bhaji must be of flowing consistency and resemble a porridge.  There should not be huge Chunks of any vegetables.  Hence, this step is very important.
  • By the time the mixture is cooked,heat a tava / griddle to roast the bread /pav to be served along with the bhaji
  • Serve the roasted bread/pav and bhaji by garnishing with some raw onions,cilantro and a dollop of butter over the bhaji.


Pin me up !!


Chole Masala / Channa Masala - Chickpeas Curry (vegan)


Share with friends and family
4 comments:

Who doesn't love the spicy tangy flavored channa/chole with hot hot Puris,bhatoora,naan or simple phulka rotis.. Ohh..just heavenly !!! I am no exception either. I love to enjoy chole any day.  This is one recipe you can never go wrong ! 


Channa / chole/ chick peas are used widely across South Indian , North Indian Cuisine as well as globally too .At our home we enjoy all delicacies made from chick peas .
You can check out the collection of recipes on my blog where I have used chickpeas in various ways.

Coming to this delicious channa masala or chole masala ,call it the way you like , there are so many different recipes to follow and enjoy the preparation. The channa masala is a classic accompaniment for hot pooris or bhaturas . 


If you are preparing channa or chole masala during Navratri or some festive meal as prasad ,you would want to try my Jain Chole Masala or Chataka chole - both of which are recipes sans Onion and garlic. 

During the mango season , pair some piping hot puris with chole and chilled Aam Ras which is a heavenly combination.  


Just like Poori Bhaji Aamras , Poori Chole and Aamras is another match made in heaven . 


Preparation Time : 10 hours
Cooking time : 45 mins
Serves : 3-4

Ingredients
100 grams kabuli channa/chick peas/garbanzo beans
2-3 tomatoes
1 medium sized onion finely chopped
2 tbsp channa/chole masala (Everest,Badshah,MDH ..any brand)
1 tsp ginger garlic paste
2 cardamoms/elaichi
2 lavang / cloves
1 tsp saunf
1 tsp jeera/cumin seeds
2-3 green chillies
pinch of turmeric
corriander/cilantro - garnish

Method
  • Soak the chick peas/kabuli channa overnight
  • Pressure cook the soaked beans with a pinch of salt until soft.
  • Make a puree of the tomatoes,green chillies and saunf.
  • Heat oil in a wok,add the jeera,cardamoms and elaichi.
  • Saute the onion until light pink.
  • Add the ginger garlic paste and saute until the raw smell is lost.
  • Pour in the tomato puree,turmeric,salt,chole masala and cook until oil separates from the gravy.
  • Add the cooked chole into the gravy,if the gravy feels too thick,you may add some water.
  • Allow it to boil ,till you get very good aroma.
  • Turn off the stove,garnish with cilantro,raw onions and serve with rotis,naan,puri,flavored rice or bhatoora.
  • If you like a little tangy flavor,you may squeeze a dash of lime juice.

Pin me up 


Channa Masala was one of the initially recipes I had posted when I started blogging in 2013. Over the years,the recipe got made several times but sadly the post never got a face-lift.  As the mango season is drawing to a close, we at home enjoyed this lipsmacking dinner and also the old post got a makeover in terms of photos and write up. Do check out this recipe and share your views and thoughts!! 


February 18, 2013

Cheesy Bread Bites


Share with friends and family
No comments:


This recipe ended up as a substitute for sumptuous Bread Upma .I had less number of bread slices in my fridge which would not be enough for making bread upma.Hence I cooked up this tasty yummy bread bites.
Can be a very good starter for any get together, kid's birthday parties or even a lunch box menu for school :)
Do try this and impress your friends or kids at the next upcoming  party.

Preparation Time : 15 mins
Cooking Time : 15 mins
Serves : 3-4

Cheesy Bread Bites

February 15, 2013

Potato Vada / Potato Dumplings


Share with friends and family
No comments:


Just as Mango is the king of fruits , I always feel that POTATO is the king of Vegetables.
There will hardly be anyone who dislikes the taste of potato and items made out of potato.
Here comes one such yummy recipe made out of the KING of VEGGIES.

Preparation Time : 30 mins
Cooking Time : 30 mins
Serves : 3-4

Potato vadas / Potato dumplings

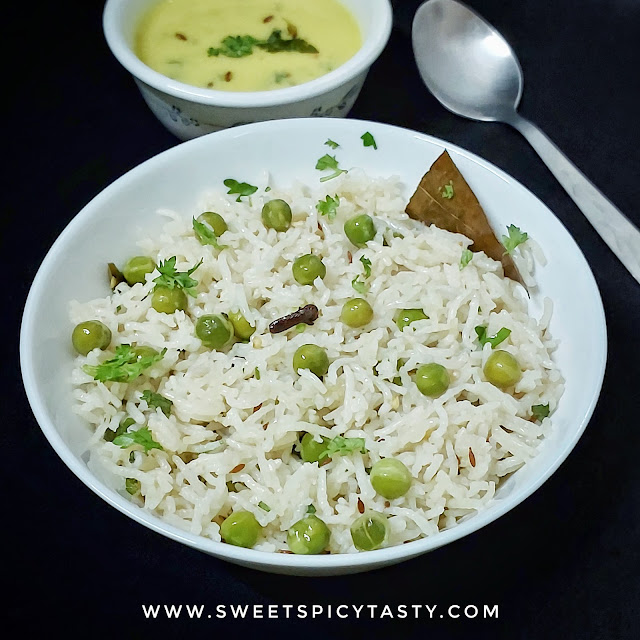
Peas Pulav / Matar Pulav / मटर पुलाव


Share with friends and family
7 comments:

Peas Pulao/ Matar Pulao is a classic and yet simple recipe . A perfect menu item for all sorts of parties ,get together and festive days.

A rice preparation that is absolutely mildly spiced, it is a crowd pleaser and also pairs well with any type of spicy gravy like Chole , Matar Paneer , Gujarati Kadhi ,Kaju Matar Masala etc etc.

Matar pulao was one of the recipes I learnt on my own when I was experimenting in the kitchen with flavors, taste and textures.I very vividly remember the surprised and happy look on my mom's face when I served her Matar pulao with raita as a surprise when she came back after completing some errands.


Peas pulav can be easily prepared to pack for lunch box as well . Kids and elderly would love to enjoy this yummy preparation during their lunch time. 

Matar pulao is one of our family favorites and go to recipes when I want to whip up a quick lunch or dinner . I normally pair it with Gujarati Kadhi as it compliments the flavors well . At times  I also serve it with some crispy papad to add up to the crunch.

Masala Matar Pulao is another classic recipe which we like at home but that is reserved for days when we crave for something spicy ,masaledar but at the same time a light and filling meal . Do check out recipe by clicking on the link above .


I had actually forgotten to update my pics on the blog with better pics for Peas Pulao. Each time I make Matar pulao ,the urge to immediately have it piping hot kept delaying my activity of clicking some decent pics, but this time I was determined to click decent pics and update the post which was published in 2013 with amateur pics during early blogging days.  So here it is a revamped post (7/10/23) with  better pics and extra anecdotes from my memories. Recipe is now suited to cater to Vegans,  No Onion No garlic and Jain patrons as well. 


Preparation Time : 10 mins
Cooking Time : 30 mins
Complexity - simple 
Serves : 2

Jain Version : Omit  the ginger garlic paste and follow the recipe as is.

No Onion No garlic version : Use grated ginger or ginger paste and skip the GARLIC

Vegan version can use cooking oil instead of ghee /butter.


Ingredients 
1 measure rice (preferably basmati rice )
ghee / clarified butter - 2 tbsp (or)
Oil 2tbsp ( vegan version) 
1 tbsp cumin /jeera seeds
1 bay leaf 
1 stick cinnamon
2-3 cardamom /elaichi
1-2 cloves/lavang
1 green chilli slit vertically 
1 tsp ginger garlic paste (optional) 
1 cup fresh/frozen green peas
Salt as per taste

Method

  • Heat the ghee/oil in a pressure cooker/heavy bottomed vessel.
  • Add the cumin seeds and let it crackle.
  • Add the ginger garlic paste , green chilli, bay leaf ,cinnamon,cardamom,cloves and saute well.
  • Now add the washed and drained rice and peas to this with 2 measures of water.
  • Close the lid and allow the rice to cook until all the water is absorbed if cooking in a pan . If cooking in pressure cooker, cook on medium flame for 1 whistle.  Let the pressure release naturally .
  • Allow the rice to set for about 10 -15 mins.
  • garnish with corriander leaves.
  • Serve hot with any kind of dhaall , kadhi, gravy or raita. 

Pin me up 


Adai /Lentil Crepes


Share with friends and family
No comments:

Adai/Lentil Crepes is a very famous dish of Tamil Nadu,India. Made out of a mixture of various lentils and rice.Makes a very healthy breakfast which is protein rich . This can be given to kids in their lunch box or even served as an after school snack when they get back home . 

Adai Avial is a very famous combination in most south indian homes. Kids and many adults also like to have Adai with jaggery and some butter . 
If following vegan diet , then butter and avial combination can be avoided ,instead it can be had with coconut chutney or tomato chutney. 


Preparation Time : 4-5 hours
Cooking Time : 15 mins
Serves : 4-5 
Complexity  : Simple 


(post edited with images on 18 June 2019)

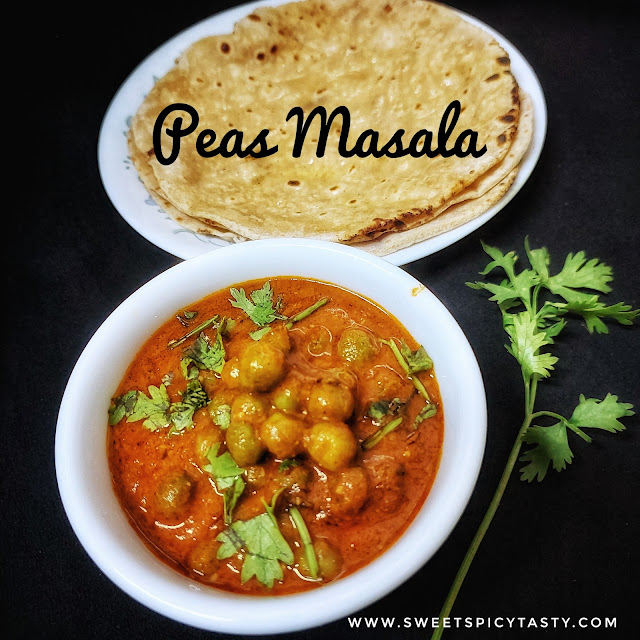
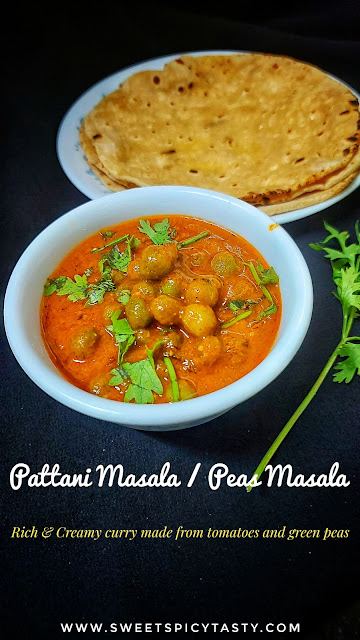
Peas (matar) Masala / Pattani Masala - Vegan Curry


Share with friends and family
4 comments:

Green peas are frequently used in Indian Cooking and in various ways ranging from starters to main course . I have also read about Green peas halwa and Green peas kheer also being prepared ,which makes it a part of dessert recipes too.
I have eaten and prepared various types of gravy using Green Peas,but this is an entirely different recipe that was roughly told to me by my hubby . He loves to have this Peas Masala or pattani masala as we call in Tamil with his favorite Tomato rice a.k.a Thakali Saadham.

peas masala/pattani Kurma/ pattani Masala.- a delicious and creamy gravy . Perfect accompaniment for main course. Pattani Kurma , pattani Masaal, matar masala, mattar masala, gurma ,pattani gurma


It seems during his initial days of work Vj would carry this for lunch very frequently. 
Once he migrated to Bangalore for work, the dabba culture vanished and this recipe was long forgotten .
One day all of a sudden ,when we were discussing about our favorite food ,Vj spoke about this pattani masala and vaguely told me how it would taste.  Basis that, I prepared a gravy my style and he was super elated to relish as it took him down the memory lane .

I use peas a lot in my day today cooking and some of my favorite recipes with Peas as the star ingredient are 
peas masala/pattani Kurma/ pattani Masala.- a delicious and creamy gravy . Perfect accompaniment for main course. Pattani Kurma , pattani Masaal, matar masala, mattar masala, gurma ,pattani gurma

Preparation Time : 10 mins
Cooking Time : 30 mins
Serves : 2

Ingredients
2 Ripe tomatoes - cut into cubes
1 medium sized onion - cut into big slices (optional) 
250 gms fresh/frozen green peas.
3-4 green chillies
2 tsps red chilli powder
1 tsp dhania / corriander powder
1/4 tsp haldi / turmeric powder
1/2 tsp garam masala
1 tsp cumin/jeera seeds.
chopped ginger
1 stick of cinnamon
1/4 tsp saunf
4 tbsp cooking oil
salt to taste.

Notes : 

  • If fresh/frozen peas is not available you can soak the green peas overnight and then pressure cook.
  • Skip the onions and follow the recipe as is for a No Onion No Garlic version
  • Skip the Ginger and onions for a pure Jain version. 
Method
  • Take a kadai with 2 tbsp cooking oil and heat on medium flame.
  • When the oil is hot,add the jeera and allow it to crackle.
  • Add the cinnamon stick,chopped onions,green chilli,chooped ginger,haldi and saute until onion turns light pink.
  • Add the chopped tomatoes and red chilli powder and cook until the tomato turns mushy.
  • Allow this to cool and then grind this in the blender into a smooth paste.While grinding add the saunf also.
  • Heat the kadai with some oil and crackle the cumin seeds.
  • Add the tomato paste ,salt , dhania powder and cook the paste.
  • When the paste starts boiling,add the fresh peas or the cooked peas to this mixture.
  • Close with a lid and cook until peas is nicely cooked and the paste starts leaving the sides of the oil is seen floating on the top of the gravy.
  • Garnish with corriander leaves and serve hot with any flavored rice,chapathi,poori ,naan etc.

Pin me up 


peas masala/pattani Kurma/ pattani Masala.- a delicious and creamy gravy . Perfect accompaniment for main course. Pattani Kurma , pattani Masaal, matar masala, mattar masala, gurma ,pattani gurma


Palak Paneer


Share with friends and family
No comments:

Palak Paneer is an Indian cuisine made using Palak (Spinach) & Paneer ( Indian Farmer's cottage cheese ).
A very unique and a tasty dish famous in North India especially at the DHABAS ( local highway motels ).
Off late this recipe holds a very special and favorite position even in the restaurant menu cards all over the world. A simple yet a delectable recipe. Here it comes for all my readers.

Preparation Time : 15 mins
Cooking Time : 20 mins
Serves - 2-3
 Palak Paneer

Mattar Paneer


Share with friends and family
No comments:

Mattar Paneer/Peas Cottage Cheese gravy is yet again another North Indian dish where the peas and paneer are cooked in a sweet ,spicy and tangy gravy.

If paneer is not available,it can be substituted with Potato.Served generally with Indian Bread (Roti,Naan,Paratha),Poori or flavored rice.


Preparation Time : 10 mins
Cooking Time : 30 mins
Serves : 2
Mattar Paneer

Rava Idli | Rave Idli - Karnataka Special


Share with friends and family
4 comments:

Rava Idli is a speciality of Karnataka,a signature dish invented by the popular restaurant / food chain group MTR (Mavalli Tiffin Rooms ). Rava idli was born sometime during the World War 2 era when there was a shortage of rice.   The popular chain then experimented making idlis using rava/ semolina and thus was invented the yummy and delicious Rava Idli. 


The main ingredient for rava idli is Semolina ,locally known as Rava , Bombay Rava or Sooji .
The rava is roasted to perfection along with seasoning of mustard, green chillies ,curry leaves and mixed with yogurt/curd to prepare a thick batter . Since there is no fermentation involved as in case of traditional idlis ,a raising agent like cooking soda or fruit salt is added to the batter just before steaming. 

To make rava idlis,the  batter is steamed using idli plates and served hot with coconut chutney, sambar or another karnataka special curry Sagu 
A dash of ghee/clarified butter drizzled over the idlis is all the more delicious. 


Preparation Time : 20 mins
Cooking Time : 30 mins
Serves : 2-3
Jain Version : Skip the ginger and follow the recipe as it is

Ingredients
200 gms / 1 measure  of rava / semolina
1/2 inch Finely chopped/grated  ginger
10-15 curry leaves finely chopped
4-5 green chillies finely chopped
Cilantro / Corriander finely chopped
1.5 measure fresh curd /yogurt
15- 20 Cashew nuts
1 tsp eno fruit salt.

Optional Ingredients
50 gms Green peas  (fresh / frozen ) 
1 carrot finely grated

Tempering
1 tsp Mustard seeds
1 tsp Udad dal / black lentil (dehusked)
1 tsp channa dal / bengal gram
pinch of asafoetida
salt as per taste
4 tbsp cooking oil
1 tbsp ghee / clarified butter


Video recipe link 


Method

  • Heat oil in a heavy bottom pan. Add the mustard seeds,once they crackle , add udad dal,channa dal,curry leaves,ginger,green chillies,asafoetida.
  • As the lentils start turning a little brown,add the semolina and roast it until the raw flavor of rava is lost.
  • The roasted rava will give out a very nice aroma ,take care to see that the rava doesnt turn brown.
  • In another pan,heat the ghee and fry the cashew nuts until golden brown.
  • Add it to the rava mixture and mix well . Also add salt and allow to cool for about few minutes.
  • In the meanwhile,grease the idli moulds and set the idly cooker ready for steaming.
  • Beat the yogurt/curd to remove the lumps by adding some water and add this to the rava mixture.
  • If you find the batter too thick you can add a little water to get the desired consistency.
  • Now add the green peas, grated carrot,cilantro to this batter and mix well.Make sure to squeeze the carrot before you add it,else the batter will turn too watery and might get an orange color from the carrot.
  • In case you feel the salt is less,add it accordingly.
  • Just before putting the batter onto the moulds,add the eno fruit salt. The moment you add this,you can see the batter bubbling because of the presence of Sodium bi carbonate in the fruit salt.
  • Now pour the batter into the moulds and steam for about 8-10 mins.
  • Demould and serve hot with ghee and coconut chutney.

Pin me up!!


Paneer Tikka


Share with friends and family
No comments:

I always have had a liking for the smoked feel of veggies while eating,and have loved eating paneer tikkas and veggie tikkas on skewers in restaurants. My hubby also loves to have them.
Though I wanted to try it at home,I always used to hold myself back for the fear of going wrong and ending up in a bad taste.This time,I made up my mind and gave it a try yesterday.For the first time,it did come out well.I shall now make it frequently with variations and keep posting.
I thought I shouldn't be writing ,but could not resist .

Preparation Time : 45 mins
Cooking time : 30 mins
Serves : 2-3

Paneer Tikka


February 12, 2013

Nylon Khaman - A savory steamed snack [Gujarat Special]


Share with friends and family
No comments:

Think Gujarat, and we are reminded off the lipsmacking food varities and the colorful vibrance . Gujuratis are fun loving and enjoy every single moment  of life with zeal & enthusiasm . 
Their snacks are famous across the length and breadth of India and there will hardly be anyone who would dislike the Khakhras, Dhoklas , Fafda , Jalebi, ghatiya etc .


Khaman is prepared using gramflour or chickpeas flour known as Besan in India , what is khaman , is there a difference in khaman and dhokla , what is the difference in khaman and dhokla ? , what is nylon khaman , how to make nylon khaman at home , nylon khaman , amiri khaman , amdavad special nylon khaman

If you are lucky like me to have been brought up amongst  Gujju families and friends  , you would have definitely experienced their generous hospitality and the love with which one is served when invited of luncheon or dinner . They totally live up to the Indian Motto "Athithi Devo Bhava" meaning " Guests are to be treated like God " 

Khaman and Dhokla are 2 delicacies which will be a part of any Gujurati festive meal . Though the two are often confused to be the same and names used interchangeably there is quite a lot of difference in the ingredients , the preparation method etc. Let us have a look at the difference and then head on to the recipe of Nylon Khaman which was shared with me by my friend Crima . This post is also a big dedication to all my Gujju friends and their dear mommies who sowed the seed for my liking towards this wonderful cuisine.

What is Khaman ?

  • Khaman is prepared using gramflour or chickpeas flour known as Besan in India . This is more like an instant version where the gramflour is mixed in water along with semolina, curd, oil , lime juice ,salt and a cake like batter is prepared . To this batter is added cooking soda or fruit salt ( most often used is eno) for immediate fermentation and the batter is steamed to perfection.
  • The texture of is very fine and silky as we use gramflour mixed with oil and water, hence the name "NYLON KHAMAN"  and is bright yellow in color.
  • Amiri Khaman is another lip smacking delicacy prepared from the Khaman by crumbling the steamed cakes and tempering it with some spices and finally garnished with fresh coconut , corriander and pomegranate arils.  Amiri Khaman recipe is on my blog and you can refer to it by clicking on the name .

What is Dhokla ?
  • Dhokla is somewhat similar to South Indian Idli . Rice along with udad dhall & channa dhal are soaked and ground into a battter which is left to ferment for 6 to 8 hrs . Little curd and green chilli paste is added to this fermented batter and then steamed.Finally tempered with mustard seeds , white sesame seeds and red chilli powder . 
  • Dhokla is slightly dense as compared to Khaman . 
  • Traditional dhoklas are white or cream in color  and also known as Idada or Khatta Dhokla .Khatta means sour , there is a hint of sourness in the batter due to the addition of curds ,hence the name.
  • Lot of variations are being prepared in Dhokla off late like Moong dhall dhokla , Millets Dhokla , Peas Dhokla  etc. 

Preparation Time : 15 mins
Cooking Time : 10-12 mins
Serves : 2-3
Complexity : Simple
Khaman is prepared using gramflour or chickpeas flour known as Besan in India , what is khaman , is there a difference in khaman and dhokla , what is the difference in khaman and dhokla ? , what is nylon khaman , how to make nylon khaman at home , nylon khaman , amiri khaman , amdavad special nylon khaman


Ingredients
 
For the dhokla batter
1 cup chickpea flour/ besan (150 to 160 gms approx)
1 Tbsp  rava/ sooji
1 cup water (I used a little more than ¾ cup but a little less than 1 cup)
Juice of a lemon
4 to 5 tbsp curd/yogurt (beat well)
1 Tbsp oil
ginger green chilli paste [ use only green chilli paste for Jain version ]
2 tsp sugar
1/2 tsp red chilli powder
Salt
1 tsp Eno fruit salt

For the tempering:
2 Tbsp oil
1-2 tsp mustard seeds
A pinch of asafoetida
2 green chillies, finely chopped
4-5 curry leaves, chopped
2 tsp sugar
Juice of a lemon

For garnishing:
2-3 Tbsp chopped coriander leaves
2-3 tsp fresh grated coconut [optional]
 
Method
 
Batter Preparation
  • Combine the chickpea flour, semolina, lemon juice, oil, ginger green chilli paste, sugar, chilli powder and salt in a bowl. Add enough water to make a smooth and lump-free batter.
  • Batter should be close to dropping consistency almost like dosa batter.
  • Just before steam cooking the batter, add the Eno fruit salt and mix well.
How to steam the Khaman?

Cooker / Stove top Method

  • Add 2 cups of water to a cooker pot or a wide vessel and bring it to a boil , this is how to ready the steamer.
  • Grease a cake mould or any stainless steel container and fill in the batter to a little over 1/2 .We have to leave space as the batter will rise up on steaming.
  • Tap the mould before placing into the steamer to remove any trapped air bubbles.
  • Place the container into the steamer and  cover it .Steam the batter for 15-20 minutes. Donot use the pressure cooker's weight / whistle if you are using the cooker pan for steaming.
  • Insert a tooth pick to check if the khaman is cooked properly. The tooth pick must come out clean. 
  • Allow it cool for a few mins and then unmould it. If you try to unmould while it is hot , the khaman will crumble and you won't be able to make slices.

Microwave recipe.
  • Grease a microwave safe container and pour the batter onto it and cook for 5-8 mins.   
  • The container must be like a rectangular or squarish cake tin . If you don't have , use a round container.
  • Use a microwave safe lid available please cover the box or the tray with the lid while baking so that the corners don't turn out to be rough and dry. 
 Serving Suggestions


  • While the batter is cooking, get the sugar solution ready. Heat the oil in a small pan, add the mustard seeds,asafoetida and let the seeds pop.  
  • Add the curry leaves and chopped green chillies and turn off the heat. 
  • Once the dhokla is ready (a toothpick inserted should come out clean when it’s done), poke a few holes all over the surface of it and pour the sugar solution all over the steamed cake while it is still warm.Cool for a bit, cut into wedges and garnish with coriander leaves and grated coconut if using.  I don't use grated coconut as no one likes that on khaman.
  • Serve along with  mint chutney and date tamarind chutney . Also fried green chillies with salt are served .
Pin up for future reference 

Khaman is prepared using gramflour or chickpeas flour known as Besan in India , what is khaman , is there a difference in khaman and dhokla , what is the difference in khaman and dhokla ? , what is nylon khaman , how to make nylon khaman at home , nylon khaman , amiri khaman , amdavad special nylon khaman