October 05, 2023

Aloo Gobhi Sabji / Potato Cauliflower gravy - No onion No garlic sabzi


Share with friends and family
13 comments:

 Aloo Gobhi is a classic winter delicacy . Piping hot phulkas/ rotis and a bowl of delicious Aloo Gobhi curry is an absolute bliss on a chill winter night . 

Very simple to make with just basic spices ,Alu Gobhi sabji can be prepared in less than 15mins. I saute the basic spices with tomato ,potato and cauliflower and cook it in a pressure cooker for 1 whistle.  This way it gets done quickly and perfectly . 

The final garnish with fresh corriander is the icing on the cake,the smell of fine chopped kothmir when mixed with the curry kindles the appetite instantly.  Those of who you like a little extra zing, you may squeeze some lime juice over the gravy.

Aloo Gobhi is a very popular side dish ordered in most restaurants and dhabas for all those who love typical North Indian flavors. We can make a dry curry like a stir fry using Aloo and Gobhi or even as a semi liquid gravy . 

We love the gravy type curry at home ,so I prefer to make this for my family . A perfect choice for Vegans as well as those who don't prefer to include Onions and Garlic in their meal .

I chose this recipe for our ongoing No Garlic No  Onion recipes theme in Shhh cooking secretly  group. Theme  suggested by Priya Iyer ,a versatile blogger .I was partnered with Sujata Ji for this theme who has dished out a creamy and delectable Paneer Malai Curry.


Preparation Time - 15 mins
Cooking Time - 20 mins
Complexity - simple
Serves - 2 to 3

Ingredients 

1 medium sized Cauliflower 
2 medium Potatoes 
3 medium Tomatoes
2 Green chillies finely chopped
1/2 inch Ginger finely chopped
1/2 tsp Red chilli powder
1tsp Dhaniya jeera powder 
1/4 tsp Haldi/turmeric 
1 tsp garam masala
1/2 tsp jeera
1/4 tsp saunf
Salt as required 
Corriander leaves finely chopped
2tsp Oil
Pinch of sugar

Method 


  • Cut out the florets from the main flower and soak it in salt and turmeric water.  This enables to clean up some hidden worms which are usually hidden inside the cauliflower.  Discard the water after rinsing the florets well .
  • Cut the potatoes into small cubes and tomatoes into medium Chunks.
  • Heat the oil in the pressure cooker and splutter the jeera and saunf . Once it crackles, fry the chopped ginger and chillies .
  • Add the spices (turmeric, chilli powder, dhaniya jeera powder  and garam masala) and fry it on low flame without burning the masalas.
  • Add the tomatoes and cook it well until it turns mushy.
  • Add the potatoes, cauliflower mix it well .Adjust salt ,sugar, 1/2 cup water and pressure cook for 1 whistle on medium flame.
  • Release the pressure naturally,  give it a nice stir . Take 1 tbsp of the curry in a bowl and lightly mash it. Add it back to the gravy and give a quick boil for 1 or 2 mins. This mashed portion gives the gravy some thickness and volume to the curry.
  • Garnish with fresh corriander and squeeze some lime just before serving and serve hot .

Pin it up


September 15, 2023

Ganesh Chaturthi Special Prasadam (Vinayaka Chaturthi) - Ganesh Utsav / Ganeshotsav


Share with friends and family
4 comments:

 Ganesh Chaturthi or Vinayaka Chaturthi is the most sought after Hindu Festival . Everyone loves to celebrate Ganesh Chaturthi with pomp and glory .  Ganesh Chaturthi falls in the Holy month of Bhadrapada as per Indian Almanac which is around August - September as per Gregorian calender . This year we are celebrating Ganesh Chaturthi on 18th September 2023.


Mumbai is known for  Ganesh Chaturthi festival which lasts for 10 days  known as Ganesh Utsav or Ganeshotsav .We can hear everyone singing Ganapati Bappa Morya , Mangal moorthy Morya while they invite Ganpati Bappa Home.

Having grown up in Mumbai, I have my set of beautiful and divine memories of celebrating the Ganesh Utsav for 10 days.It is very difficult to bid adieu to Ganesha on Ananth Chaturthi.  The entire city of Mumbai puts up a very vibrant look and there is just positive vibes all over.  I always have my heart in Mumbai during Ganesh Utsav .Bangalore also celebrates Ganesh Utsava in its own way and there is a vibrant charm all over the city.

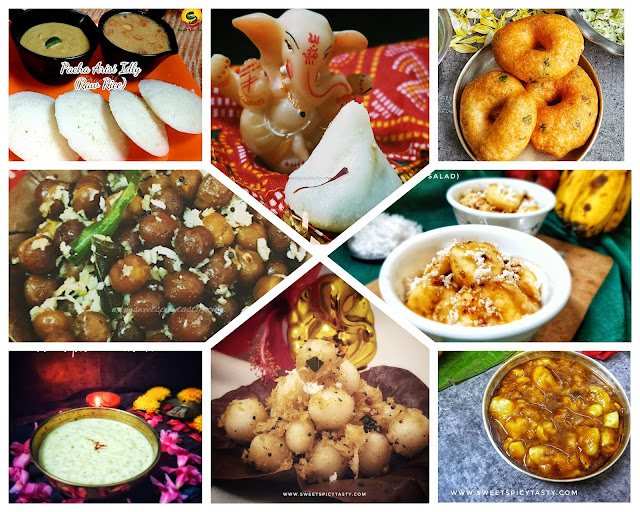
The atmosphere is so positive and vibrant during this festive season in every home . Everyone at home gets into planning of bringing the best Ganesha idol home by placing the order for the Murthy well in advance with the sculptor .The decor planning also starts much before with kids ,elders all getting into festive mood . The ladies of the house get into the planning of prasad and neivedya making and list out what bhog to be offered as long as we have Ganapati Bappa at our abode. I am detailing the list of prasadams we can offer to Lord Ganesha during the 10 day Festival . Click on the recipe names below for a detailed procedure to make.

South Indian Style Prasadam Menu 


Modakam/ Kozhukkattai 
Ammini Kozhukkattai 
Kondakadalai Sundal 
Pachai Arisi Idli (Raw rice Idli)
Ulundhu Vadai (Medhu Vadai)
Aval Payasam 
Panchamritham
Baalehannu Rasayana 


  ■■■■■■■■■■■■■■■■■■■■■■■■■

Maharashtrian Style Prasadam Menu


Ukidiche Modak 
Varan Bhaat
Basundi
Shrikhand
Puri - Batatachya Bhaji 
Kothimbir Vadi 
Khamang Kakdi
Dry fruits Kheer


After the 10 day festivity, it is very heart breaking to send off Lord Ganesha . This process is called as Visarjan wherein Lord Ganesha is immersed into the sea and we bid a farewell to him .While sending him off,we all wish and pray for his return next year and the mind begins to plan on how to welcome him home coming year .
Ganapati Bappa Morya ,Pudchya Varshi Lavkar Ya ..this is what is chanted while we bid him adieu,meaning  "oh lord Ganesha,pls come back soon next year" .

Pin me for later 


September 07, 2023

Keerai (greens) Kootu - vegan south Indian accompaniment


Share with friends and family
11 comments:

 Keerai is the Tamil name for Green Leafy vegetables in general . Spinach is known as palak keerai , fenugreek is known as Vendhiya Keerai , Amaranthus is known as Arai Keerai , Dill Leaves is known as Soi Keerai ,Drumstick leaves as Murunga keerai so on and so forth.

We all know how healthy and beneficial is the inclusion of greens in our daily diet . So pls do make it a point to include greens as a part of diet atleast once or twice a week  . Of course please exercise caution and consult your Doctor if greens need to be  avoided due to underlying medical conditions.

I am very fond of keerai sambar, keerai masiyal and keerai kootu in south indian cuisine whereas in North Indian cuisine my favorites are Dal Palak,Palak Paneer , Methi theplas, Palak Paratha which feature frequently on our meals regularly. 

Keerai kootu has been my childhood favorite and I would eat this almost everyday as a little girl . The mild sweetness from the cooked moong dal blends well with the coconut jeera paste and cooked palak and the final tempering of mustard in coconut oil simply elevates the flavor profile of the kootu.  You can pair it with some delicious sambar rice or mix this kootu with some steamed rice and ghee and enjoy as is.   You can use any variety of keerai for this kootu,but I personally love palak.  I don't like Methi in kootu as it imparts a slightly bitter taste to the kootu which puts me off.

The green Leafy vegetables need to be cleaned very well before using.  There may be a chance of lot of weeds or some rotten leaves hidden in the bunch . I am sharing a detailed video on how to clean the green Leafy vegetables at ease.  If the stems are tender,I chop them finely and use it too while making the kootu.

If you are a lover of exotic greens, then Baby Bokchoy and Shitaake stir fry by Preethi will be the best choice.  I was paired with Preethi for August's Theme of Leafy Greens theme suggested by Seema of Mildly Indian.


Preparation Time - 15 mins
Cooking Time - 20 mins
Complexity - easy
Serves - 2 to 3 

Ingredients 

2 small bunch spinach/palak 
1.5 cup cooked moong dhall
1/4 cup grated coconut 
1tsp jeera
1/2 tsp pepper
2 to 3 dry red chillies / 1 tsp red chilli powder 
2 tsp coconut oil
1 tsp mustard seeds 
1/2 tsp udad dhall
Pinch of asafoetida
Salt as needed 

Method 

  • Clean and wash the spinach  bunch well . Finely chop the palak and cook it well . No need to pressure cook .you can cook it in regular open pot until the raw flavor is lost. Use a heavy bottomed pan always.
  • Grind the coconut, jeera ,pepper, red chillies to a fine paste with sufficient water.
  • Once the palak is cooked, add this coconut paste,bring it to a rolling boil and then add the cooked moong dhall .
  • Ensure the cooking is on medium flame and you are stirring constantly to avoid burning . Moong dhall and coconut paste will stick to the pan very quickly.
  • Once the kootu reaches a rolling boil,turn off and prepare a tempering of mustard, udad dhall and asafoetida in coconut oil and pour it over the kootu . Relish the kootu with rice and papads. 

August 03, 2023

Vendakka Kichadi (Pachadi) | Fried ladies finger (okra) in coconut yogurt sauce - Sadhya special


Share with friends and family
13 comments:

 Kichadi (Pachadi) is an integral part of a festive meal (Sadhya) in Kerala. Kerala style kichadi must not be confused with the North Indian Khichdi which is a rice based main course recipe. 

 Onam and Vishu Sadhya is incomplete without serving a kichadi . Kichadi also known as Pachadi in few regions of Kerala,is a yogurt based side dish often made from various vegetables like Okra/ladies finger ,ginger ,tomato, Cucumbers, ash gourd etc .

Kichadi pairs well with Sambar Rice and a coconut based vegetable stir fry . One can even make it as a part of day to day meal as well. Why wait for a special occasion to savor such a healthy delicacy ? 

Vendakkai Thayir Kichadi/Pachadi   is made from okra/ladies finger . Ladies finger is known as Vendakka or Vendakkai in Malayalam/ Tamil.

Chopped ladies finger is shallow fried in coconut oil and then added to the coconut chilli paste mixed in yogurt. The yogurt must not be spur, else it will ruin the taste of the kichadi /pachadi.

Some recipes call for cooking the coconut chilli paste + yogurt ,but in this recipe I am not cooking the yogurt mixture . I am going to just add the fried Okra to the yogurt mix along with the tempering. 

Some popular kichadi /pachadi served as part of Sadhya 

Inji (Ginger) Thayir  Kichadi 

Thakali (Tomato) Kichadi 

Vellarikai Inji (Cucumber Ginger )Thayir 

Vellarikai (Cucumber) kichadi


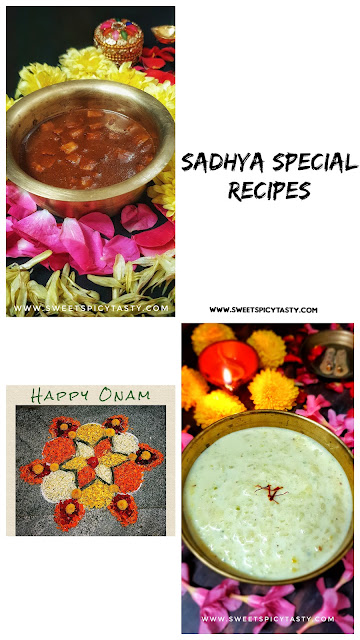
This month in our SHHH Secretly Cooking Challenge food group,we are celebrating Sadhya special hosted by me . My fellow bloggers have come up with amazing and authentic Kerala Sadhya recipes . My partner for this month ,Radha Rajagopalan has dished out the traditional Ada Pradhaman ,which is a classic dessert from Kerala. Do check out her recipe for Ada Pradhaman without fail .  

To know more about the dishes served in a typical Sadhya for Onam / Vishu, check out the list soon after the recipe of Vendakkai Kichadi. I am giving you a complete list of authentic recipes.


Preparation Time - 10mins
Cooking Time- 5 mins
Complexity - simple
Serves - 2 to 3 

Ingredients

1/4 cup fresh grated coconut 
2 green chillies
1/2 tsp jeera/cumin
8 to 10 tender ladies finger/okra/vendakkai
200ml  thick yogurt/dahi/thayir
Salt as needed
2 tsp coconut oil
1/2 tsp mustard seeds
1 dry red chilli
Few curry leaves 

Method

  • Wash and dry the ladies finger. Cut into medium sized roundels. 
  • Whisk the yogurt well and make it lump free and smooth. 
  • Grind the green chillies, coconut,jeera with 1tbsp yogurt and some water  into a smooth paste.
  • Add this paste to the yogurt and mix it well with adequate salt.
  • In a frying pan,heat 1tsp of coconut oil and roast the ladies finger until it crispy  ,add a little salt to the roasted ladies finger in the end .
  • Prepare a tempering of mustard seeds,red chilli and curry leaves in the remaining coconut oil .
  • Add the roasted ladies finger ,tempering to the yogurt mixture and mix it well .Delicious and tasty vendakkai kichadi is ready to be served .

Sadhya recipes on the blog. Click on the individual items below to get detailed recipe

Pin me up


July 31, 2023

Nei Payasam | Aravana Payasam


Share with friends and family
3 comments:

 Nei Payasam also known as Aravana Payasam is very popular as prasadam in Kerala Temples especially Bhagavathy (Devi) Temple and Ayyappa Temple . Sharkara Payasam ,Kadu Madhuram or just Aravanai are some other names for Nei Payasam.

Nei means ghee and payasam means kheer. This payasam gets it flavor and taste from just 3 ingredients; rice,ghee and jaggery. The payasam is either garnished with fried coconut bits or ghee fried cashews . A pinch of ginger powder at the end elevates the flavor profile manifold. 

Though we call this as Nei Payasam, the consistency of nei payasam isn't like the usual paysam (kheer). Consistency of nei payasam is gooey and thick similar to sakkarai pongal . 

Originally, Kerala Matta raw rice or red rice is used in the preparation of Nei Payasam,but if that us not available we can use any short grained rice, but a strict No to Basmati rice as it will alter the taste of Nei Payasam, because of the natural flavor that Basmati rice possesses


 In temples, nei payasam is made in huge bronze urulis and slow cooking method is followed. Ghee is poured at intervals until the ghee is completely absorbed into the rice and jaggery mixture.  Normally, dark colored jaggery is used for preparing nei payasam, hence the color will be dark and deep brown. 

Aravana / Nei Paysam shouldn't be confused with sakkarai pongal though they may sound similar. The quantity of ghee used in Nei payasam in more also there is no use of milk or lentils. Because the quantity of ghee is more ,we cannot eat this nei paysam like any other paysam for dessert . Just a small quantity can be savored and that itself will be very satiating and satisfying. 

Even to this day, Bhagavati Seva Pooja always has the offering of nei paysam and the same is distributed to all those partaking in the Pooja . 

I have very fond memories of enjoying piping hot Nei Payasam and crispy fried Medhu Vadai served as prasadam in leaf cups after Bhagavathy Seva Pooja.  The taste still lingers on my tongue and nothing can beat the taste and flavor of prasadam that is blessed with divine vibrations.

Holy month of Aashada or Aadi or Karikatam(July 15 to Aug 15 as per English calender) is known for Bhagavathy Seva ,many Brahmin families hailing from Kerala / Palakkad have the tradition of performing thus pooja at home on either Tuesdays or Fridays in this holy month .

So,whether or not you perform Bhagavthy Seva at home,you can always prepare Nei Payasam and offer as prasadam during auspicious pooja days or even on Tuesdays and Fridays during Aadi Maasam .


Preparation Time - 15 to 20 mins
Cooking Time - 45 mins
Complexity- medium 
Serves - 2 to 3

Ingredients 

3/4 cup raw rice (I have used Sona Masuri )
3/4 cup powdered organic jaggery 
1/2 cup ghee 
Few cashews 
Pinch of dry ginger powder 
Pinch of cardamom powder 

Method 

  • Wash the rice well and pressure cook it with 3 cups of water and let the pressure release naturally. 
  • The rice must be cooked well and soft but not mushy . With the back of ladle ,lightly mash the rice but don't make it mushy . 
  • In a thick bottomed vessel , melt the jaggery with 1/2 cup water . We don't need any string consistency  just the jaggery needs to melt . Incase ,you see any impurities in the jaggery syrup,then filter it out and bring the syrup to a quick rolling boil.
  • Slowly add the mashed and cooked rice and mix it well without any lumps .Gradually add the ghee in parts and keep stirring until all the ghee is well absorbed into the nei payasam and the paysam looks glossy and well done .
  • If you are using coconut bits ,fry them in ghee until it turns golden brown and crisp ,likewise the same with cashewnuts as well.
  • Add this to the nei payasam along with cardamom powder and ginger powder and mix it well .
  • Offer it to the lord and distribute it among family and friends. 

Pin me up


July 05, 2023

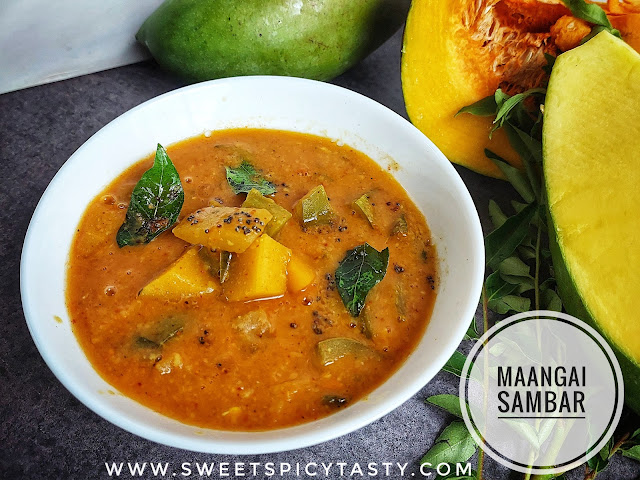
Maangai Sambar | Raw Mango Vegetable Sambar


Share with friends and family
15 comments:

 Raw mangoes mark the beginning of summer and the pickling season.  Apart from making pickles ,raw mangoes can be used in a variety of recipes in our day to day cooking.

The  sourness, tartness and a mild hint of sweetness adds up a lot of flavor profile to the recipe.  Earlier we had to wait for summer to get good Raw mangoes, but now with so much improvement in cold storage facilities, we do get good Raw mangoes all through the year .

The current situation in Indian markets,is the cost of tomatoes which are sky high and we have to use them sparingly . In these times,Raw mango sambar has come to my rescue. Raw mangoes are a perfect work around for tomatoes. 

Depending on the tartness/sourness in the raw mango we can adjust the usage of tamarind pulp.  Most of the times we don't need to use tamarind as the sourness from the mango balances the flavors well . 

I use some vegetables like pumpkin and capsicums in my sambar recipe because we like to have lots of veggies in the sambar . You can also use carrots ,drumsticks ,Brinjals as well in this same recipe.

Piping hot sambar mixed in rice with a dollop of ghee is just out of the world . Pair this sambar with a coconut based vegetable stir fry and serve along with some papads to enjoy a wonderful lunch experience. 

In our Facebook gourmet food group Shh Cooking Secretly!!! , we are sharing Mango based recipes for the month of June .

Anu Kollon who hosted the theme, suggested we use mango in any form, either raw or ripe in our recipe.   I have used raw mango as the star ingredient while my partner Narmadha has made Mango Popsicles using ripe mango . 

If you are looking to exploring some lipsmacking recipes using raw mango ,you must definitely check out my list below .

Maanga Pachidi (Mango relish)

Maanga Thokku ( spicy mango relish) 

Maavinkaai Chitranna ( Mango Rice)

Maanga  Thogayal (Chutney)

Maangai Pisaral (Instant mango pickle)

Aam Panna (refreshing Summer drink)


Preparation Time - 15 mins
Cooking Time - 20 to 25 mins
Complexity - Simple
Serves - 3 to 4

Ingredients 

100 gms pumpkin 
1 medium sized capsicum/green bell pepper 
1 medium sized raw mango 
3 tbsp sambar powder 
3/4 cup thoor dall /pigeon peas
Pinch of turmeric 
Salt as needed 
2 tsp oil
1/2 tsp mustard seeds 
Fresh curry leaves 
1/2 tsp jaggery powder 
Fresh corriander chopped
Pinch of asafoetida 

Method 


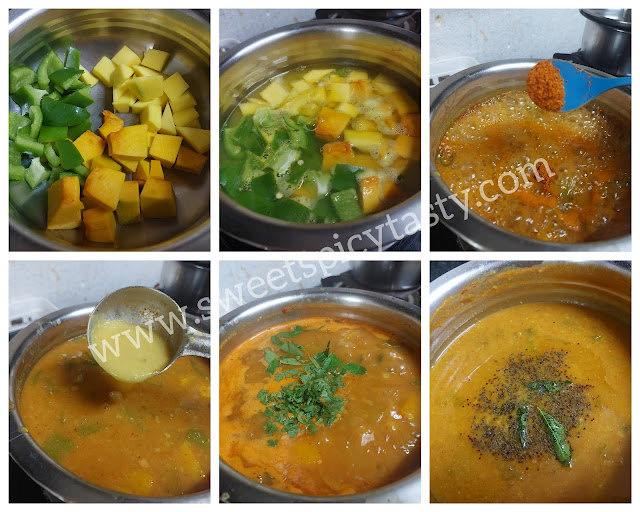
  • Chop the capsicum,pumpkin and mango into medium sized cubes .
  • Add 3/4 cup water ,Pinch of salt and cook the vegetables until they are well cooked. The vegetables must be firm ,yet well cooked . Donot keep stirring with the ladle,they will become mushy.
  • Meanwhile ,wash the thoor dhall well and pressure cook it with turmeric for 4 to 5 whistles with sufficient water. Release the pressure naturally and mash it well using a whisk or hand blender . The dhall must be soft and mushy. 
  • Once the vegetables are well cooked, add the sambar powder ,jaggery ,some more salt and bring it to a rolling boil. 
  • Slowly add in the cooked thoor dhall, adjust the consistency of sambar by adding some water if needed and let it come to a boil . You can add some sambar powder if you feel the spice is less. 
  • Prepare a tempering of mustard seeds,asafoetida and curry leaves in hot oil and pour it over the sambar .
  • Garnish with fresh corriander and turn off the stove.

Pin me up


June 21, 2023

Karpooravalli (Omavalli) neer mor / Indian Borage Buttermilk (Doddapathre neer majjige)


Share with friends and family
6 comments:

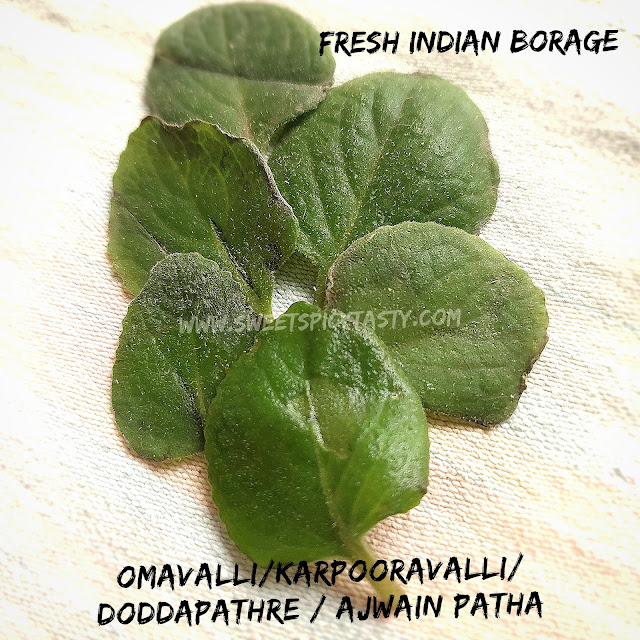
 Karpooravalli / Omavalli / Ajwain patha /Indian Borage - are you hearing these names for the first time ? 

Well, this is a very traditional and medicinal herb used in Indian Cooking especially in the South.  This herb belongs to the mint family, but has a pungent and strong flavor resembling that off Thyme /Ajwain/ Omam.

A perennial plant and can be grown easily at home without any effort . The leaves are used in herbal drinks to treat indigestion, cold ,cough and also to boost overall immunity. 

Due to the pungent taste and the anti microbial properties possessed by Karpooravalli it is very effective to treat sore throat and sinusitis .

Also a mild diuretic , it helps in flushing out the toxins from the body and maintains good kidney health ,there by managing the body metabolism. 


As a kid ,I remember my mom would make me chew a small leaf especially in monsoon to keep me away from seasonal flu and stomach issues due to weather change . It is always good to incorporate such healthy and natural food in our day to diet to keep us safe and healthy.

When I found some fresh karpooravalli, I was intrigued to try Preethi's recipe of making karpooravalli Buttermilk/Neer Mor using this magical herb.

Preethi has used dried powder form of karpooravalli while I have used fresh leaves since I had an access to these . My friend's mom has it growing on her home garden and aunty was kind enough to get me some fresh and tender leaves .

Summer ,winter or monsoon buttermilk is a part of daily diet in our home and I keep experimenting with different flavors . If you also like buttermilk in various taste then you must try some of it 

Pudina Chaas 

Neer Mor  - Ramanavmi Special 

Vazhaithandu Mor (banana stem) 

Masala Chaas 


Preparation Time - 5 mins
Cooking Time  - Nil
Complexity - Nil
Serves - 2 to 3

Ingredients 

2 to 3 fresh karpooravalli leaves
200ml thick yogurt
400ml water 
1/4 tsp finely chopped ginger
Salt to taste 
Pinch of kala namak (black salt)
Pinch of roasted jeera powder 

Method 

  • In a small blender ,blend the ginger ,karpooravalli leaves with little salt into a coarse paste.
  • Whisk the curd using an electric beater or manual whisk till it appears creamy.  
  • Add the ground paste, salt , black salt ,jeera powder and chilled water and whisk it again until it appears nice and frothy. Adjust salt based on your need.
  • Pour into glasses and enjoy with your meal or keep it refrigerated until your lunch time.

Pin me up 


June 16, 2023

Rose Gulkand Shrikhand | Gulkand Shrikand | Gulab Shrikhand


Share with friends and family
No comments:

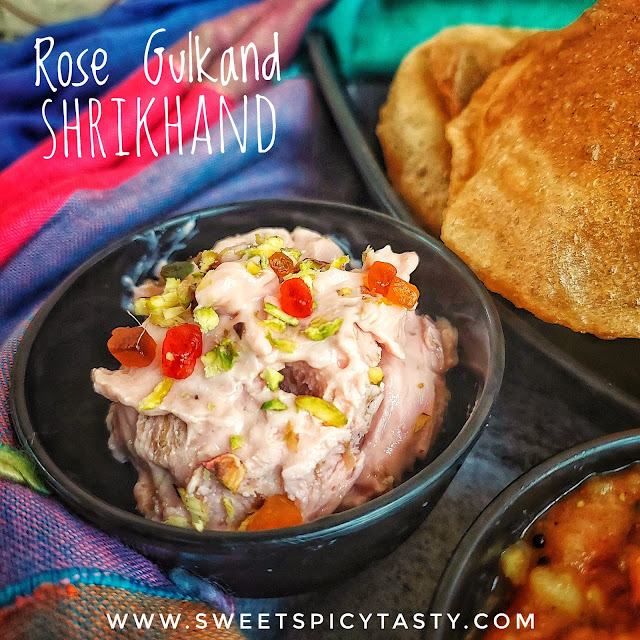
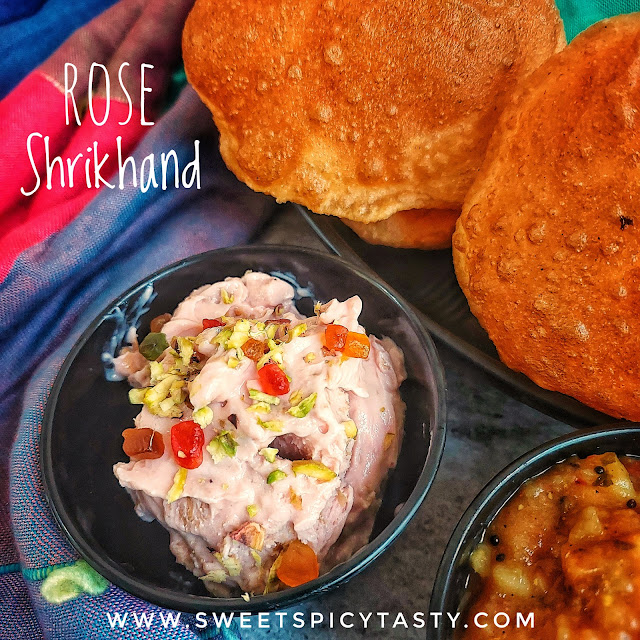
 Rose Shrikand or Gulab shrikand is made using Gulkand and mild rose essence or rose syrup .

Gulkand is a delicious jam made from rose petals and sugar . Gulkand is an important ingredient while preparing masala paan (flavored betel leaf) or beeda as it is called in the South .

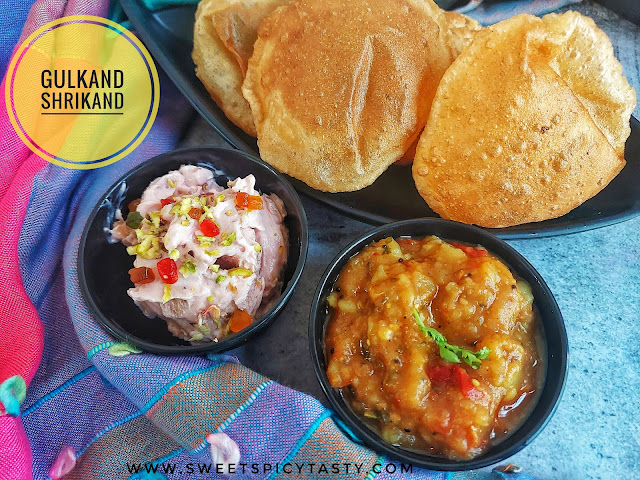
Shrikand is often served alongside the main course meal as an accompaniment to puris and hot parathas. Rose Shrikand is my next favorite after the classic flavors of Badam Elaichi Shrikand and Kesar Pista Shrikand .

Rose shrikand, gulab Shrikhand, Shrikhand, Shrikand, gulkandh Shrikhand, rose Gulkand Shrikand, kulkandh , gulqand srikand ,srikand

This gooey and sweet Gulkand along with mild rose essence is blend into the silky smooth hung curd to make the lipsmacking Gulkand Shrikand . Serve it along with some hot puris or parathas and you will relish the taste forever . 

The trick to making a silky smooth yogurt is getting hold of a perfect hung curd. To know how to make the best and perfect hung curd ,check my recipe below which has all the details.

Rose shrikand, gulab Shrikhand, Shrikhand, Shrikand, gulkandh Shrikhand, rose Gulkand Shrikand, kulkandh , gulqand srikand ,srikand

If you love this flavor of rose / gulkand ,then you must definitely check these recipes out 

Gulkand Milkshake

Rose Kulfi

Rose Thandai

Rose Milk

Rose shrikand, gulab Shrikhand, Shrikhand, Shrikand, gulkandh Shrikhand, rose Gulkand Shrikand, kulkandh , gulqand srikand ,srikand

Pre Preparation time - 2 to 5 hrs 
Cooking Time - Nil 
Actual Preparation - 5 mins 
Serves - 2 to 3

Ingredients 

400ml thick yogurt or dahi or curd

2 tsp rose syrup 

2 to 3 tablespoons gulkand 

2 to 3 tsp  powdered  sugar (optional)

Preparation of Hung curd

Take a wide mixing bowl and place a strainer over it lined with a muslin cloth/ cotton cloth and pour the curd into the cloth . I have used shop bought thick curd for an even consistency. 

Bring the ends of the cloth together, squeeze it once and tie it very tightly . Place a heavy object over the tied cloth and leave the colander over the mixing bowl so that all the whey water will get collected in it . Keep squeezing the cloth occasionally to drain the excess water . Keep this set up inside the refrigerator so that the hung curd doesn't turn sour especially in summer .

After about 2 to 3 hrs , you can see all the whey collected in the bowl below and when you open the cloth all that is left is thick creamy mass which is hung curd . Squeeze it once again before removing it from the cloth to ensure there is no water content left.  When you touch the hung curd , it should appear thick and creamy without any excess water.  If you find it watery, leave it for somemore time in  the cloth with the weight on . 

Donot waste the collected whey, you can use it while kneading the dough for rotis or even to prepare buttermilk or Chaas

Preparation of Shrikhand

Rose shrikand, gulab Shrikhand, Shrikhand, Shrikand, gulkandh Shrikhand, rose Gulkand Shrikand, kulkandh , gulqand srikand ,srikand

  • Transfer the hung curd to a wide mixing bowl .Add in the gulkand , rose syrup. Powdered sugar may be added though it isn't necessary.    Gulkand as well as rose syrup will have sugar already added in them which is enough to give sweetness to the Shrikhand.
  • Mix well with a spoon until all the ingredients blend well . Keep it in the refrigerator for it to set well . 
  • Take it off the refrigerator just before serving and garnish with some chopped pistachios and some tutti fruity. 


June 06, 2023

Tomato Rice | Thakaali Saadham - Quick one pot vegan recipe


Share with friends and family
14 comments:

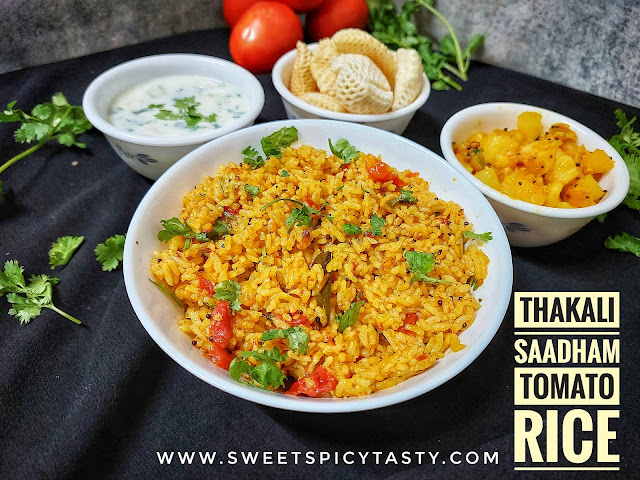
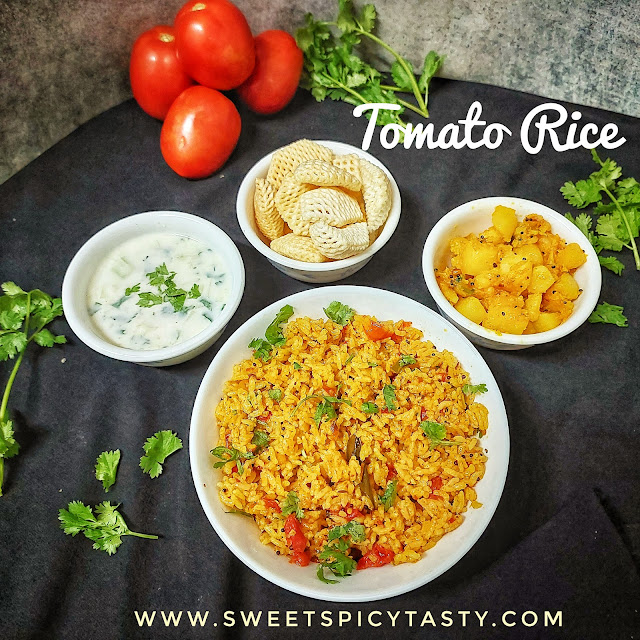
 Thakali Saadham / Tomato Rice is a simple and delicious recipe from South India . It makes for a Quick fix lunch or dinner option and also apt to pack for lunch boxes . 

It is not a traditional recipe, hence each household may have different recipes to dish out this yummy Thakali saadham .

The main ingredient for this recipe are juicy and slightly tangy tomatoes for the extra punch. I use just basic spices and not much whole masalas/ garam masala . I like the rice to soak in the taste and flavor of tomatoes and chillies . 

If you like you may add some fried cashews or boiled peas while preparing the tomato rice . I add them depending on my family's request . 

My hubby loves to have his tomato rice with either Pattani (Peas) Masala or Potato Curry and some chilled raita/pachadi . Papads or fryums are an excellent addition as well . 

If packing for lunch , make sure you cool the rice completely and then pack it . If you pack it very hot ,there is a chance the rice may go bad especially in summer.  

I often make thakali saadham for dinner as it is a quick fix and I wont see fussy faces at home . As always, I realised that this delicious tomato rice wasn't on my blog and as a matter of coincidence our gourmet food group theme for this month was "cook what you like " .. Viola !! I got an opportunity to publish this recipe.  My partner Rafeeda has dished out a baked Pasta recipe and if you are a pasta lover, you must try it for sure .

Preparation Time- 10 mins
Cooking Time - 20 mins
Complexity - simple
Serves  - 2 to 3

Ingredients 

2 cups rice (Basmati / Sona Masuri / any short grained rice ) 
3 to 4 medium sized tomatoes 
1 onion chopped (optional) [skip for jain and no onions no garlic recipe ] 
3 green chillies slit 
Few curry leaves 
Fresh corriander 
1 tsp mustard seeds 
1 tsp channa dal 
1 tsp udad dhal 
2 tsp corriander powder 
1/2 tsp jeera powder 
1/2 tsp chilli powder 
Pinch of turmeric powder 
Salt as  needed
2 tbsp cooking oil 
Pinch of sugar 

Method 

  • Wash the rice well and soak it for 10mins and then drain the water through a colander. 
  • Chop the tomatoes into medium sized chunks and finely chop the green chillies .
  • Heat the oil in a pressure cooker or pressure pan and crackle the mustard seeds followed by channa dal and udad dal until they turn crisp and golden brown . Saute onions if using until pick and translucent. 
  • Fry the green chillies,  curry leaves . Keep the flame on low and add the chopped tomatoes and  spice powders (haldi, red chilli powder, jeera powder and corriander powder ).
  • Saute the tomatoes well and sprinkle some water ..cook covered until the tomatoes turn mushy and soft . Continue cooking until the oil begins to separate.Add salt at this  stage along with some chopped corriander. 
  • Add water and bring to a boil . If using basmati rice use 1.5 cups water for 1 cup rice and if using sona masuri rice use 2 cups water for 1 cup rice.
  • Once the water begins to boil,add the drained rice,  Pinch of sugar and adjust salt if needed .
  • Close the pressure cooker and cook on medium flame for 2 whistles.  Let the pressure release naturally. 
  • Fluff it with a fork and add some ghee if not vegan and serve hot with raita ,papads and some gravy or curry . 


May 22, 2023

NeerAagaram | Pazhaya Saadham | Probiotic rice porridge


Share with friends and family
3 comments:

 Neer is water and Aagaram is food ,so basically NeerAagaram boils down to Watery Food or put it simply,  a liquid diet . Neeragaram is very popular in the Southern part of India and also in Orissa, Bengal, Bihar ,chattisgarh as well . Partaking Neeragaram on a daily  basis prevents malnutrition and also improves our immune system .

Now,if you are wondering what is this  Neeragaram ? The answer is very very simple and will leave you amazed .

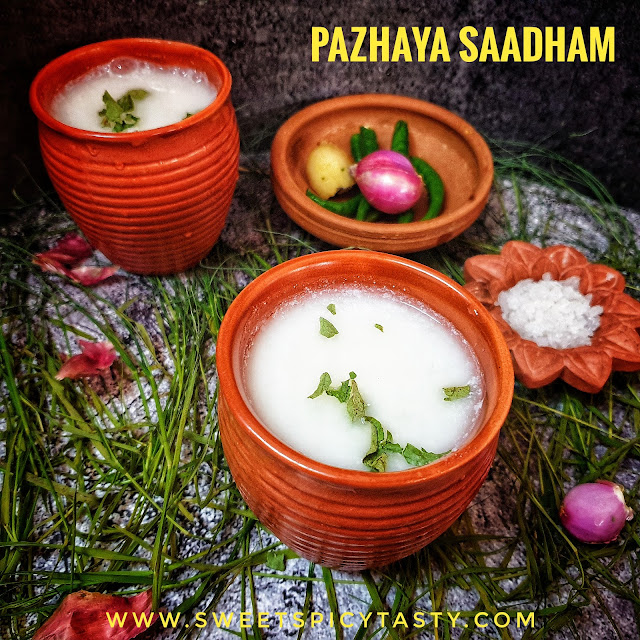
Neeragaram is just left over cooked rice soaked in water overnight and the next morning it is mashed well and mixed with buttermilk ,rock salt and consumed with shallots and some green chillies .

Neeragaram is also known as Pazhaya Saadham , Saadhertham , pazhaya sor Kanji in South and in the North it is called as Pakhala, Paani Bhaat,Panta Bhaat etc

Neeragaram is also known as Pazhaya Saadham , Saadhertham , pazhaya sor Kanji in South and in the North it is called as Pakhala, Paani Bhaat,Panta Bhaat etc . Orissa celebrates this health rich food as Pakhala Dibasa in the month of March every year .

Neeragaram is a powerhouse of nutrients for the benefit of good gut health . It's a natural probiotic just like home set curd .

The overnight soaking of cooked rice helps in the activation of good bacteria which is very beneficial on consumption for good gut /intestinal health.  You may need not take probiotic supplements if you have this pazhaya saadham regularly.

Neeragaram is also known as Pazhaya Saadham , Saadhertham , pazhaya sor Kanji in South and in the North it is called as Pakhala, Paani Bhaat,Panta Bhaat etc

Consuming Neeragaram early in the morning is an age old practice followed by ancestors especially during the hot summer months when the sun is blazing. The soaked rice acts as a natural coolant and also keeps us full for long hours due to the absorption of starch content in the rice and most importantly prevent us from dehydration. 

Neeragaram can be had with some pickle , fried curd chillies (mor milagai) or with chopped shallots /onions . If you are pairing pazhaya saadham with onions you must definitely try it out with Srilankan Seeni Sambol - get the recipe from my fellow blogger Priya's blog.

You may adjust the quantity of buttermilk as per your preference. I like my neeragaram watery,so I add more buttermilk, if you like it thick like a porridge, you can adjust accordingly. 

Preparation Time - 8 to 10 hours /overnight 
Cooking Time - Nil
Complexity - easy 
Serves - 2 to 3 

Ingredients 

1.5 cups cooked rice (I use the sona masoori variant)
2 cups water 
3 cups buttermilk
Rocksalt as needed 

Method 

  • Soak the rice in 2 cups water overnight . Use an earthen vessel if you can else regular steel bowls will work.
  • The next morning, mash the rice well with your hands or use a masher . The rice when mashed should resemble porridge /gruel like consistency.  Mashing the rice with your hands is always a good choice .
  • To this now add the buttermilk ,rock salt and mix well . Pour it into glasses and serve with the accompaniments of your choice .
  • You may also add 1/4 tsp fenugreek seeds while soaking the rice previous night. 

Pin it up 

Neeragaram is also known as Pazhaya Saadham , Saadhertham , pazhaya sor Kanji in South and in the North it is called as Pakhala, Paani Bhaat,Panta Bhaat etc


May 08, 2023

Vellarikaai Inji Thayir Pachadi | Cucumber Ginger flavored yogurt - No cook recipe


Share with friends and family
6 comments:

 Cucumbers are my best friend in summer . I love to munch on some juicy Cucumbers as is or use them in salads or raitas .

Raitas or pachadis are a must have in summer as they cool down the body heat and are comforting on our stomach aiding digestion. 

Across the length and breadth of India ,Cucumbers are an integral part of summer meal be it the Khamang Kakdi of Maharashtra ,Southekaai kosambri from Karnataka ,Vellarikai Kichadi of Kerala or Pahadi Raita from Himachal Region . 

Vellarikaai inji thayir pachdi, cucumber ginger raita , kakdi adraki raita,kheera aur adrak ka raita, vellari inji pachadi,cucumber pachadi

Today , I shall be sharing another favorite recipe using cucumber.  Thayir Pachadi is the South Indian version of raita . We can make thayir pachadi with many vegetables like tomatoes,  sweet potatoes,  ladies finger,ginger etc .

Inji Vellarikaai thayir pachadi ,is very easy to make and is a No cook recipe.  We will need fresh and tender cucumbers to make this raita . Donot use an over ripe cucumbers as the cucumber won't be juicy and also the seeds will be too mature and rough.

Spice level can be adjusted by increasing or decreasing the number of chillies used .I prefer to keep the pachadi mild so that the flavor of ginger is lifted up. 

Vellarikaai inji thayir pachdi, cucumber ginger raita , kakdi adraki raita,kheera aur adrak ka raita, vellari inji pachadi,cucumber pachadi

Preparation Time - 10 mins
Cooking Time - Nil 
Complexity- easy 
Serves - 3 to 4

Ingredients 

2 small Cucumbers or 1 medium Cucumber
150ml thick yogurt /dahi/curd 
Salt as needed 
Small piece of ginger 
1 small green chilli
Few curry leaves 
2 tsp finely chopped fresh corriander 
1 tsp oil
1/4 tsp mustard seeds
1/4 tsp udad dhall 
Pinch of asafoetida 

Method 


  • Peel the skin of the cucumber.  Finely chop half the quantity of the cucumbers and add it to a mixing bowl.
  • Roughly chop the other half of the cucumber and blend it with ginger , chilli, corriander, curryleaves and little salt to a very fine paste.
  • Whisk the curd with adequate salt and make it lump free. 
  • Mix the cucumber paste , chopped cucumber and the whisked yogurt.  Adjust salt if needed. 
  • Prepare a tempering of mustard seeds and udad dhall in hot oil with asafoetida.  Cool it and then add it to the raita . Donot pour hot tempering over the pachadi as the curd may turn sour in the hot weather .
  • Delicious thayir pachadi is ready to serve .

Pin me up 


April 14, 2023

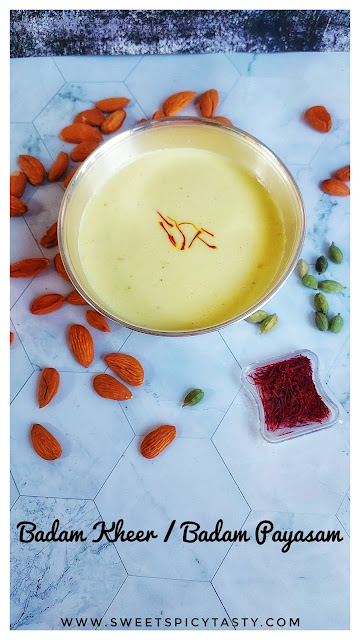
Badam Kheer | Badam Payasam | बादाम खीर


Share with friends and family
8 comments:

 Badam Kheer / Payasam is an exotic festive dish which is loaded with lots of richness and flavor .

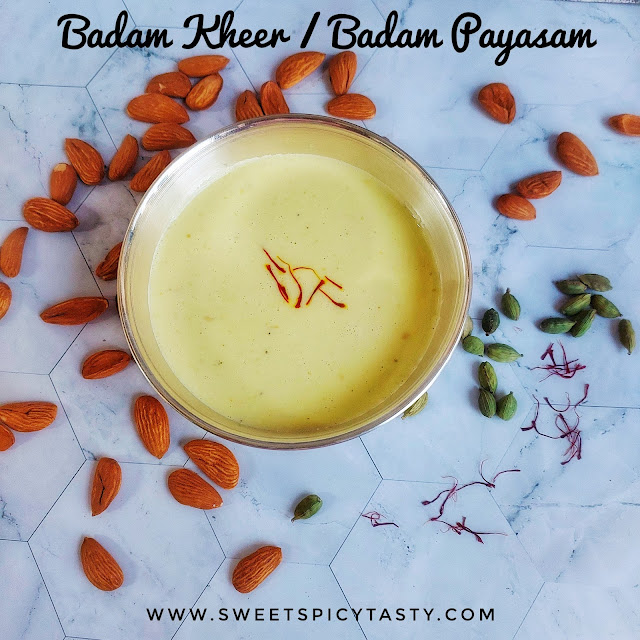
It is very easy to make and has no fancy ingredients except almonds ,cardamom, milk and saffron strands.  Sugar is used as a sweetener.   Soaked almonds are ground to a fine paste with saffron and cardamom and simmered in boiling milk .

Badam kheer , how to make badam payasam , baadam payasam , badam payasa , badam kheer at home , almond pudding , badam geer , badam gheer

Mom used to stock up home made badam powder and I used to drink Badam milk during my school days as I was not a fan of malt based drinks . Badam payasam is an extension of Badam Doodh or Badam milk and a perfect dessert for all festive occasions or even get togethers .

Even beginners can easily make  badam Kheer due to the ease involved in the making of this payasam. I prepared this yummy and aromatic badam Kheer for our Tamil New Year's festival today .

To know more about ,how we celebrate Tamil New Year (Puthaandu) and the delicious spread we prepare ,check this post here .


Badam kheer , how to make badam payasam , baadam payasam , badam payasa , badam kheer at home , almond pudding , badam geer , badam gheer


Preparation Time - 1 hr
Cooking Time - 30 mins
Complexity- easy 
Serves - 3 to 4 

Ingredients 

1/2 cup badams /almonds soaked in hot boiling water 
1/2 litre milk (preferably use 2% fat or full fat milk) 
1/4 cup sugar 
3 to 4 cardamoms
Few strands of saffron

Method

  • Soak the almonds in hot boiling water for mini1 hr . You can soak for 2 to 3 hours also. Deskin the badams and discard the skin.
  • In a blender add the badams, cardamoms,  saffron ,1/2 cup milk and grind to a fine paste .
  • Boil the 1/2 litre milk in a thick bottomed vessel . As the milk reaches its boiling point ,slowly add this badam paste and keep stirring on low flame and continue cooking until the raw flavor of almonds is lost .
  • Lastly, add the sugar and continue to simmer till the kheer thickens .  You can add some saffron strands while the kheer is simmering. Turn off the stove and let it come to room temperature. 
  • Serve this badam Kheer warm or chilled . 

Pin me up !!

Badam kheer , how to make badam payasam , baadam payasam , badam payasa , badam kheer at home , almond pudding , badam geer , badam gheer