March 31, 2017

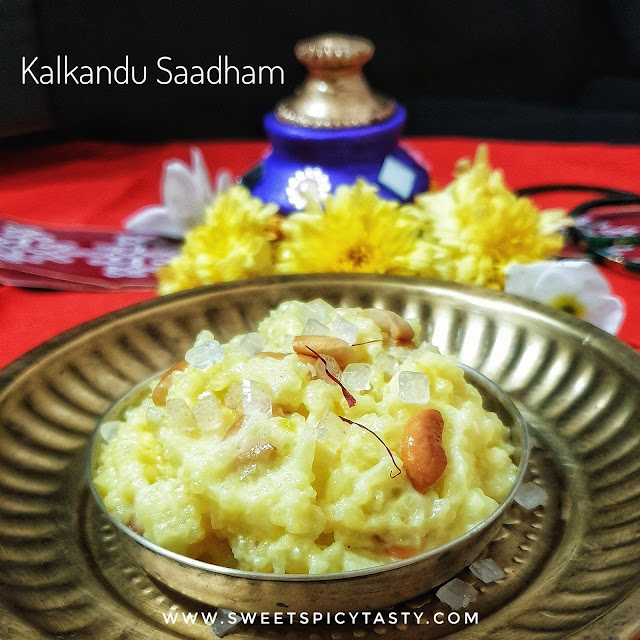
Kalkandu Saadham (Ksheerannam) | Sugar Candy Rice Pudding - Video Post


Share with friends and family
1 comment:

Kalkandu Saadham / Kalkandu baath is a very creamy,rich and a delicious pudding made using rice,milk,saffrom and rock sugar candy /kalkandu (tamil) / kal sakkre (kannada) / kadi saakar (marathi) . 

Kalkandu Baath, is a very popular prasad served in many South Indian temples especially Vaishnava (Vishnu).temples. It is also referred to  as KsheerAnnam wherein Ksheera in Sanskrit means Milk and Annam meaning Rice.

We can also use diamond sugar in place of rock sugar. This recipe uses diamond sugar as I had run out of rock candy sugar.


If you want to make a yummy and a quick dessert ,this is your best pick. Gets done very easily without any mess or strain and makes it a perfect option for large get togethers or pot luck parties .
Kalkandu Baath is a close cousin of the rice kheer but for the consistency.  Kalkandu saadham is thick and creamy while kheer is liquid . 

Ksheerannam, sheerannam , ksheeraannam ,kalkandu baath , kalkandu saadham

The rice is entirely cooked in milk along with saffron till the rice is well cooked and mushy . To this cooked rice, we add the rock candy sugar or diamond sugar and cook for a few more mins till the sugar candy melts and adds taste to the kalkandu saadham . Lastly nuts fried in ghee are added and the delicious and creamy kalkandu rice is ready.  The subtle yellow color comes from the saffron which gives a very good taste and flavor , but you can skip using the saffron if you don't like the taste or flavor. 

Watch this detailed video from my channel for a step by step recipe .Do subscribe to my channel without fail. 


Preparation Time : 5-10 mins
Cooking time : 30 mins approx (inclusive of Pressure cooking time : 15 mins)
Serves : 3-4
Complexity : Simple

Ingredients
1/2 cup rice (approx 100-120 gms)
1 cup milk
1 cup diamond sugar
few saffron strands
2-3 cardamoms powdered
pinch of edible camphor
handful of assorted raisins & cashews
2 tablespoon ghee.


Pin me up for future 


Giving a face-lift (30/10/22) to this recipe originally published in 2017 by adding new pictures,  editing the write up as part of our foodies redoing old post activity actively managed by Renu .


March 30, 2017

Karnataka Style Veg Palav - Video Post


Share with friends and family
1 comment:

This paticular variation of Pulao is very popular in the state of Karnataka and is called as PALAAV.
Karnataka being in the coastal belt uses a lot of coconut in the cooking ,so does this Palav. A flavorful masala is ground using fresh coconut,mint leaves,corriander and whole spices like jeera,cloves,cinnamon etc.
 A one pot wholesome meal that can be done in less than 30 mins and most importantly has an array of flavors and tastes that will pep up your tastebuds wanting you to have some more.

Preparation Time : 15-20 mins
Cooking Time : 25-30 mins
Complexity : medium
Serves : 3-4 people generously


March 28, 2017

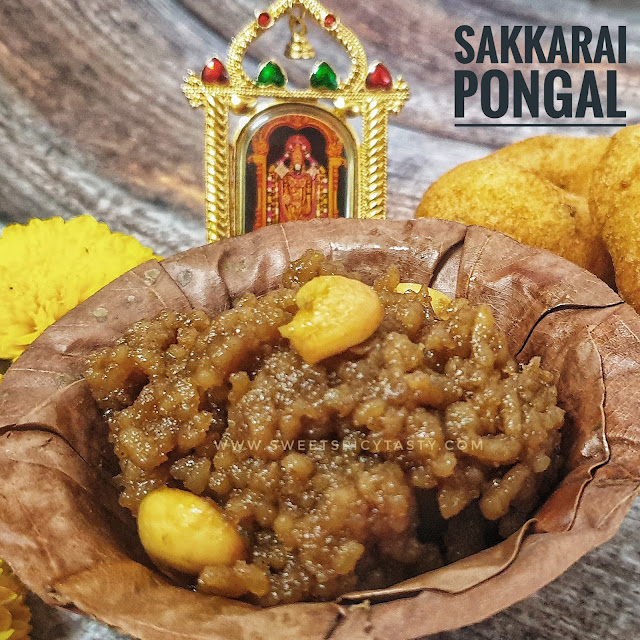
Sakkarai Pongal | Chakkarai Pongal ( Jaggery Rice Pudding)


Share with friends and family
6 comments:

Sakkarai Pongal is a very common neivedhiyam offered to the lord and served as Prasad to the devotees. This Sakkarai Pongal is slightly different from the Pongal we make during Makara Sankranthi / Pongal Pandigai .

Sakkarai in Tamil means Sugar but contradictory to the name ,the recipe doesn't use sugar at all . The Pongal is made using jaggery .

Sakkarai pongal,step by step details how to make sakkarai pongal,chakkarai pongal easy method,prasadam for navratri-sakkara pongal,ramanavami prasadam,bhog for

Here ,in this recipe , the main ingredients are rice and jaggery while the Pongal that is prepared on the eve of Sankranti is made using Rice,Moong Dhall,milk and jaggery where in the rice and dhall are cooked in milk until they are soft and mushy. Compared to the long drawn process ,this is very quick and easy to make.

Chaitra Navratri,Ugadi,RamNavami,Tamil New Year ,Vishu - with all these festivals lined up in the next 10 -15 days prepare this delicious mouth watering Sakkarai Pongal and treat yourself as well as your family.

Sakkarai Pongal is also made as an offering during Navaratri , Aadi Velli,  Aadi Sevvai  (Aashada Friday and Tuesday) and most importantly during Purataasi Month (corresponds to Gregorian Months of September- October ) on Saturdays as an offering to Lord Balaji along with Ellu Saadham (Sesame Rice) or Puliyogare  (Tamarind Rice)

Sakkarai pongal,step by step details how to make sakkarai pongal,chakkarai pongal easy method,prasadam for navratri-sakkara pongal,ramanavami prasadam,bhog for

The color of the sakkarai Pongal will depend on the kind of jaggery that is being used.  I normally use organic jaggery ,hence the color is deep brown . If you use the normal jaggery which is golden in color,the Sakkara Pongal would also have a golden color. 

Use of edible camphor /pacchhai karpooram is optional ,but I highly recommend using it as it gives a very nice taste and also a refreshing after taste lingering in your taste buds.


Preparation Time : 15- 20 mins
Cooking Time : 10 mins
Serves : 2-3
Complexity : medium

Ingredients
1/2 cup rice  ( approx 100 gms)
1/2 - 3/4 cup powdered jaggery .
2-3 cardamoms powdered
pinch of edible camphor / pachhai karpooram
2 tablespoon mix of cashews and raisins
2 tablespoon ghee

Method
  • Pressure cook the rice with water in the ratio of 1 rice : 3.5 water. 
  • Mash the rice well with the back of a spoon until its all mushy . You can add about 1-2 teaspoons of ghee while mashing . It gives a distinct aroma to the rice. Mashing is the key step to get a very nice gooey texture like the ones we get in temples.
  • Add the powdered jaggery to this mashed rice and mix it well until most of the jaggery melts and mixes well with the rice.  Alternatively you can also melt the jaggery in 1/4 cup water and then mix the mashed rice with it .
    • Note : Incase you feel the jaggery is having some impurities,melt in hot water ,strain it and then add it to the rice and mix it well.
  • In a kadai,heat about a tablespoon of ghee,roast the cashews and raisins and keep it aside.
  • In the same kadai add this cooked rice and cook on medium flame.
  • Incase there were some jaggery lumps ,they will start melting now.Need not worry.
  • Add the elaichi powder,camphor and mix well.
  • After about 2-3 minutes,you can see that the mixture starts oozing ghee from the sides and looks very glossy and attractive.
  • At this stage add one more tablespoon of ghee and mix well till you get a good aroma.
  • Stick a ladle in the middle of the rice and it should stand without falling,this is the right time to take it off the flame.  Check out the detailed video below with all tips and tricks to get the perfect sakkarai Pongal .
  • Add the roasted cashews and raisins,mix well and serve .
Subscribe to my YouTube Channel and donot forget to share it with your friends and family !! 


Pin me up !! 


Updated this post with latest photos,write up and my  yotube video link as part of Redoing Old posts activity of our Facebook group . 

First published in March 2017 and updated today on 18 sept 2022.


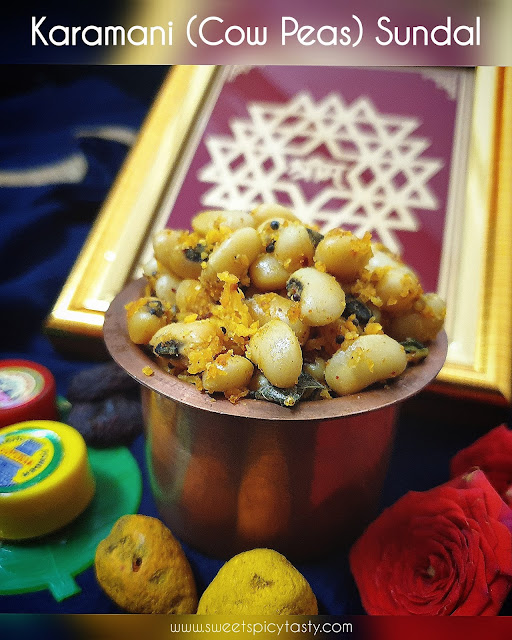
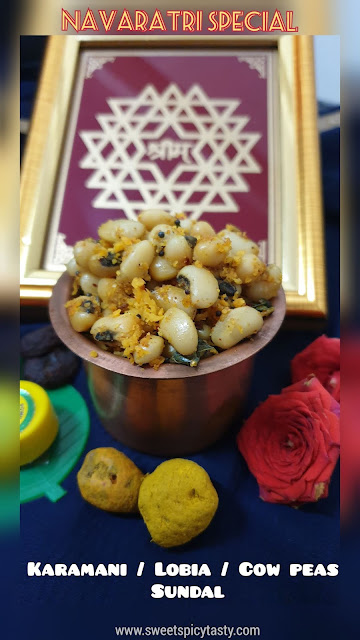
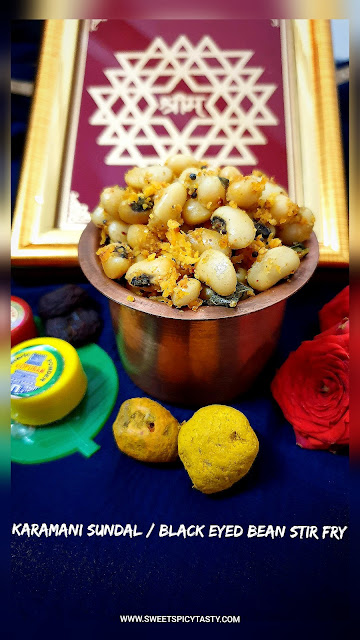
Karamani / Lobia Sundal | Black eyed beans Stir fry - Vegan recipe


Share with friends and family
3 comments:

Karamani / Lobia sundal is very simple to prepare like any other sundal . Compared to other beans cowpeas or lobia requires less soaking time and not 8 to 10 hrs like kabuli chana or dried yellow peas .
If you have soaked karamani ready on hand then all it takes it 15 mins to put this sundal together. 

Karamani sundal , lobia sundal , Lobia curry,  karamani curry , karamani chundal , navaratri sundal ,lobia , black eyed bean,  cow pea stir fry

Normally, any sundal has very simple seasoning of either sundal/curry podi and coconut gratings. Today's sundal  is my mom's recipe and the seasoning used is rasam powder + fresh coconut gratings . Do try this sundal during this navaratri and offer it all those who come home .

During Sharda Navratri a different variety of sundal is made on all the 9 days as an offering and then shared with all the ladies who come home for thamboolam . 


Karamani sundal , lobia sundal , Lobia curry,  karamani curry , karamani chundal , navaratri sundal ,lobia , black eyed bean,  cow pea stir fry


Preparation Time : 5-6 hrs
Cooking Time : 25-30mins
Complexity : Simple
Serves : 3-4 

Ingredients

150 gms karamani/lobia/black eyed beans
1/4 cup fresh grated coconut
2-3 green chillies slit
few curry leaves
1/2 tsp rasam powder
pinch of asafoetida
1/2 tsp mustard seeds
2 tsp cooking oil.
salt to taste.

Method
  • Wash and soak the lobia for about 4-5 hrs and pressure cook in 2 cups of water  with salt for 1-2 whistles on medium flame.
  • Let the pressure release naturally.Drain the water and keep the lobia aside.
  • In a kadai,temper the mustard seeds,green chillies,curry leaves,asafoetida and add the boiled karamani/lobia/beans and saute well.
  • Spread the rasam powder on the beans and toss it well.Adjust salt if needed.
  • Keep it closed for about 2-3 mins for the flavours of tempering to get infused.
  • Add the grated coconut ,mix well and garnish with chopped corriander.

write up and pics updated on 22 April 2023 as a part of our Foodies_Redoingoldposts group activity.  A very nice initiative by our coblogger Renu which allows us to rework on our old posts . This is the 99th week and we are super excited to reach the milestone 100th week next fortnight.

Donot forget to pin me !!! 


Karamani sundal , lobia sundal , Lobia curry,  karamani curry , karamani chundal , navaratri sundal ,lobia , black eyed bean,  cow pea stir fry


Karamani sundal , lobia sundal , Lobia curry,  karamani curry , karamani chundal , navaratri sundal ,lobia , black eyed bean,  cow pea stir fry


March 27, 2017

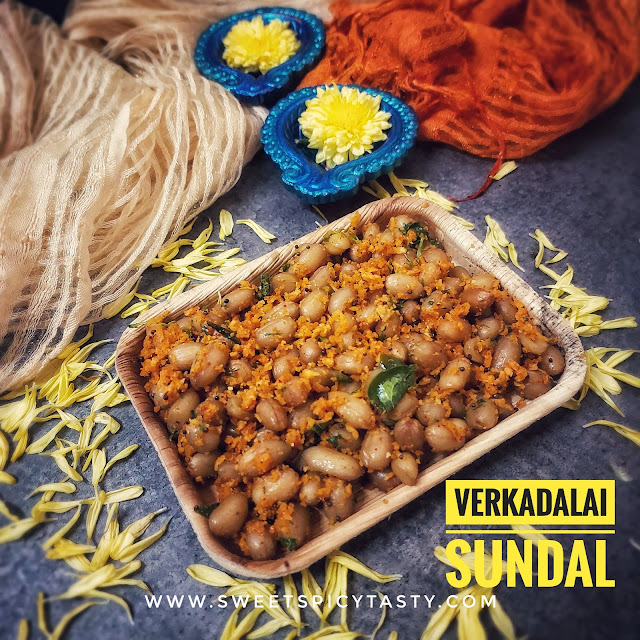
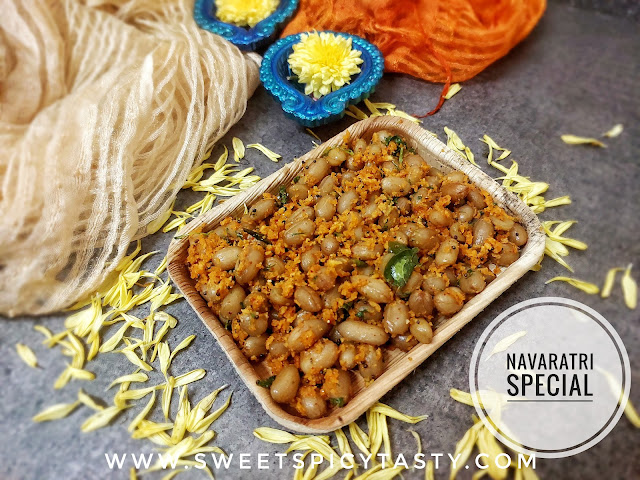
Verkadalai Sundal | Peanut Stir Fry


Share with friends and family
3 comments:

Sundal / Chundal is a south indian stir fry made from various lentils like Channa Dhall,Kabuli Channa,Peanut,Lobia/Karamani etc. A protein packed recipe sufficing for the day's protein intake.

Today's sundal is my personal favorite as I love peanuts in any form and I try to include it in my daily cooking as well. 

Verkadalai sundal , Nelakadalai sundal are the other names for this delicious peanut stir fry.
It is vegan and also Jain friendly if we skip the use of ginger . 

verkadalai sundal,chundal,navaratri sundal,groundnut sundal,nella kadalai sundal


Sundal and Navratri are synonymous for the reason being during the Navratri festival ,on all the 9 days Sundal made out of these lentils are offered as Prasad/Neivediyam for the Goddess Durga, Laxmi and Saraswathi who symbolise the  NARI SHAKTI (WOMEN POWER) .
During Navaratri I definitely try to make this delicious sundal as prasad on one of the 9 days . My mom would generally make Verkadalai sundal on the day when my friends would come over for visiting Kolu /Golu as it is really kid friendly and a crowd pleaser too.

verkadalai sundal,chundal,navaratri sundal,groundnut sundal,nella kadalai sundal


Most of the kids love it as it is mildly spiced and tempered with fresh grated coconut. This can be given as evening snack or even packed for school lunch box for kids as well as adults.  Snacking on sundal is a healthy option as compared to other fried snacks or chips .

Even otherwise Sundal can be offered as prasad for any Satsangs ,Pooja at home since its purely Satvik (No onion No Garlic) .

Donot forget to click on the image below for a collection of Sundal recipes offered to Devi during Navaratri. 


Today,22/10/2023 I prepared Verkadalai sundal as prasad on the eve of Durgashtami and took this opportunity to update the post with new photos and additional information.   


Preparation Time : 2 hrs
Cooking Time : 20 mins
Complexity : Simple
Serves : 3-4

Ingredients

150 gms peanut
1/2 cup fresh grated coconut
2-3 green chillies slit
few curry leaves
small piece of ginger finely chopped/grated
pinch of asafoetida
1/2 tsp mustard seeds
2 tsp cooking oil.
1/4 tsp turmeric 
2 tsp sundal podi (optional)
salt to taste.

Method

verkadalai sundal,chundal,navaratri sundal,groundnut sundal,nella kadalai sundal
  • Wash and soak the peanuts for about 2 hrs and pressure cook in 2 cups of water  with salt for 3-4 whistles on medium flame.(Soaking the peanuts helps in achieving softness and it prevents flatulence or gastric problems ) . 
    • Incase you are in a hurry or have forgotten to soak,pressure cook with 3-4 cups of water for 4-5 whistles on medium flame.
  • Let the pressure release naturally.Drain the water and keep the peanuts aside.
  • In a kadai,temper the mustard seeds,green chillies,ginger,curry leaves,asafoetida and add the boiled peanuts,sundal podi (if using) and saute well.
  • Keep it closed for about 2-3 mins for the flavours of tempering to get infused.
  • Add the grated coconut ,mix well and garnish with chopped corriander.

Notes:
Alternatively instead of pressure cooking the peanuts you can boil the peanuts in a normal vessel until all the water is absorbed into the peanuts and the peanuts have cooked well .


Show some love on Pinterest ......


March 26, 2017

Gajar Kheer | Carrot Payasam | Carrot Pudding


Share with friends and family
13 comments:

Kheer / Payasam needs no special introduction .Almost every Indian meal, be it South Indian or North Indian has a kheer or payasam in the menu . The list is endless when we consider the varities of Kheer or Payasams that are dished out in our country . We are experts in making kheer/pudding with all possible ingredients that blend with regular milk or coconut milk and sugar or jaggery.

Carrot payasam,is a very healthy variant of payasam/kheer/pudding made using fresh carrots. This payasam uses very little sugar as the carrots are naturally sweet and just a teaspoon of ghee for garnish which is also optional .


I generally make this gajar kheer when the spread is very heavy and this balances the dessert segment without much added sweetener or ghee.
This paysam can be made for any get togethers,,festivals or even as Prasad during Navratri,Gokulashtami etc

You can either use the orange ooty carrots or the Delhi Laal Gajar for making this payasam . Just before you cook the  carrots ensure that the carrots are washed well and peeled thoroughly. 


Classic Recipes using Carrot on my blog 


Preparation Time : 5-10 mins
Cooking Time : 20-25 mins
Serves : 3-4
Complexity : Simple

Ingredients
3-4 medium sized carrots - peeled and cut into halves
4-5 cashews/kaju/mindhiri paruppu (optional)
2 cups of milk ( 350-400 ml approx)
2-3 tablespoon sugar (adjust depending upon sweetness of carrot)
pistachios finely chopped
1 tsp elaichi powder
2-3 tsp fresh grated coconut.
1 tsp ghee

Method


  • Pressure cook the carrots and cashews in 1/2 cup milk  and cool for a while.
  • In a blender ,add the cooked carrots with milk,sugar,grated coconut and blend finely until its smooth and creamy.
  • You may add a little milk incase you find it difficult to blend.
  • Transfer the carrot mixture into a big vessel,add the remaining milk and mix well and simmer it on low flame until the mild raw flavor of the carrots are lost totally and you get a nice aroma.
  • Add the cardamom powder at this stage ,mix well and turn off.
  • Roast the pistachios in ghee and add it to  the payasam. 
  • You may serve this warm or chilled. I personally like it chilled as its very flavourful.
    • Note : You may substitute jaggery for sugar . Adjust the quantity of jaggery depending on  jaggery 's sweetness. 


      Pin it up


      This post was originally published in March 2017 with some really amateur clicks when I did not know much about food styling and photography.  Today (1/10/2022) as part of the Foodies_Redoingoldposts  group activity, I got the opportunity to click some decent photos of the recipe and also update the write up . Hope you all enjoy reading and viewing the modified content. 


      BMLogo


      March 25, 2017

      Healthy Methi Dal - One shot cooker recipe - No Onion No garlic


      Share with friends and family
      No comments:

      A very simple but healthy dal made using fresh methi leaves and moong dhall. You just have to put all the ingredients in the pressure cooker with enough water and pressure cook for 3-4 whistles and you are done with a flavourful healthy dal. This is perfect for those days when we are not in the mood for an elaborate cooking and just want to wind up for the day.
      Serve this dal with rotis or plain steamed rice with some roasted papads ,achaar and curd .
      You may also like to try other dal/sambar variants like


      Preparation Time : 10 mins
      Cooking Time : 15-20 mins
      Serves : 2-3
      Complexity : simple


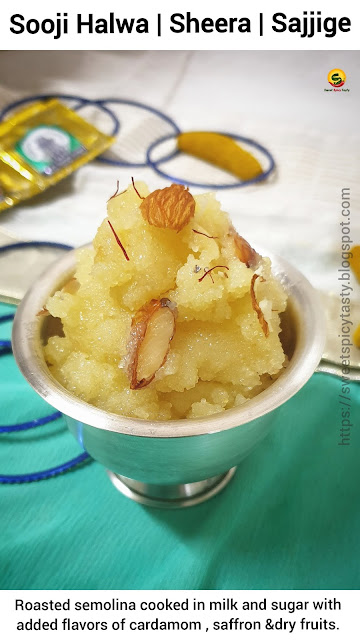
      Sooji Halwa | Prasad ka Sheera | Sajjige | Semolina Pudding - Video Post


      Share with friends and family
      12 comments:


      Sooji Halwa / Sajjige / Sheera is the most  important Prasad for SathyaNarayan Pooja,Kanya Pooja during Navratri also known as Kanjak pooja . 

      In North India Halwa Poori and Channa are offered as Bhog to Devi Maa on Durgashtami .Little girls who haven't attained puberty are invited and offered this Prasad .These little girls are called Kanjaks or Kanya and are seen as Devi roopam.(form of Devi).

      (Redoing my old posts - 20/10/2020) 

      Sooji Halwa / Sajjige / Sheera is the most  important Prasad for SathyaNarayan Pooja,Kanya Pooja during Navratri also known as Kanjak pooja . Halwa puri ,sajjige , sooji ka halwa ,suji halwa , milk kesari , milk kesri ,sheera


      This time for Blogging Marathon we are exploring "Puddings"  and this is my humble attempt to promote the famous  Indian dessert which falls under the Pudding category..read below to know  more about Puddings 


      When we hear the name pudding,the first thing that strikes us is some complex International cuisine..doesn't it? and immediately we take a back stand thinking about the unknown ingredients that we will need to use,some new cooking techniques etc etc.

      Donot worry my friends,initially when I started cooking ,I also was under the same impression about puddings ,but as I started reading cookbooks,googling for new recipes and surfing the internet to understand the various cooking terms and actual meanings, I realised we Indians have so many mithais that qualify under the pudding category which we call by different names. To name a few the various Payasams/Kheer ,Rabri,Firni,Sheera ,Sheer Korma etc.
      You can look up wiki for an exhaustive list that will break your myths about Puddings .

       
      Now coming to our recipe , often Sajjige and Kesari are confused to be the same dish with different names,but there definately is a difference in both even if the main ingredient Rava/Semolina is the same. 

      Differences in Sheera/Sooji Halwa and Kesari 

      • Kesari is made only with Rava,sugar and water as main ingredients . 
      • Sheera/Sajjige is made using Rava,sugar and Milk.
      • For Kesari a wee bit of food color is used like orange or yellow.
      • Sooji ka halwa gets its light cream color from saffron strands.  Adding saffron is purelyyour choice.
      • Kesari is very popular in South India and is a special delicacy liked by one and all . 
      • Kesari Bhaat is very popular breakfast item in Karnataka and is a part of the popular breakfast combo Chow Chow Bhaath.


       This is a video post ,that has all the detailing about how to roast the rava perfectly and the consistency,amount of ghee to be added etc etc.


      Other flavors of Sheera on my blog 

      Preparation Time - 5 mins
      Cooking Time : 20-25 mins
      Serves : 3-4

      Ingredients
      1/2 cup rava
      1 cup milk
      1/2 - 3/4 cup sugar
      2-3 elaichis powdered
      10-15 cashewnuts chopped
      2-3 tablespoon ghee
      few strands of kesar/saffron/kumkuma poo

      Method
      • Keep the milk in a sauce pan with the saffron strands for boiling.
      • Simultaneously , heat a tablespoon of ghee in a kadai/pan,and roast the rawa nicely until you get a nice aroma of roasted rava and the rava begins to feel light on roasting.
      • As the rava is roasted,the milk also begins to boil,slowly pour the milk onto the roasted rava and stir simultaneously to avoid formation of lumps.
      • Slowly all the milk gets absorbed into the rava and it feels like a huge mass.
      • Now add the sugar and mix well,the mass gets liquified again.Donot worry,it will thicken up as the sugar gets absorbed.
      • Keep stirring occasionally and when you see all the sugar is melted and mixed well,add the cardamom powder and a tablespoon of ghee and mix well.
      • Slowly the sheera gets done and you can see it leaving the sides of the pan easily and the ghee starts oozing out from the sides. The entire mixture looks glossy and shiny.Turn off the stove at this stage.
      • Roast the cashews in ghee and add it to the sheera and mix well.
      • Transfer into a dry container and serve it warm.
      • You can warm the sheera in the microwave before serving .The sheera stays good for 3-4 days in fridge if kept away from moisture and wet spoon.
      Notes:
      • Ratio of Rava to Milk is 1: 2 i.e. for 1 measure of rava you will need 2 measures of milk.
      • Ratio of Rava to Sugar is 1:1 or if you like a little more sweet you can use 1 measure rava to 1.25 measures sugar.
      • Roast the rava very patiently in medium flame taking care not to burn the rava. Do this step very carefully and utmost attention.

      ⬇️ Pin it up for future ⬇️

      Sooji Halwa / Sajjige / Sheera is the most  important Prasad for SathyaNarayan Pooja,Kanya Pooja during Navratri also known as Kanjak pooja . Halwa puri ,sajjige , sooji ka halwa ,suji halwa , milk kesari , milk kesri ,sheera


      March 24, 2017

      Coffee flavored Biscuit Pudding - No Baking No Cooking | Video Post


      Share with friends and family
      11 comments:

      This name itself excites me for many reasons: Most importantly-its my mom's signature recipe.
      As a child I have never liked any other form of sweet apart from ice creams and chocolates ,so Amma would make this pretty much frequently for me so that I stay away from the most addictive chocolates and ice creams.
      The moment Valli told me that Only Pudding theme was available for the last week of BM#74 I was left wondering what to present as there is not much inclination to consuming sweets at home.,
       I thank Valli to have given me the oppurtunity to revive my child hood sweet treat and this was also an oppurtunity to let my hubby finally taste this Yummy Creamy Pudding...
      There are various versions of this same type of pudding ,but this particular recipe is what I have tasted and enjoyed all through. An absolute recreation of my mom's recipe.
      This post is a tribute to my mom for the ever so many times she has whipped this up for me as a surprise for having scored good grades or any sort of accomplishment that I achieved in my school /college.

      The other two posts in the coming days are also going to be my childhood favorite sweets but ,Indianised pudding versions. Hope you all enjoy it !!

      Preparation Time : 20 mins
      Freezing Time : 4-6 hours
      Serves : 2-3 people


      March 22, 2017

      Thikha Gathiya(Theekha Ghatiya) | तीखा गाठीया | Khara Sev | Spicy Fried Noodle Strands - Video Recipe


      Share with friends and family
      No comments:

      Thikha Ghatiya is a traditional Gujurati deep fried snack made out of gram flour. Gathiya is used as one of the main ingredients in various types of mixtures,farsans,chewdas or even enjoyed as is with a cup of hot tea. Diwali is incomplete without ghatiya . I make sure that along with the traditional South Indian snacks like Ribbon pakoda ,murruku and mixture, I make one batch of Ghatiya without fail during Diwali. It is more like a ritual for me now which takes me down the wonderful memory lane .


      Thikha Gathiya(Theekha Ghatiya) | तीखा गाठीया |   Khara Sev | Spicy Fried Noodle Strands - Video Recipe

      Theekha Gaatiya has been an integral part of my growing up. This yummy snack would always be stocked up at home and also any visit to my gujju friend's homes would be incomplete without ghatiya and masala puris .

      You can make this quick snack for even festivals like Diwali,Gokulashtami and Holi where in we make lots of snacks and sweets for distribution among friends and relatives.

      To make  Gaatiya you need the Sev Press / Saancha /Acchu with the medium sized 3 holed plate for getting the noodle strands.
      Make this for kids in summer holidays to munch on for their sudden hunger pangs and junk food cravings :-)


      Thikha Gathiya(Teekha Ghatiya) | तीखा गाठीया |   Khara Sev | Spicy Fried Noodle Strands - Video Recipe


      Preparation Time : 10 mins
      Frying Time : 20-30 mins
      Makes about 200 gms of gaatiya.
      Complexity : High

      Watch the complete detailed video link given below to make a perfect Theeka Ghatiya/Sev for the upcoming Diwali fest.


      Ingredients
      2 cups besan/kadalai maav/gram flour
      1/2 tsp cooking soda
      1 tsp red chilli powder
      1/2 - 1 tsp white sesame seeds / ajwain (optional)
      pinch of asafoetida
      salt to taste
      Oil for deep frying

      Method
      • In a wide mixing bowl, add the besan,salt,soda,chilli powder,asafoetida,ajwain/sesame seeds and mix well with your hands.
      • heat about 2 tablespoon of oil and pour it on the dry ingredients and slowly mix with your fingers until it forms a crumbly mixture.
      • Now add water little by little and make a smooth dough.Apply some oil over the dough and keep aside.
      • Grease the inner surface of the sev press and take a small portion of the dough and fill it in.
      • Heat the oil ,drop a small ball of dough,if it sizzles up immediately,the oil is perfectly heated for frying.
      • Hold the press above the oil and lightly press and move in circular motion ,such that the strands fall into the oil.
      • Flip over when the sizzling of oil reduces  and fry until its golden brown.
      • Drain and store in air tight containers and keep away from water/moisture.


      How to make the best phulka rotis - Video Post


      Share with friends and family
      No comments:

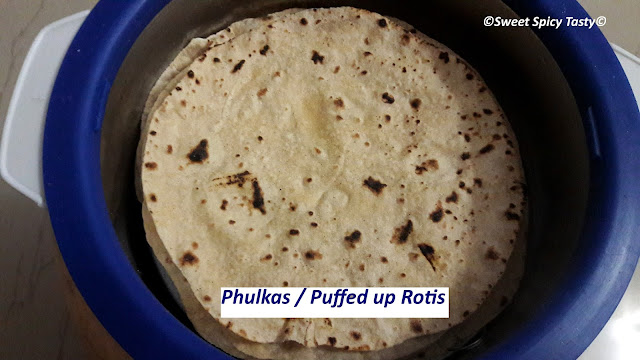
      I already have a post on Phulka Rotis with detailed pictorial representation on making Fulkas.
      The post has details on kneading the dough ,the resting time and other minute details. Please go through that post here for all those minute details. Recipe here

      In this video recipe, I am just demonstrating on how to get the Puffiness in the rotis while making Fulkas.


      ©Sweet Spicy Tasty©

      March 21, 2017

      Plantain (Raw Banana) Chips | Vazhakkai Varuval


      Share with friends and family
      3 comments:

      Summer holidays are almost going to begin in a few weeks time and the kids will be home having fun playing around with friends. This is that time of the year when parents look for various ideas to cater to children's sudden hunger pangs. Not always can we run to the kitchen to whip up snacks for kids . It is  best to have some dried snacks handy to attend to their uncalled for munching time. I will try to present some home made snacks in the coming days.


      Even if the snacks are deep fried,its always best to make it at home because we will use the best of ingredients and most importantly  the quality of oil which we always worry about when buying snacks from outside.

      Chips in any form are children's favorite..why alone children? Even we adults get addicted to potato chips and banana chips very easily. This Banana chips is very close to my heart as I have grown up seeing my grandma and mom make these in big dabbas for all of us to munch on.


      Grandpa would help grandma in slicing the bananas thinly and spread it on a huge white towel while grandma would fry it patiently as I would await to get my share from her. On the other hand,mom would slice the bananas directly over the oil with absolute precision ..I am scared to do that so I followed by grandmom's old way of slicing - spreading - frying . Slightly lengthy,but safe as we donot have to bother about balancing the slicer on the hot oil...


      Fast forward to 2024......

       I have now mastered the art of slicing the banana slices directly into the oil. It certainly requires a lot of skill, patience and concentration. So pls do it only if you have the confidence and have someone around you,if you are attempting it for the first time. 
      I am sharing a quick video which will demonstrate how to slice the bananas direct into the oil.

      Important tips & Tricks

      1. Take the piece of plantain from the water and drain it on a cotton cloth . 
      2. Grease the slicer blade with little oil for ease of slicing.  Adjust the thickness of the blade to the desired slice size .
      3. Hold the slicer at a height from the oil and place it at the position such the slices fall into the hot oil .
      4. Start slicing and you can see the slices fall easily into the oil .


      Preparation Time : 15 mins
      Frying Time : 30-40 mins
      Makes  - 200-250 gms (approx)
      Complexity : Medium High

      Ingredients
      2-3 medium sized raw bananas
      1 teaspoon salt
      oil for frying
      1/2 tsp red chilli powder 
      1/2 tsp pepper powder


      Method
      • Mix the salt ,redchilli powder ,pepper powder in a bowl and keep aside.
      • Peel the skin of the bananas and soak them in water to prevent it from turning black.
      • Take a slicer or with a knife make thin slices of the bananas and spread it on a nice big cotton towel.
      • Heat the oil in a kadai and once it reaches the heating point turn it to medium flame.
      • Drop the banana slices one by one in batches and fry only on MEDIUM FLAME. 
      • If slicing directly over the oil ,do it on medium flame.
      • It will start bubbling a lot as soon as slices are droped in the Oil .Wait until the sizzling and hissing sound reduces. 
      • Slowly turn the batch of chips to the other side and fry until golden brown. Drain and take it out in a bowl. The chips will sound crunchy and crisp.
      • Add the  seasoning mix and give it a good mix. 
      • Repeat the frying process for the entire batch .Yummy home made chips is ready to eat.
      • Store it in a dry container and keep away from moisture.

      Pin me up 


      March 17, 2017

      Perfectly puffed up Puris? - Video Post


      Share with friends and family
      1 comment:

      I had posted the recipe of Methi Puris a few days ago with tips that will help you make the best Puffed up puris. Though many of us love to eat puris,the very thought of not able to get the correct puffiness in the Puris makes one not to make at home.
      The points I am mentioning below are a NO FAIL method to get the best puffed puris. If you follow the steps correctly making Puris at home is a breeze.


      I had a lot of offline requests asking me to post a video of making puris for better understanding.
      I  have tried to do some justice in shooting the video while frying puris at home.Hope it helps all of you Poori Lovers :-) . Do give me a feedback on how did the puris turn out for you all.
      This video if for plain puri but the tips hold good for any flavored puris as well.


      Important Tips :
      1. Never use dusting flour while rolling out puris.This will prevent the puris from fluffing well and also will make the oil smoke a lot turning it black due to the residual flour getting sedimented/settled at the base. 
      2. Fill only 1/3rd  of the kadai with oil .Donot fill more oil since the chance of oil spilling is more  while frying which is dangerous.
      3. Oil has to be really very hot for the puris to puff up well. Maintain the same temperature throughout.
      4. Incase,you feel the temperature of the oil has gone down,increase the flame and wait until it becomes hot .Only then slip in the puri.Else you will end up with flat pooris.
      5. Fry only one puri at a time,this gives enough space for the puri to puff up in the kadai.
      6. Last but not the least,patience and multiple trials is the way to success. Don't lose heart if you dont get it right the first time.
      Method
      • Knead a soft and pliable dough using whole wheat flour and water. Knead it well,apply some oil on the dough and keep it covered for about 10 mins.
      • Pinch out small balls from the dough.
      • Apply some oil in your palms and make even shaped balls and make sure the oil coats the balls.
      • Apply some oil on the rolling pin as well. NO DUSTING FLOUR AT ALL.
      • Heat the oil in a kadai while you are rolling out the balls so that the oil reaches the heating point.
      • Maintain this heat through out the process of frying puris.
      • Roll out about 6-7 puris in a batch and keep it ready .
      • As the oil reaches the heating point,put in one rolled out puri and slowly press the center of the puri in the oil which will enable it to puff up well.
      • after about 30 seconds flip it over carefully and let the other side also turn golden brown.


      March 16, 2017

      Kanjivaram Idli | Kancheepuram Idli | Kudalai Idli


      Share with friends and family
      4 comments:

      The name Kancheepuram/ Kanjivaram is synonymous to Pattu Saree popularly known as Kanjivaram Pattu. The handloom industry with skilled workers make the best of  Silk Sarees that are woven with beautiful and intricate designs ,styles and motifs.

      Next to Sarees,the city is known for the very many temples and most importantly the famous Varadaraja Perumal Temple where this idli is offered as Prasadam to the Lord.

      The authentic recipe doesn't use idli rice/parboiled rice as it is an offering/prasad ,but when making at home we can make use of idli rice.  Any  prasad /offering generally doesn't make use of idli rice or parboiled rice as per customs.


      These idlis are slightly different as compared to the regular idlis as the batter is ground slightly coarse in texture and tempered with some spices like pepper,ginger and curry leaves.Also,traditionally these idlis are steamed in mandhara elai Dhonnais (eco friendly cups made out of dried leaves) .
      The other name for Kancheepuram Idli is Kudalai Idli as it is steamed in the Dhonnai.

      Where can you find the Dhonnais / eco friendly leaf cups ?

      Go to a store where they sell items related to Pooja like mud diyas, cotton wicks , photo frames of God and Goddesses . These stores usually sell these dhonnais and also leaf plates which is used to serve prasad during any festive occasion in temples as well as homes . Ask for leaf cups and they will show you various sizes,pick the size you like . Wash it well before you steam the idlis.

      Kancheepuram idlis can be served with Coconut chutney and Sambar .Many people like the combination of Tomato Khara Chutney with these idlis.We at home like to have it with Idli Molagapudi and sesame oil along with the other accompaniments  .

      I am thankful to Mayuri ji for introducing me to the food group on Facebook started by Renu which focuses on redoing our old posts.  As bloggers when we began we would have clicked photos or posted about the recipe in a simple manner,but with time we would love to update either the write up or the photos of the recipe which will be more appealing for our readers.  This group Foodies_Redoingoldposts on Facebook gives us a good momentum and push to look up our old posts and update them . So inspired by this group's activity I have updated this post on Kanjivaram Idlis with new photos and write up on August 7 - 2022


      Preparation Time : 10-12 hrs 
      ( Soaking Time : 3-4 hrs | 
      Fermentation Time : 8-10 hrs)
      Cooking Time : 20 mins
      Serves : Makes about 16-20 idlis
      Complexity : medium high


      Ingredients

      1 cup udad dhall
      1 cup idli rice
      1 cup regular raw rice ( I used Sona Masuri.,donot use basmati )

      **you can also use 2 cups raw rice and skip idli rice if making for prasad /neivedhiyam

      To Temper
      2 tsp jeera/cumin
      2 tsp ginger powder/ chukku/shunt
      2 tsp pepper powder
      pinch of asafoetida
      finely chopped curry leaves
      2 tsp gingelly oil/sessame oil/til oil

      Method

      Grinding the batter


      Wash the rice and dhall separately until the water turns clear. Soak them separately for atleast 4 hrs. 

      It is best to use wet grinder to grind the batter . Incase of using a mixie/blender ,make sure to use cold water while grinding the udad dhall. 


      Grind the udad dhall first using very little water until it feels fluffy and almost doubles in volume.
      Drop a small blob of the batter in a cup full of water ,the blob of batter must float and not sink.  This is the desired consistency of udad dhall batter for soft and fluffy idlis .

      Take it out in a separate vessel that is wide enough. Next add the rice to the grinder and grind it well but not very smooth.let it be a little coarse. Add this to the udad dhall batter and mix it well using your hands.

      Please Note,using hands to mix the batter helps in fermentation process as our body heat is transferred in the process of mixing. Leave it aside for fermentation . It will take 6-10 hrs depending on the outside temperature and season.

      ©Sweet Spicy Tasty©
      Freshly ground batter

      ©Sweet Spicy Tasty©
      Well fermeneted batter.


      How to prepare Idlis ?

      Prepare the tempering using jeera and asafoetida.Add the tempering along with the finely chopped curry leaves,dry ginger powder ,pepper powder and salt.Mix well 

      ©Sweet Spicy Tasty©

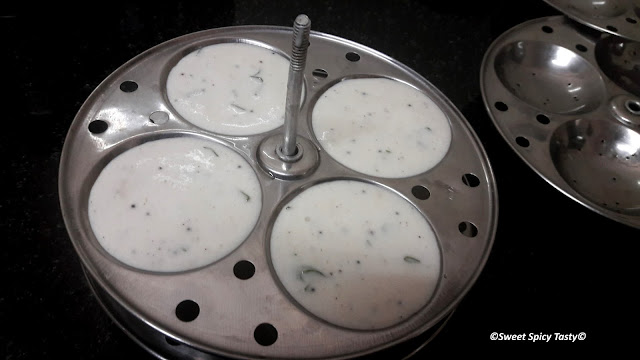
      Grease the idli plates with a little oil and prepare the steamer/ pressure cooker by then with sufficient water. Pour the batter into the greased idli moulds and steam for 16-18 minutes or use the tooth pick test to check if the idlis are done .

      If you want to steam them in the eco-friendly leaf cups (donnais) then pour the batter into those cups and place them in the steamer and steam it as always .

      ©Sweet Spicy Tasty©

      ©Sweet Spicy Tasty©
      Steamed Idlis

      Soft and fluffy idlis are ready to be served.

      Alternatively,you can also grease a round mould and steam the batter in it and cut in desired shapes .Just like how you would do for a cake or dhoklas.

      ©Sweet Spicy Tasty©

      Incase, you feel the batter is not risen well, you can add some eno fruit salt before steaming. Take care to add eno only to the quantity of batter to be steamed and not to the entire batch of batter.


      Pin for later