Showing posts with label Video Recipes. Show all posts

November 30, 2020

Cabbage Methi Pakoras | Cabbage fenugreek fritters - Vegan


Share with friends and family 9 comments:

 Winters and fresh vegetables are always a treat to eyes and taste buds . Last few days have been pretty cold in my city and we also experienced mild showers owing to a cyclonic depression.  Cold weather coupled with rains definitely calls for some crispy bites and is it not a pleasure to indulge into some fried snacks keeping the guilt aside for a day?

Deep fried snack prepared by mixing fenugreek, cabbage with gram flour and spices.  Pakoras are a winter or rainy special snack loved by all.

I had some fresh cabbage and methi /fenugreek leaves in my fridge and this time I prepared pakoras or Fritters using them . This was the first time, I combined the two veggies and made pakoras . Generally I make either only cabbage pakoras or methi pakoras, but this mix veg pakoras were just out of the world and it just flew out of the pan soon after I made them. You can add some chopped capsicum also to this .

By now you all must be aware about our weekly themes in Foodie Monday Bloghop and this time we are celebrating Winter vegetables as suggested by Sasmita for the 274th week.  The next soup on my mind is Beetroot Carrot Soup which Sas has on her blog "First timer cook" .


Preparation Time- 15 mins

Frying time - 20 mins

Serves- 3 to 4

Complexity- medium


Video recipe of Pakoras on my channel 


Ingredients 

1 cup finely chopped cabbage 
1/2 cup finely chopped methi /fenugreek leaves
2 to 3 green chillies finely chopped 
2 cups besan/gram flour 
1/2 cup rice flour 
2 tsp red chilli powder
1 tsp ajwain /carom seeds 
Finely chopped corriander 
Salt as needed 
Asafoetida as needed  
Oil for frying 

Method 

  • In a wide mixing bowl, take the cabbage , methi Leaves , corriander, salt , red chilli powder , ajwain,chillies ,asafoetida and mix it well with your fingers . Let it sit for 5 to 10 mins for the veggies and spices release their flavor. 
  • Add the gram flour and rice flour and mix it with the vegetable mixture.  Rub it well with your fingers such that you get a crumbly texture.  The salt and spices would have released water which will be enough to mix the dough for pakora . Incase you find it dry , sprinkle water little by little and make a tight but moist dough. 
  • Heat oil and drop little bits of the dough into hot oil and fry them on medium flame until the hissing sound of the oil stops and the pakoras feel crispy and golden brown .
  • Repeat this step until the dough is over . Always fry in small batches so that the pakoras are evenly fried and turn crisp .

Pin it for future 

Deep fried snack prepared by mixing fenugreek, cabbage with gram flour and spices.  Pakoras are a winter or rainy special snack loved by all.

Some more deep fried nibbles  on my blog which will interest you 


June 22, 2020

Jain Falafel - Video recipe


Share with friends and family 9 comments:

Falafel is a middle eastern/Lebanese delicacy made using chick peas/ kabuli channa/ kondakadalai .
These are deep fried balls or patty made by grinding the soaked chickpeas with lots of spices which are commonly used even in Indian cuisine. You can call falafel as a close cousin of our Dal Vada /Aam vadai /paruppu vada.

Falafels traditionally are served stuffed in  Pita Bread ;which is a pocket type bread with some pickled salad and dips like Tahini and Hummus ;which are also a Lebanese delicacy. 

The first time I had these falafel was at a restaurant in Mumbai called Srinathji which specializes in serving delectable multi cuisine menu without using Onion and Garlic . I liked the taste and crunchy Falafels but soon forgot about it until I tasted it again at a proper Middle eastern restaurant during my stay in the US .

This time for our foodie blog hop Monday event  week #252 ,the theme was  Chana Time by Mayuri  and we had a choice of brown channa or chick peas to select as our main ingredient.  The moment she suggested these two , I jumped with joy and decided then and there that Falafel it is . I have tried to make the Jain version sans Onion and garlic but I shall give the method to prepare the regular Falafel also.  Check the notes section for the details .

Donot forget to check Mango Sriracha Hummus on Mayuri's blog which can be a perfect accompaniment for these falafels. 
Also, don't miss out some lipsmacking recipes from my blog made using chickpeas .


Chickpeas Vathakuzhambu (south Indian delicacy) 


Srinathji's have outlets in major cities, so do try visiting them once the lockdown is over and restrictions have been lifted .
For those in  Bangalore , you can try Srinathji's at Indiranagar on Krishna temple street .
 (Not a sponsored post )

Soaking Time - 8 to 10hrs 
Preparation Time - 15 mins
Cooking Time - 30 to 40 mins
Makes 15 to 20 Falafels 


Ingredients 
250 gms white chick peas/kabuli channa
1/2 bunch finely chopped coriander
1/4 bunch finely chopped parsley (optional)
15-20 mint leaves 
2 tsp pepper powder 
2 tsp roasted jeera powder 
3 to 4 green chillies 
Salt as needed 
Juice from 1/2 lemon

Method 

Check the video recipe on my YouTube channel given below and donot forget to subscribe to my channel.


  • Wash and soak the chickpeas for 8hrs or overnight in sufficient water. 
  • Drain the water and wash it once again .
  • In a blender add all the ingredients and grind into a fine paste . Add water little by little and grind . Donot add too much water else the batter will become runny.
  • We need a thick batter so that we can make balls easily.
  • Transfer this ground mixture to a mixing bowl and add 1 tablespoons white sesame seeds and mix it well.
  • Refrigerate it for 20 mins before frying .By doing this we can make balls easily and the  balls wont disintegrate while frying.
  • Heat the oil and make small balls and drop the balls in hot oil and fry on medium flame until they turn crisp and golden brown.
  • Serve with hummus or any dip of your choice. 
Notes 
  1. You can add 1 finely chopped onion and 2 to 3 garlic cloves while grinding for making the non satvik version .
  2. Instead of balls you can shape them as bullets or cylindrical  shape and fry. 


Linking it to foodie Monday blog hop week #252 channa Time 


June 14, 2018

Haagalkaai Gojju | Pavakkai Gojju | Bitter gourd curry - Video Post


Share with friends and family 6 comments:

Presenting to you another speciality from Karnataka, Haagalkaai Gojju. Bitter gourd is known as Haagal kaai in Kannada.

Gojju is a sweet and sour gravy made from  tamarind base and some jaggery along with various other spices  bringing about an aromatic and a flavorful gravy. 

This delicacy is also called a Menaskkai in some parts of Karnataka . The bittergourd can be replaced with Pineapple or Lady's finger as well with the preparation process remaining the same.


This bitter gourd gojju is like a palate cleanser and leaves a fresh feeling in the mouth. Hot rice with a little ghee and this gojju tastes heavenly.

Diabetics who are bored of having normal stir fries or boiled bitter gourd can definitely prepare this gojju and have. Goes well with rotis or puris as well.

Preparation Time : 10 mins
Cooking Time : 20-30 mins
Serves : 2-3

Video Method

(Play to watch the video) 


Ingredients
1 medium sized bitter gourd / pavakkai / karela
1/2 cup tamarind pulp
1 tablespoon sambar powder (recipe click here)
1 tablespoon rasam powder (recipe click here)
2-3 teaspoons grated coconut
few curry leaves
asafoetida - a pinch
salt as needed
1/2 tsp turmeric
2 tsp  powdered jaggery - optional ( diabetics can omit this)
1 tsp mustard seeds
1-2 tablespoon cooking oil. ( I used til oil , you can also use regular oil)

Method
Cut the head and tail end of the bitter gourd. De -seed it and cut into small pieces and keep aside.


Grind the coconut , sambar powder and rasam powder in a mixie jar with little water to a smooth paste.

Heat oil in a wok/kadai, crackle the mustard seeds and curry leaves.


Saute the bitter gourd pieces with haldi, some salt and asafoetida and cook it in tamarind pulp until the raw flavor of the tamarind is lost. Add some jaggery while the tamarind pulp is boiling.


Slowly add the ground paste and mix it thoroughly so that no lumps are formed. You can adjust salt and some spice powder is you need at this stage.


Let the mixture simmer well on a medium flame until it reaches a thick sauce like consistency . Keep stirring at intervals to avoid burning or sticking to the underside of the pan. You can drizzle some til oil in the end for an extra added flavor.

Serve it with piping hot rice with a dash of ghee and some roasted papads .


June 10, 2018

Khara Boondi - video post


Share with friends and family 2 comments:

Khara boondi is an integral part of any Indian savory snack. They can be called as  spicy pearls made using gram flour / besan. Boondis can be used in various preparations , garnish for jal jeera, spread over the serving of Bisi Bele baath, or even had as a plain tea time snack. Boondis are prepared in large numbers to be added to chiwdas/ mixture during Diwali.
Today we shall see how we can make this tasty snack at the comfort of our home. I am also including a video to demonstrate how to make boondis.

Preparation Time : 10 mins
Frying Time : 30-40 mins
Complexity : Difficult.


October 12, 2017

Avarekaalu Akki Roti - karnataka special - Video recipe


Share with friends and family No comments:

It is Avarekaalu Time in karnataka !! 

Avarekaalu is known as 
Mochhai in Tamil, 
Hyacinth Bean in English ,
Vaal papdi Hindi/Marathi , 
Surti papdi / lilva in gujarati.

The most sought after bean in this season and it makes its way into many many recipes like upma,sambar,rasam,pallya,kootu and the most famous Akki rotti commonly known as Avarekaalu Akki Roti .
I have already posted the recipe for Avarekaal Kootu in the last season . Check the recipe here 
The video illustrates how to make cruncy and tasty avarekaalu rotti at the comfort of your home..

Preparation Time : 15-20 mins
Cooking Time : 20-30 mins
Complexity : medium high


October 04, 2017

Cholam Thattai | Jowar Thattai | Sorghum Crispies


Share with friends and family 10 comments:

Diwali is just round the corner and we shall soon start preparing yummy snacks for family,friends and relatives .
Thattai is a south indian version of Mattri made using Rice flour and udad dhall flour generally . This is a slightly different and a healthier version using Millet flour.

Try this different and crispy Thattai using Jowar Flour / Cholam Maav and surprise your family :-)


August 22, 2017

Thenkuzhal | Thengozhal | Thengol - Video recipe


Share with friends and family No comments:

ThenKuzhal literally translates to Honey Pipes ("Then" meaning Honey & "Kuzhal" meaning Pipe) .. though the names sounds like a sweet dish it is actually a Savoury Snack made using rice flour and Udad dhall flour . A very crunchy and melt in mouth snack which is why its called Honey Pipe. you can eat it seamlessly and effortlessly when you take bite.


Mucchore | Manam Kombu | Mullu Murukku - Video Recipe


Share with friends and family No comments:

Mucchore (Kannada) ,Manam Kombu (Tamil) ,Mullu Murukku (Tamil) are all different names for a deep fried snack made using Moong Dhall flour and Rice flour.
In Kannada ,"Mucchore" means deep fried dough. Since we use butter to knead the dough for crispness,it is also called as "Benne Mucchore" ."Benne" meaning Butter
In Tamil "Mullu" means "Thorn" and Murukku is "Twist / Winding/Entangle" . Since ,we use a star shaped plate to press out this chakli,the shape of the chakli feels a little serrated and the shape is random as we just move the press in random order. Hence called as Mullu Murrukku since it resembles a "Bunch of Entangled Thorns".
"Manam" in Tamil is "Aroma" and "Kombu" is "Small Sticks" . This snack has a very nice aroma due to the moong dhall flour and with every bite we can feel the taste explicitly,hence aptly calle as "Manam Kombu" or " Aromatic Savoury Sticks"

Enjoy the video and make this crispy snack for evening Tea Time


Vaazhai Thandu Mor / Banana Stem Buttermilk


Share with friends and family No comments:


Vaazhai Thandu in Tamil literally translates to Banana Stem 
("Vaazhai" meaning "Banana" & "Thandu" meaning "Stem")This part of the banana plant has a lot of natural fibre and helps in digestion and flushing out toxins from the body. wide usage of banana stem is to cure kidney stone as a home remedy. It is believed that drinking this juice dissolves the kidney stone and flushes it out. Banana stem can also be used for weight management


June 08, 2017

Mix veg Kurma - No Onion No Garlic - Video Recipe


Share with friends and family No comments:


Many of the households donot make use of onion and garlic on regular days and some on special occassions like Amavasai,Festive days,Pooja days etc etc.
The general feel is making gravies without onion and garlic will not be tasty and hence many of them donot attempt making gravies at all. 
Donot worry,try this gravy and you will really love to eat No Onion No Garlic recipes .


Preparation Time : 15-20 mins
Cooking Time : 10 mins
Serves : 3-4
Complexity : Medium

Traditional Bisi Bele Baath - No Onion No Garlic - Video recipe


Share with friends and family No comments:

Presenting the famous Karnataka special Bisi Bele Baath / Bisi Bele Huli Anna.
Bisi means Hot 
Bele means dhall/paruppu/lentil
Huli means Sambar/ Sour taste from tamarind
Baath/#anna means Rice
Literally it means Hot Lentil Rice /hot dhall rice
Mostly this recipe is liked by one and all due to the mixture of flavors that burst into your mouth when you take a spoonful. Enjoy this speciality with a small twist. Today's preparation is without use of Onion & garlic.


Green gram Gravy | Hara Moong Sabji - Zero Oil - Easy cooker method


Share with friends and family No comments:

This time its totally an OIL FREE preparation..yes you read it right..NO OIL at all .

A quick preparation using the pressure cooker.

Ideal for all the health and calorie conscious foodies. 
This gravy is a No Onion No garlic version using the very healthy lentil - Green Gram / Hara Moong / Paccha Payar .

Skip the potatoes in the recipe and it can become Diabetic Friendly as well as Jain Friendly.

May 08, 2017

Restaurant Style Crispy Rava Dosa - Video recipe


Share with friends and family No comments:

Does anyone really need an introduction to Rava Dosa? The name itself makes us imagine of a crispy ,lacy and big sized golden brown color dosa / crepe loaded with jeera,pepper corns,finely chopped green chillies ,curry leaves,corriander leaves and some bits of finely sliced coconuts or cashewnuts..
This itself must have set you all drooling....am I right?
So now for all of us Rava Dosas are synonymous to restaurant order as we  take a back stand to make it at home . henceforth,with this recipe you can always make crispy restaurant style rava dosas at the comfort of your home and dunk them in your favorite chutney and sambar and relish it.
This is an absolutely instant dosa that requires no special ingredients and can be whipped in actually less than 20 min.
Coconut chutney ,Tomato chutney are the best side dish for rava dosa.

Please read the tips and follow the video to get the perfect crispy Rava Dosa.

Jain Version : Skip the onion and follow the recipe as is

Preparation Time : 10  mins
Cooking Time : approx 2 mins per dosa
Makes : 9 dosas
Complexity : medium


March 30, 2017

Karnataka Style Veg Palav - Video Post


Share with friends and family 1 comment:

This paticular variation of Pulao is very popular in the state of Karnataka and is called as PALAAV.
Karnataka being in the coastal belt uses a lot of coconut in the cooking ,so does this Palav. A flavorful masala is ground using fresh coconut,mint leaves,corriander and whole spices like jeera,cloves,cinnamon etc.
 A one pot wholesome meal that can be done in less than 30 mins and most importantly has an array of flavors and tastes that will pep up your tastebuds wanting you to have some more.

Preparation Time : 15-20 mins
Cooking Time : 25-30 mins
Complexity : medium
Serves : 3-4 people generously


March 25, 2017

Sooji Halwa | Prasad ka Sheera | Sajjige | Semolina Pudding - Video Post


Share with friends and family 12 comments:


Sooji Halwa / Sajjige / Sheera is the most  important Prasad for SathyaNarayan Pooja,Kanya Pooja during Navratri also known as Kanjak pooja . 

In North India Halwa Poori and Channa are offered as Bhog to Devi Maa on Durgashtami .Little girls who haven't attained puberty are invited and offered this Prasad .These little girls are called Kanjaks or Kanya and are seen as Devi roopam.(form of Devi).

(Redoing my old posts - 20/10/2020) 

Sooji Halwa / Sajjige / Sheera is the most  important Prasad for SathyaNarayan Pooja,Kanya Pooja during Navratri also known as Kanjak pooja . Halwa puri ,sajjige , sooji ka halwa ,suji halwa , milk kesari , milk kesri ,sheera


This time for Blogging Marathon we are exploring "Puddings"  and this is my humble attempt to promote the famous  Indian dessert which falls under the Pudding category..read below to know  more about Puddings 


When we hear the name pudding,the first thing that strikes us is some complex International cuisine..doesn't it? and immediately we take a back stand thinking about the unknown ingredients that we will need to use,some new cooking techniques etc etc.

Donot worry my friends,initially when I started cooking ,I also was under the same impression about puddings ,but as I started reading cookbooks,googling for new recipes and surfing the internet to understand the various cooking terms and actual meanings, I realised we Indians have so many mithais that qualify under the pudding category which we call by different names. To name a few the various Payasams/Kheer ,Rabri,Firni,Sheera ,Sheer Korma etc.
You can look up wiki for an exhaustive list that will break your myths about Puddings .

 
Now coming to our recipe , often Sajjige and Kesari are confused to be the same dish with different names,but there definately is a difference in both even if the main ingredient Rava/Semolina is the same. 

Differences in Sheera/Sooji Halwa and Kesari 

  • Kesari is made only with Rava,sugar and water as main ingredients . 
  • Sheera/Sajjige is made using Rava,sugar and Milk.
  • For Kesari a wee bit of food color is used like orange or yellow.
  • Sooji ka halwa gets its light cream color from saffron strands.  Adding saffron is purelyyour choice.
  • Kesari is very popular in South India and is a special delicacy liked by one and all . 
  • Kesari Bhaat is very popular breakfast item in Karnataka and is a part of the popular breakfast combo Chow Chow Bhaath.


 This is a video post ,that has all the detailing about how to roast the rava perfectly and the consistency,amount of ghee to be added etc etc.


Other flavors of Sheera on my blog 

Preparation Time - 5 mins
Cooking Time : 20-25 mins
Serves : 3-4

Ingredients
1/2 cup rava
1 cup milk
1/2 - 3/4 cup sugar
2-3 elaichis powdered
10-15 cashewnuts chopped
2-3 tablespoon ghee
few strands of kesar/saffron/kumkuma poo

Method
  • Keep the milk in a sauce pan with the saffron strands for boiling.
  • Simultaneously , heat a tablespoon of ghee in a kadai/pan,and roast the rawa nicely until you get a nice aroma of roasted rava and the rava begins to feel light on roasting.
  • As the rava is roasted,the milk also begins to boil,slowly pour the milk onto the roasted rava and stir simultaneously to avoid formation of lumps.
  • Slowly all the milk gets absorbed into the rava and it feels like a huge mass.
  • Now add the sugar and mix well,the mass gets liquified again.Donot worry,it will thicken up as the sugar gets absorbed.
  • Keep stirring occasionally and when you see all the sugar is melted and mixed well,add the cardamom powder and a tablespoon of ghee and mix well.
  • Slowly the sheera gets done and you can see it leaving the sides of the pan easily and the ghee starts oozing out from the sides. The entire mixture looks glossy and shiny.Turn off the stove at this stage.
  • Roast the cashews in ghee and add it to the sheera and mix well.
  • Transfer into a dry container and serve it warm.
  • You can warm the sheera in the microwave before serving .The sheera stays good for 3-4 days in fridge if kept away from moisture and wet spoon.
Notes:
  • Ratio of Rava to Milk is 1: 2 i.e. for 1 measure of rava you will need 2 measures of milk.
  • Ratio of Rava to Sugar is 1:1 or if you like a little more sweet you can use 1 measure rava to 1.25 measures sugar.
  • Roast the rava very patiently in medium flame taking care not to burn the rava. Do this step very carefully and utmost attention.

⬇️ Pin it up for future ⬇️

Sooji Halwa / Sajjige / Sheera is the most  important Prasad for SathyaNarayan Pooja,Kanya Pooja during Navratri also known as Kanjak pooja . Halwa puri ,sajjige , sooji ka halwa ,suji halwa , milk kesari , milk kesri ,sheera


March 24, 2017

Coffee flavored Biscuit Pudding - No Baking No Cooking | Video Post


Share with friends and family 11 comments:

This name itself excites me for many reasons: Most importantly-its my mom's signature recipe.
As a child I have never liked any other form of sweet apart from ice creams and chocolates ,so Amma would make this pretty much frequently for me so that I stay away from the most addictive chocolates and ice creams.
The moment Valli told me that Only Pudding theme was available for the last week of BM#74 I was left wondering what to present as there is not much inclination to consuming sweets at home.,
 I thank Valli to have given me the oppurtunity to revive my child hood sweet treat and this was also an oppurtunity to let my hubby finally taste this Yummy Creamy Pudding...
There are various versions of this same type of pudding ,but this particular recipe is what I have tasted and enjoyed all through. An absolute recreation of my mom's recipe.
This post is a tribute to my mom for the ever so many times she has whipped this up for me as a surprise for having scored good grades or any sort of accomplishment that I achieved in my school /college.

The other two posts in the coming days are also going to be my childhood favorite sweets but ,Indianised pudding versions. Hope you all enjoy it !!

Preparation Time : 20 mins
Freezing Time : 4-6 hours
Serves : 2-3 people


March 22, 2017

Thikha Gathiya(Theekha Ghatiya) | तीखा गाठीया | Mota Sev | Spicy Fried Noodle Strands - Video Recipe


Share with friends and family 10 comments:

Thikha Ghatiya is a traditional Gujurati deep fried snack made out of gram flour. 
Diwali is incomplete without ghatiya . 

Gathiya is used as one of the main ingredients in various types of mixtures,farsans,chewdas or even enjoyed as is with a cup of hot tea for tea time munching. 

I make sure that along with the traditional South Indian snacks like Ribbon pakoda ,Butter murruku and Madras mixture, I make one batch of Ghatiya without fail during Diwali. It is more like a ritual for me now which takes me down the wonderful memory lane .


Thikha Gathiya(Theekha Ghatiya) | तीखा गाठीया |   Mota Sev | Spicy Fried Noodle Strands - Video Recipe

Theekha Gaatiya has been an integral part of my growing up. This yummy snack would always be stocked up at home and also any visit to my gujju friend's homes would be incomplete without ghatiya and masala puris .

You can make this quick snack for even festivals like Diwali,Gokulashtami and Holi where in we make lots of snacks and sweets for distribution among friends and relatives.

To make  Gaatiya you need the Sev Press / Saancha /Acchu with the medium sized 3 holed plate for getting the noodle strands.
Make this for kids in summer holidays to munch on for their sudden hunger pangs and junk food cravings :-)


Thikha Gathiya(Teekha Ghatiya) | तीखा गाठीया |   mota Sev | Spicy Fried Noodle Strands - Video Recipe


Preparation Time : 10 mins
Frying Time : 20-30 mins
Makes about 200 gms of gaatiya.
Complexity : High

Watch the complete detailed video link given below to make a perfect Theeka Ghatiya/Sev for the upcoming Diwali fest.


Ingredients
2 cups besan/kadalai maav/gram flour
1/2 tsp cooking soda
1 tsp red chilli powder
1/2 - 1 tsp white sesame seeds / ajwain (optional)
pinch of asafoetida
salt to taste
Oil for deep frying

Method
  • In a wide mixing bowl, add the besan,salt,soda,chilli powder,asafoetida,ajwain/sesame seeds and mix well with your hands.
  • heat about 2 tablespoon of oil and pour it on the dry ingredients and slowly mix with your fingers until it forms a crumbly mixture.
  • Now add water little by little and make a smooth dough.Apply some oil over the dough and keep aside.
  • Grease the inner surface of the sev press and take a small portion of the dough and fill it in.
  • Heat the oil ,drop a small ball of dough,if it sizzles up immediately,the oil is perfectly heated for frying.
  • Hold the press above the oil and lightly press and move in circular motion ,such that the strands fall into the oil.
  • Flip over when the sizzling of oil reduces  and fry until its golden brown.
  • Drain and store in air tight containers and keep away from water/moisture.


Pin for future 


How to make the best phulka rotis - Video Post


Share with friends and family No comments:

I already have a post on Phulka Rotis with detailed pictorial representation on making Fulkas.
The post has details on kneading the dough ,the resting time and other minute details. Please go through that post here for all those minute details. Recipe here

In this video recipe, I am just demonstrating on how to get the Puffiness in the rotis while making Fulkas.


©Sweet Spicy Tasty©

March 17, 2017

Perfectly puffed up Puris? - Video Post


Share with friends and family 1 comment:

I had posted the recipe of Methi Puris a few days ago with tips that will help you make the best Puffed up puris. Though many of us love to eat puris,the very thought of not able to get the correct puffiness in the Puris makes one not to make at home.
The points I am mentioning below are a NO FAIL method to get the best puffed puris. If you follow the steps correctly making Puris at home is a breeze.


I had a lot of offline requests asking me to post a video of making puris for better understanding.
I  have tried to do some justice in shooting the video while frying puris at home.Hope it helps all of you Poori Lovers :-) . Do give me a feedback on how did the puris turn out for you all.
This video if for plain puri but the tips hold good for any flavored puris as well.


Important Tips :
  1. Never use dusting flour while rolling out puris.This will prevent the puris from fluffing well and also will make the oil smoke a lot turning it black due to the residual flour getting sedimented/settled at the base. 
  2. Fill only 1/3rd  of the kadai with oil .Donot fill more oil since the chance of oil spilling is more  while frying which is dangerous.
  3. Oil has to be really very hot for the puris to puff up well. Maintain the same temperature throughout.
  4. Incase,you feel the temperature of the oil has gone down,increase the flame and wait until it becomes hot .Only then slip in the puri.Else you will end up with flat pooris.
  5. Fry only one puri at a time,this gives enough space for the puri to puff up in the kadai.
  6. Last but not the least,patience and multiple trials is the way to success. Don't lose heart if you dont get it right the first time.
Method
  • Knead a soft and pliable dough using whole wheat flour and water. Knead it well,apply some oil on the dough and keep it covered for about 10 mins.
  • Pinch out small balls from the dough.
  • Apply some oil in your palms and make even shaped balls and make sure the oil coats the balls.
  • Apply some oil on the rolling pin as well. NO DUSTING FLOUR AT ALL.
  • Heat the oil in a kadai while you are rolling out the balls so that the oil reaches the heating point.
  • Maintain this heat through out the process of frying puris.
  • Roll out about 6-7 puris in a batch and keep it ready .
  • As the oil reaches the heating point,put in one rolled out puri and slowly press the center of the puri in the oil which will enable it to puff up well.
  • after about 30 seconds flip it over carefully and let the other side also turn golden brown.


March 14, 2017

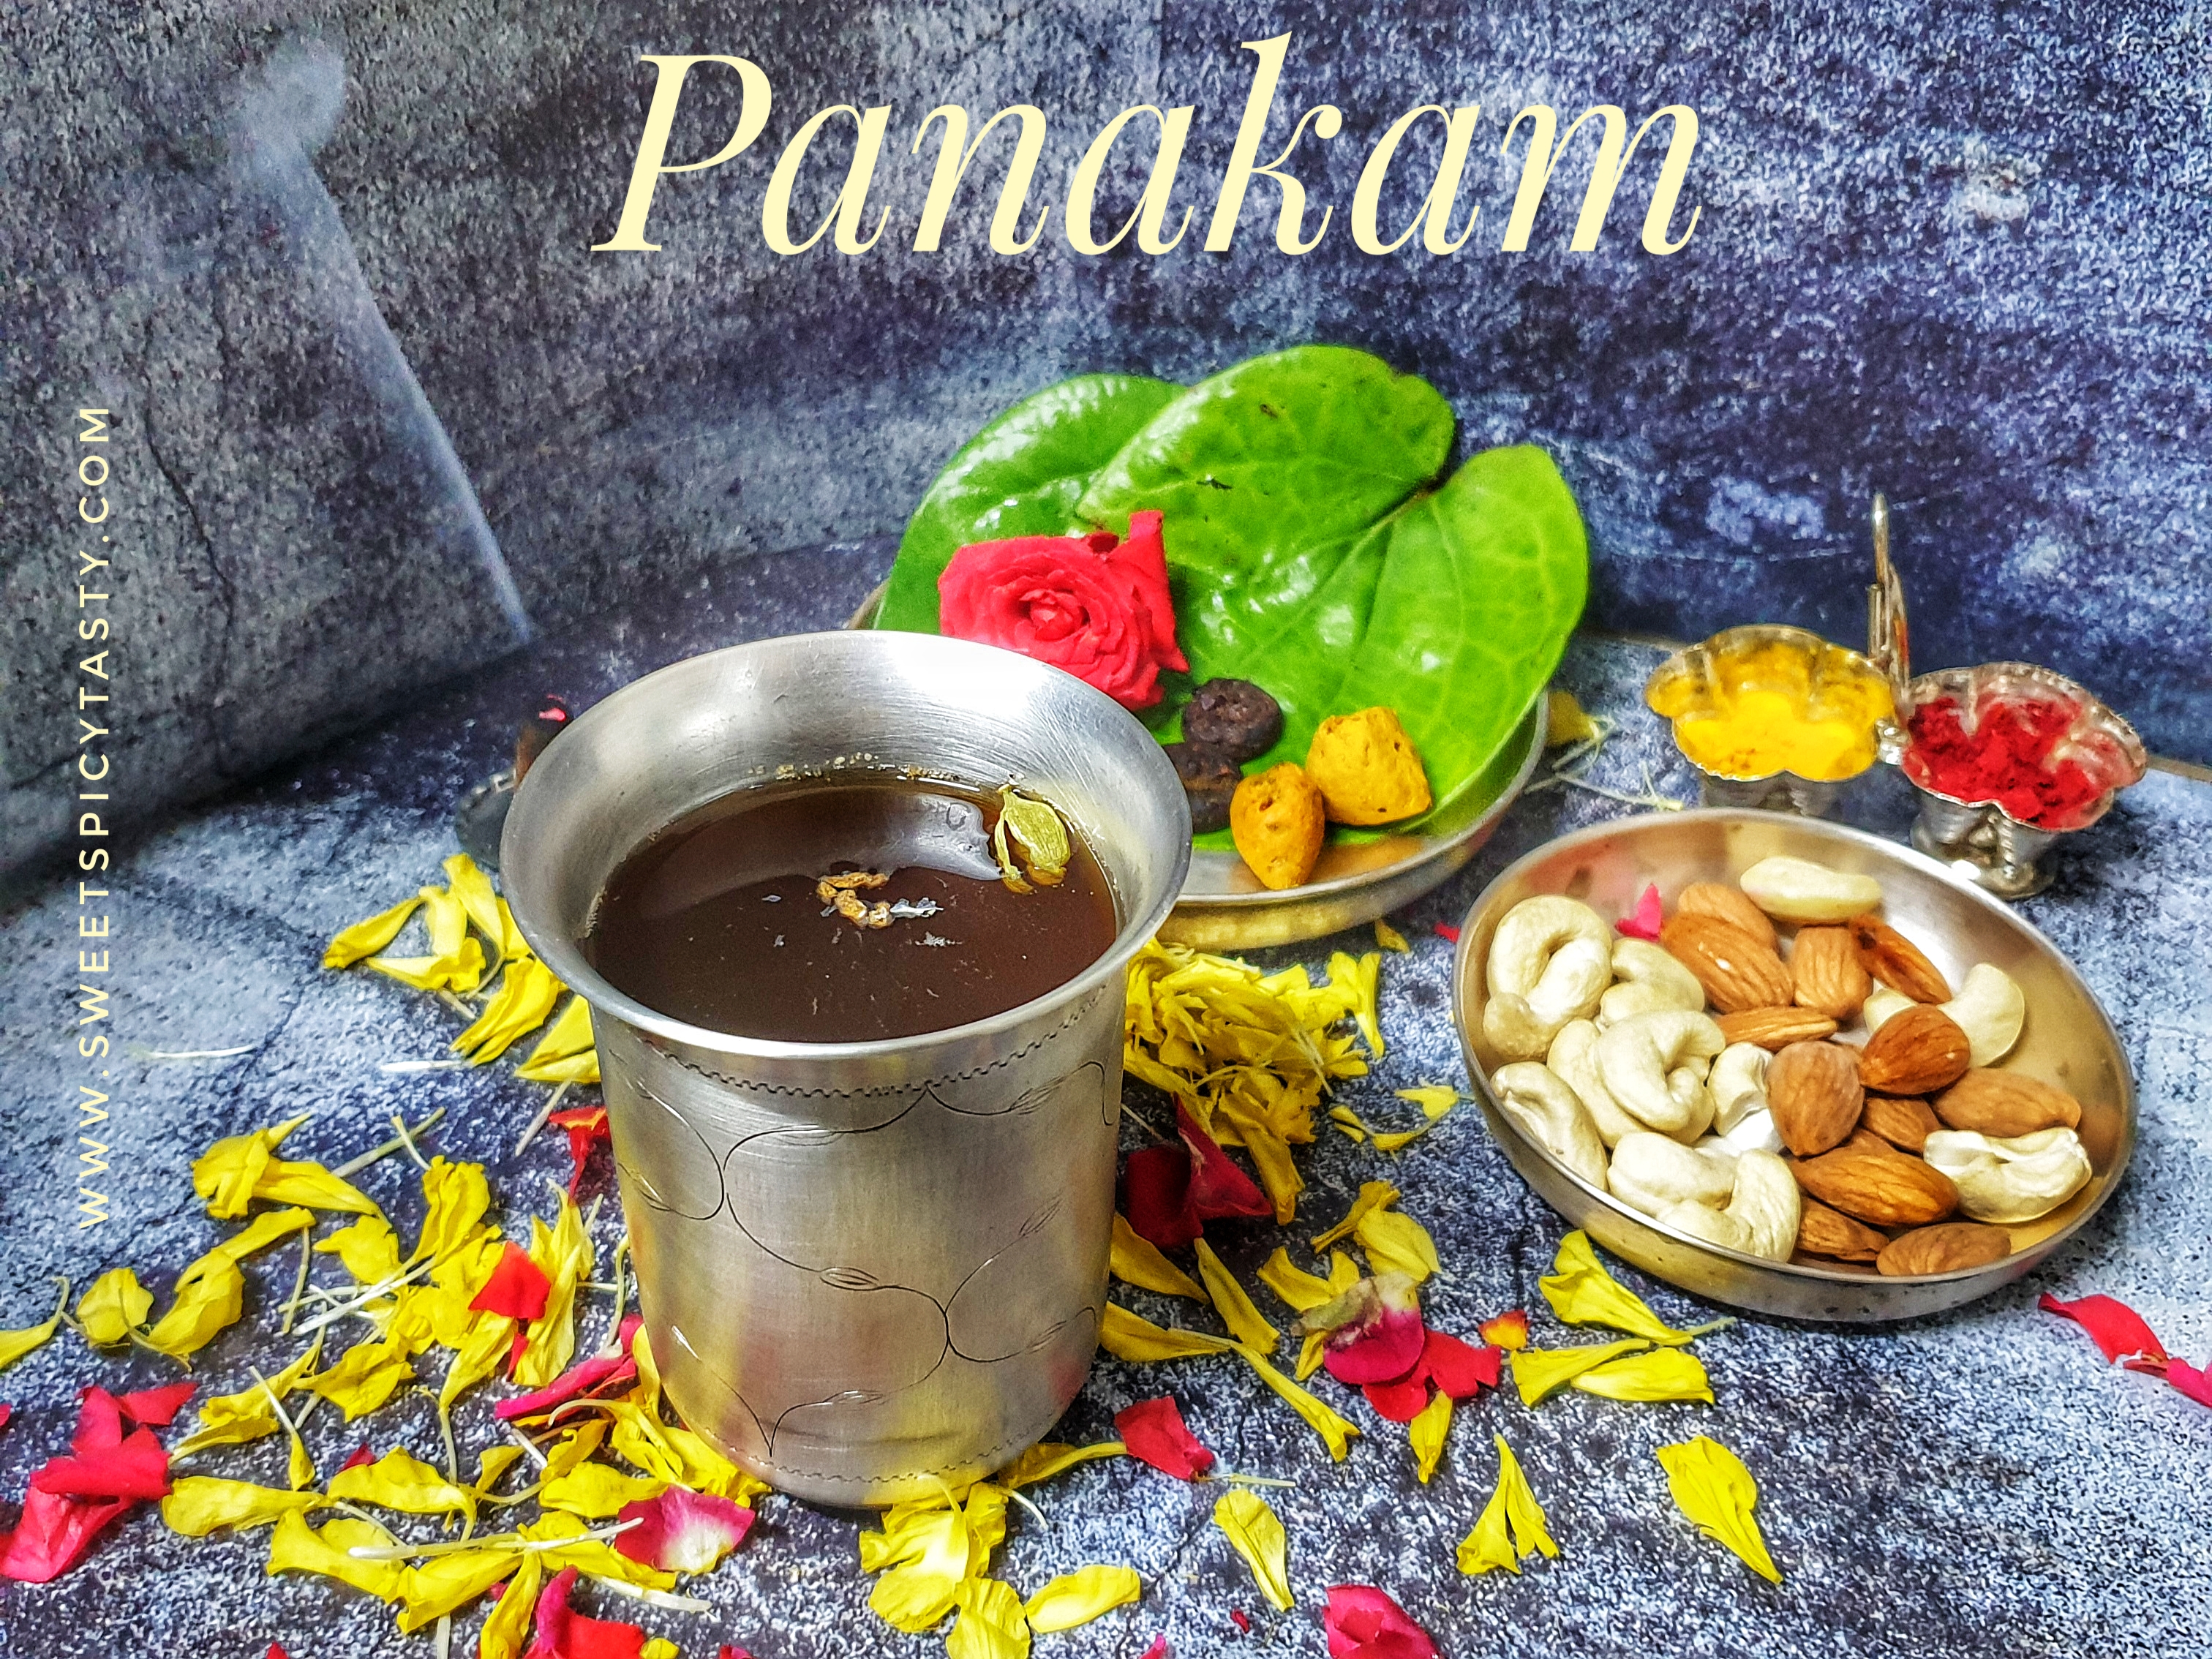
Paanakam| Paanagam - Traditional Indian Cooler (Ramanavami & Narsimha Jayanti special)


Share with friends and family 9 comments:

Paanakam /Panagam is a traditional South Indian summer cooler made using jaggery,ginger powder ,lemon and cardamom powder. Its a power packed energy and health drink to keep the body well hydrated and maintain the body temperature during the severe summer days .
The jaggery version of Paanakam is popular in Tamil Nadu while the lemon based Paanaka is popular in Karnataka . 

(Photos and write up updated on 20th March 2022)


Jaggery is a very good source of iron and potassium while lemon and ginger have antioxidants and good digestive properties. Since summer is the time when the heat wave causes excess dehydration and also leads to increase in body heat, a glass of chilled Panakam on a daily basis will help fight all the dehydration, tiredness and exhaustion .

In  Tamil Nadu,we can find huge stalls along the road side where free Panakam is served to the wiery pedestrians . Even temples have huge pandals or shamianas where panakam and neer mor (spiced Buttermilk) is served to the devotees as prasadam after the Pooja rituals.

Ramanavmi and Narsimha Jayanthy are the two main summer festivals where in Paanakam is a main offering .

Prasadam for both the festivals is incomplete without the Paanakam along with 


Ramanavami 2022 - April 10th

Ramanavmi is celebrated to rejoice the birth of Lord Rama ,the 7th avatar/incarnation of Lord Vishnu . The festival normally falls in the Gregorian Month of March or April every year . As per Indian Calender it is celebrated on the 9th Day of the Chaitra Shukla Paksha (9th day after Amavasya).
Devotees chant verses from Ramayana or sing hymns/bhajans in praise of the Lord and offer prasad and Arati towards the end of the Pooja Rituals.


Narsimha Jayanty is celebrated to rejoice the 4th Incarnation of Lord Vishnu on the 14th day of Vaisakha Shukla Month (14th day after Amavasya); Generally it is in the Gregorian Month of May.
Lord Narasimha incarnated as Half Man and Half Lion to save Prahlada- an ardent devotee of the Lord Vishnu from his Demonic Father Hrinyakashyapu.It is believed that the lord incarnated at the time when the Sun was about to set and the Moon was to rise called as Andhi Sandhi Time .Hence the festival is also celebrated at that time of the day .Devotees observe fast the whole day and immerse in the activities like singing bhajans,doing some kind of charity work and finally break their fast after offering Pooja,Prasad and Arati to the Lord.


This post includes step by step video to make Paanagam / Paanaka


Preparation Time : 5mins
Cooking Time : Nil
Serves  : 2-3 glasses ( 300 ml approx)
Complexity : Simple

Ingredients

1 cup powdered jaggery (160-180 gms)
1.5 cups water (1 cup is 200 ml approx)
1 teaspoon dry ginger powder/chukku podi/shunt powder
2-3 cardamoms/elaichi/elakka powdered
pinch of edible camphor/pacchai karpooram
2-3 teaspoons lime juice
few strands of saffron/kesar/kungumapoo

Method
  • Soak the jaggery in 1.5 cups of water and let the jaggery melt .
  • Stir it well and filter it to remove any form of impurities.
  • Now add the ginger powder,cardamom powder,edible camphor,saffron strands and stir well.
  • Lastly add the lemon juice mix well and serve it chilled or as is.

Pin me up