Showing posts with label Deep fried snacks. Show all posts

September 12, 2022

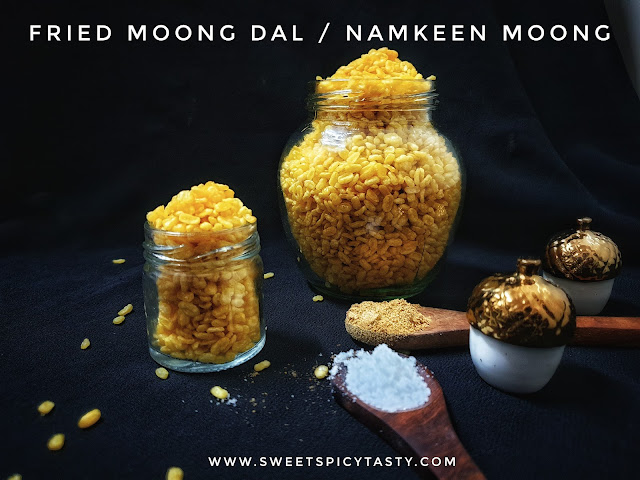
Namkeen Moong Dal | Fried Moong (split green gram)- Vegan snack


Share with friends and family 9 comments:

 Namkeen moong dal is a very tasty and addictive tea time snack which is enjoyed by all age groups .

A popular snack which is sold by major snack brands, in India and abroad this certainly is a Go to snack which most of us will stock at home to just munch on for time pass .

You can also make amazing chaat with this fried moong dal by adding chopped onions ,tomatoes, fresh corriander and dress with some fresh lime juice .


To make namkeen moong dal at home ,you need to have a few pre preparations, but if you plan your work accordingly, this tasty snack can be made just in time for your tea time or the time when kids are back from school.

The key to get perfectly fried moong dal is to pat dry the soaked moong dhal on a cotton cloth until it is totally dry and moisture free . A small amount of moisture also will end in oil splutter while frying which is definitely risky and hazardous.  So take care to dry up the moong dhall before frying.

The fried moong dal is seasoned with basic spices like salt and chat masala ,but you can also add some red chilli powder if you may like. I prefer to keep it plain salted with a hint of chaat masala . 


Preparation Time - 4 hrs
Frying time - 15 mins
Complexity - easy
Serves  - 3 to 4 

Ingredients 

2 cups of moong dal / yello split gram
Oil to fry
Salt as needed 
Pinch of chat masala 

Method 

  • Wash and soak the moong dal in a bowl of water for 3 to 4 hrs .
  • Drain the water through a colander and spread the soaked moong dal on a soft cotton cloth for about 30 mins under shade so that all the moisture is absorbed by the cloth .
  • Heat up the oil and fry the moong dal in small batches until it turns crisp and appears golden yellow. Fry in medium flame and be vigilant else it will  burn too quickly .
  • To the fried moong dal add salt and chat masala and mix it well .Store it in an air tight container.  Use a dry spoon to use while serving. 
  • Enjoy this addictive snack with your tea or a leisure drink with your friends and family.


May 09, 2022

Mix Dal Vada | Mix Dal bhajiya (pakoras) - Lentil fritters


Share with friends and family 12 comments:

 Dal vada or dal bhajiyas are a tasty and delicious gujurati farsan or deep fried snack which is a popular Street food as well in Mumbai and Gujarat.   Originally dal vadas are made only using Moong dhall also known as Moong Bhajjiyas . 

One must not confuse the Gujarati style dal vadas with the South Indian style Paruppu Vadai as there are some minor variations in terms of seasoning the batter and shaping the vadas while frying. 

To make the dal vadas more tasty and healthy,  a combination of lentils are used to make these bhajjiyas ,even called as pakoras . Serve them with some piping hot tea on a rainy evening or serve it as starters with a lavish meal , this sure is a crowd pleaser and will vanish off in a whiff .

Dal vadas are served with fried chillies sprinkled with salt and some tongue tickling dates tamarind chutney , green chutney  or both.  The vadas are crispy from the outside and fluffy soft from within making it all more the tempting to stop with a few pieces .

Make sure you make a huge batch of batter so that you won't have to regret for having fallen short of crunchy pakoras to treat your family and friends. Trust me,this is not an overstatement as the dalvadas just fly off from the serving dishes,that very addictive .

The trick to getting fluffy and spongy pakoras or vadas is to beat the batter vigorously for 10 to 15 mins to incorporate aeration..donot miss this step, else you will end up with hard and dry bhajjiyas . 

You definitely must try the Cabbage methi pakoras ,Methi na Gota , Aloo Bajjiyas and Faraali Pattice to pair with the evening tea.


Preparation Time - 15 mins

Soaking Time - 2 to 3 hrs

Frying time - 8 to 10 mins per batch

Makes 30 to 40 vadas 

Ingredients 

1/2 cup moong dhall /split yellow lentil
1/4 cup udad dhall
1/4 cup channa dal
4 to 5 green chillies
Small piece of ginger  (skip for jain version) 
1/2 tsp carom seeds /ajwain
Freshly chopped corriander 
1 tsp red chilli powder
1 tsp roughly powdered pepper 
1/4 tsp cooking soda 
1/2 tsp sugar 
Salt to taste
Oil to deep fry

Method


  • Wash and soak all the lentils in sufficient water for 2 to 3 hours
  • After 3 hrs ,drain the water from the lentil . Take the soaked lentils,  green chillies, ginger in a blender or food processor and blend to a coarse paste with very little water .
  • Transfer this batter to a mixing bowl, add salt and whisk it using a hand whisk or beater and beat it continuously in clockwise direction for 10 to 15 mins .The batter will be hard initially when you start whisking and as time proceeds the  batter will begin to feel light and fluffy . Continue whisking till you feel the batter to be very light and it would have doubled up in quantity.  This indicates the batter is aerated .
  • Add the chili powder ,crushed carom seeds, sugar, pepper powder ,corriander and give the batter a good mix ..let the mix be under refrigeration until you begin frying . 
  • Heat the oil in a deep kadai . Drop a small blob of batter,if it sizzles up immediately then the oil is ready for frying .
  • Using a spoon , drop small blobs of batter into the hot oil . Donot crowd the kadai . Fry the vadas on medium flame until the pakoras turn crisp and golden brown . Drain it off the kadai and serve hot .

Pin up


March 17, 2022

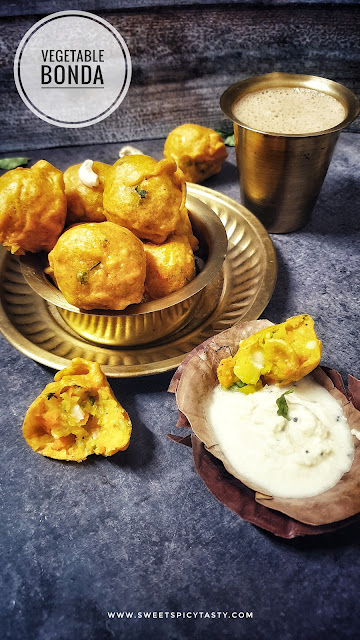
Vegetable Bonda | Mix Veg Bonda | Tarkari Bonda - Vegan Snack


Share with friends and family 7 comments:

 Vegetable Bonda or mix veg bonda is a very popular tea time snack in Southern India. Just as Batata Vada is a loved snack in Maharashtra, similarly Mix veg bonda is a sought after snack just as popular as Vazhakkai Bajji in south india especially in Tamil Nadu .

As the sun begins to set and the evening starts to feel young ,the small food carts  along the streets start preparing to handle the evening rush by dishing out piping hot vegetable bondas and serve them with a slightly runny coconut chutney . People love to enjoy the hot and spicy bondas with some tea as they catch up some good time with their near and dear ones .

Not only is it a famous as a street food,but it is also served at weddings too . A typical Tambrahm wedding would definitely serve these tasty bondas along with tasty flavored Sevai (string hoppers) and some rich and royal sweet dish on the evening prior to the wedding ,while the groom's family is welcomed by the bride's family .

When served for weddings, normally onion and garlic are omitted but on other days you can add them to the vegetable mixture to make it all the more tasty and delicious. 


Preparation Time - 30 to 40 mins
Frying time - 20 to 30 mins
Makes - 15 to 20 bondas 
Complexity - medium 

Ingredients 

For the filling 

5 medium sized potatoes 
3 small carrots finely chopped 
1/2 cup boiled green peas 
3 to 4 green chillies finely chopped 
10 to 12 cashews roughly broken
1 tsp ginger grated or finely chopped 
1/2 tsp turmeric 
Salt as needed 
Pinch of asafoetida 
Lots of chopped corriander
Handful of curry leaves chopped
1 small onion finely chopped (optional)
2 small cloves of garlic finely crushed /chopped (optional)

For the batter
1.5  cups besan /gram flour 
2 tbsp rice flour 
1 tsp red chilli powder
Pinch of asafoetida 
Salt as needed 

Oil to deep fry 

Method 


Preparing the Filling. 

  • Pressure cook the potatoes until soft . Let it cool before peeling the skin.  Boil the chopped carrots in an open pan until soft and well cooked. 
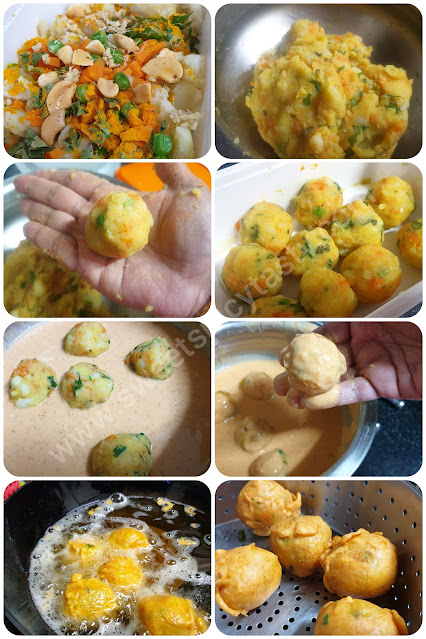
  • In a wide mixing bowl, mash the boiled potatoes roughly, add to it chopped green chilli, boiled carrots, peas, ginger, cashews, curry leaves,asafoetida, corriander, salt and turmeric and mix it well with your hands to form a smooth and nice filling . Adjust salt if needed . If you are using garlic or onion add them at this stage and mix it along with other ingredients. 
  • Pinch out lemon sized balls from the filling and make smooth round balls and keep aside .

Preparing the Batter

  • Place the oil in a deep wok / kadai for heating. 
  • In another mixing bowl,add the gram flour, rice flour, salt ,red chilli powder, asafoetida and make a batter of dropping consistency by adding water gradually . 
  • Incase ,you happen to add more water by mistake,add a little more gramflour to thicken the batter to get to the right consistency. 

Frying the Bondas 

  • Take vegetable mixture/filling dumpling and drop them into the batter carefully .
  • Coat each of the dumpling well with the gram flour batter and carefully drop it into the hot oil.
  • If you have a medium sized kadai, drop only 4 to 5 bondas at a time and never over crowd the frying pan. 
  • Slowly splash oil on the bondas and gently flip it over at regular intervals. 
  • Fry until the oil stops sizzling and hissing and the bondas appear crisp and golden brown.
  • Carefully drain it on an absorbent paper and serve hot with coconut chutney and filter coffee. 


Donot forget to pin me !!


March 10, 2022

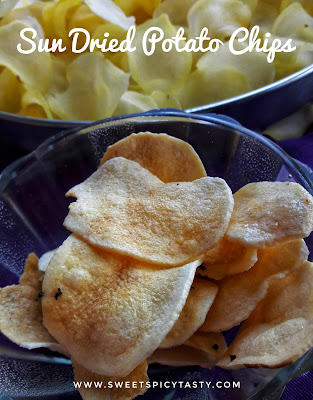
Potato Chips | Aloo Wafers


Share with friends and family 2 comments:

Potato chips / Potato Wafers needs no introduction . Children to adults, there would hardly be anyone who dislikes these paper thin crispy potato chips .

Finally this post is seeing the light of the day after being on my drafts for close to 1 year .I make chips frequently at home but  each time I would miss clicking the pics and this post which is very dear to me never made it to the blog..So this time I made sure I click and publish the post without fail.


A  bowl of potato chips makes up for a perfect company when we are on long drives,  outings, catching up on late night movies,nail biting cricket match or a quite evening with friends over a drink

Would you believe me if I said making potato chips at home was easy ? You  can make potato chips just like the ones we get at the fresh chips outlets where we can see the potato slices sizzling in hot oil before they turn crunchy and crispy.

 It indeed is easy..nonetheless it requires a little pre preparation, but the end result is just perfect to make us forget all the effort that has gone into the making of these crunchy delights .

You may also want to try out  (click the images below for recipes) 


Pin me up as you read the recipe !!


Ingredients
Potatoes - as many as you want
Oil for deep frying
1 tsp salt 
1 tsp red chilli powder 

Method


  • Wash and peel the potatoes.Soak the potatoes in water until you are ready to slice them.This step will prevent the potatoes from turning black. 
  • Using a slicer make thin slices of the potatoes and soak them in cold water for 15 mins. This helps in removing the starch from the potatoes and chips will be crisp and not turn brown while frying. 
  • Heat the oil in a pan and simultaneously take some potato slices out of water and dry them on a kitchen towel to remove excess water.
  • Once the oil is hot enough, drop the potato slices into the oil and fry until the oil stops hissing and the chips are crisp. 
  • Drain on an absorbent paper .
  • In a mixing bowl ,add these fried chips ,sprinkle some salt and chilli powder and give a lightly toss to mix it evenly. Store in a dry air tight container once the chips have cooled down.
Notes

  1. Washing the potato slices and soaking it in water is a very essential step . Do not Miss It . 
  2. If there is starch present in the potato, the chips will turn black very soon and will not get fried properly giving a weird taste.
  3. Ensure that after the slices are dropped in oil, reduce the flame to medium after 1-2 mins and keep stirring the fries occasionally to prevent sticking and even frying.
  4. Patience is the key to getting the perfect crisps . Do not increase the flame for quicker results, the potatoes take time to get crispier. Hastening will make the outer portion crisp while the inner will remain soft and you will end up with soggy fries. Fry only in medium flame and drain them after the sizzling sound stops completely.

March 09, 2022

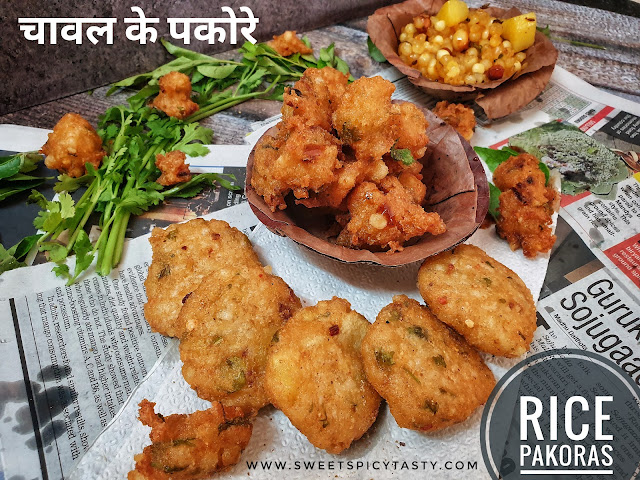
Chawal Ke Pakore | Chawal k tikki | Rice Fritters (Vegan snack)


Share with friends and family 7 comments:

 Does the leftover rice from lunch or dinner make you go crazy ?

Today ,I shall share with you a very delicious and lipsmacking chawal k pakore or chawal k tikki recipe and trust me your family won't even notice the transformation of the rice and you won't have to worry abt wasting the left over Rice .

These pakoras made from rice can be served as appetisers for parties or get together . They are a  perfect crowd pleaser and everyone would love it . You can prepare rice in the morning if you are hosting a party in the evening or night as the rice has to be little dry and grainy before you can make the tikkis or pakodas . The dryness helps in getting crisp and crunchy pakodas ..soft and moist rice will make the pakodas mushy and we don't want that. 

 I am sure we all make the left over Rice turn into lemon rice, curd rice or fried rice and over time it certainly gets monotonous and boring for us as well as our dear family.

From now on you can make these yummy and lipsmacking chawal k pakode or  chawal k tikki and serve it with some tamarind dates chutney and piping hot tea or coffee . At times, I purposely keep some extra rice so I can make these delicious pakodas in the evening for tea time .

You can also add some veggies like shredded carrots , boiled sweet corn , finely chopped methi (Fenugreek) or even palak to make it even more tasty . I had some soaked sabudana (sago pearls) which I added to the pakora mixture and it gave it a nice texture and taste to the pakoras .


Preparation Time - 10 mins
Frying Time - 20 to 25 mins
Serves - 2 to 3 
Complexity - medium 

Ingredients 

2 cups left over cooked rice 
1/2 boiled potato 
1 tbsp soaked sabudana /sago pearls (optional)
Chilli flakes as per taste 
1 green chilly finely chopped 
1/2  tsp kashmiri chilli powder
1 tsp chat masala 
2 tbsp gram flour / besan 
Finely chopped corriander 
Salt as needed 
Oil to deep fry

Method 


  • Take the rice in a blender with some salt and red chilli powder and give a quick pulse . This helps the rice mash well and you don't have to spend time to mash with a masher or your fingers .
  • Take this mashed rice in a big bowl and add the mashed potatoes, gram flour ,chilli flakes,  chat masala,  corriander leaves, green chillies and sabudana if using. 
  • Mix all the ingredients and form a nice and smooth dough.  Adjust salt if needed while mixing the dough .Leave this dough in the fridge for about 10 mins . Refrigeration helps to shape the pakoras as tikkis/patty easily. 
  • Heat the oil in a kadai while the dough is resting in the fridge. 
  • Grease your palms with a little oil, pinch out small portion of the pakoda dough and shape them like a tikki or patty and slowly slip it into the oil and fry until the oil stops hissing and the tikkis turn crisp and golden brown.
  • Alternatively, you can also just roughly pinch out small portions of the dough and drop them into the oil and fry them until crisp and golden brown.
  • Serve with chutney or sauce of your choice and enjoy.

You must definitely pin me to enjoy 😉 


March 02, 2022

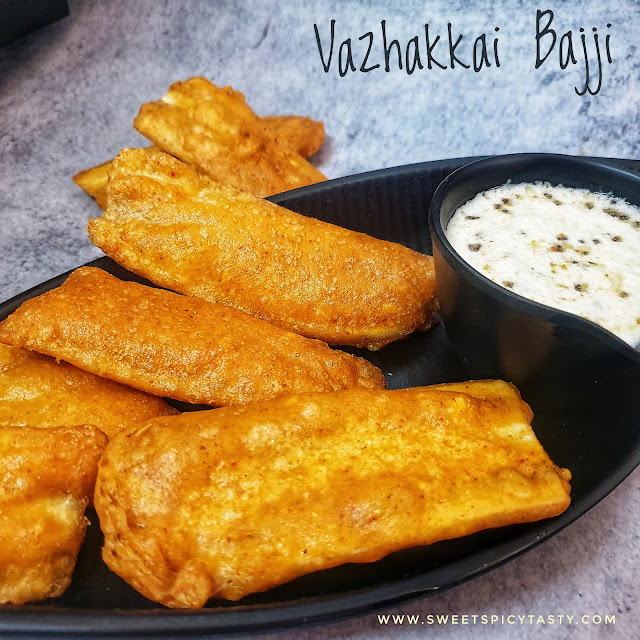
Vazhakkai (Artikaaya) Bajji | Kela Bajjiya | Raw Banana fritters - Restaurant style


Share with friends and family 18 comments:

Bajji is what we call in Tamizh for Bhajiya or Pakoras.  As much as we relish bajjiyas like Aloo Bajjiya , Mirchi Bajjiya ,Bread Bajjiya ,there is a very special place for Vazhakkai Bajji a.k.a Raw Banana or kela bajji. Artikaaya Bajji or Baalekaai Bajji are the names used in Telugu and Kannada for this lipsmacking and traditional tea time snack. 

Vazhakkai Bajji tastes heavenly with coconut chutney and strong filter coffee. It is very easy to prepare bajji at home if we have gram flour (besan) and rice flour handy . No extra spices except red chilli powder ,salt and asafoetida. 

Undoubtedly, my Amma and paati would make amazing bajjis at home but I have very fond memories of enjoying  these vazhakkai bajjis at a small yet very famous eatery in King circle ,Bombay.  Anand Bhavan is a very famous hotel which serves amazing South indian items on the menu. Even to this day ,the restaurant serves in steel plates and very simple and humble seating arrangement and presentation with taste par excellence . 

There used to be 3 to 4 pieces of kela bajji served on a small steel plate with tasty coconut chutney served on the side or to be precise the bajjiyas will served over a bed of coconut chutney .  Those days during my childhood eating out was a pleasure as it was  not  common as today ,also swiggy and zomato were non existent . These small things meant a lot of pleasure in my childhood. 


This month in our Facebook group of food bloggers, Aruna suggested we share recipe of restaurant style food ,but made at home . It indeed is a wonderful theme to replicate our favorite recipe from our favorite restaurant at the comfort of our home.  For a bajji loving family that we are ,I plan to try Aruna's Stuffed chilli bajji as I have some delicious Bajji Chillies in my fridge .bajji chillies are a special variety of chillies which hardly have any heat in them and is best for deep frying .
I had many recipes on my mind, but I finally zeroed down  on this yummy and crispy vazhakkai bajjis as the weather was little chilly and all at home were craving for something  deep fried and spicy. 
I was paired with Seema of Mildly Indian for the theme and she has dished out a delicious  Madras Curry / Vegan Cauliflower curry which is a famous menu in the restaurants of Australia. 


Preparation Time - 15 mins
Frying Time - 20 to 25 mins
Complexity - medium 
Serves - 3 to 4


Ingredients 

2 medium sized raw banana / Artikaya/kacha kela /vazhakkai 
1 cup gramflour/besan/kadalai maav
2tbsp rice flour 
1.5tsp red chilli powder
Pinch of asafoetida 
Salt as needed 
Oil to deep fry 

Method


  • Sift the gram flour,  salt, rice flour, chilli powder into a wide mixing bowl .
  • Add asafoetida and 1/2 cup water and make a thick batter of dropping consistency. Adjust salt and spice level if needed . Whisk /beat the batter to well to induce aeration.  This step makes the batter light and fluffy or you can add 1/2 tsp cooking soda . 
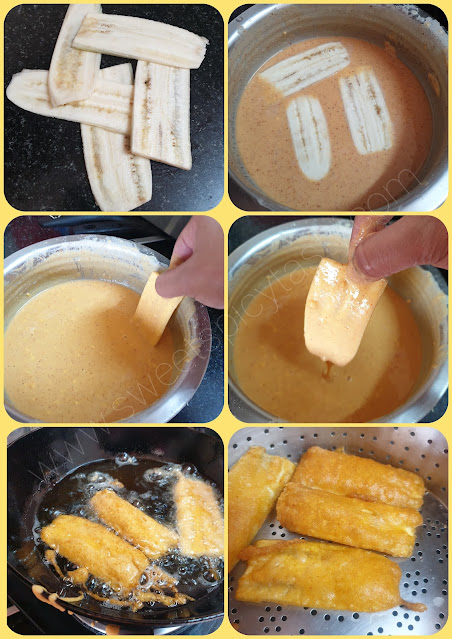
  • Peel the skin of the raw bananas and slice them into medium thick long  slices (refer pic 1 in above image) using a knife or slicer. Soak it in cold water to prevent it from turning black. 
  • Heat the oil in a deep thick bottom kadai/frying pan.
  • Take 3 or 4 slices of raw banana from the water and drain excess water on a kitchen  towel .
  • Dip the slices in the gram flour batter and drop it into the hot oil . 
  • Turn the flame to medium and fry until the bajjiyas turn deep golden brown in color and the oil stops to sizzle .
  • Drain in a colander or on kitchen  tissue and serve hot with chutney or sambar .

Tips 
  • If you are unable to cut into long slices ,you can make round slices too .
  • Donot overcrowd the kadai with too many bajjiyas as they won't get fried properly. 
  • When you drop the bajjiyas into the oil the flame must be high,but gradually reduce it to medium else the raw banana slice and inner side of batter will remain u cooked .

Pin me , will you ?


February 12, 2022

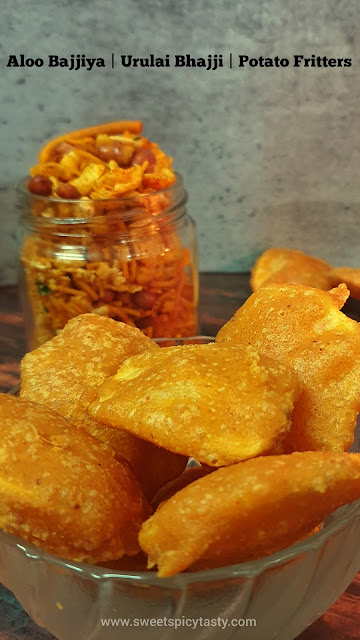
Urulai Bajji | Aloo Bhajjiya | Aloo Pakoras(Potato Fritters)


Share with friends and family 10 comments:

 Bajji , Bajjiya or Pakoras have an emotional connect with us Indians.As much as we love and relish snacks from various cuisines, these gram flour based traditional bajjiyas have a special place in our lives. 

Every region across India enjoys these bajjiyas all round the there . We just need a small reason to prepare bajjiyas and enjoy with hot chaai .

There is also a very funny anecdote that " when it rains the veggies are ready to coat themselves in gramflour and dive into hot oil" ,that is how much we love these fritters /bajjiyas.

Bajjis are  prepared in most Tambrahm homes on the eve of Diwali . DIWALI morning starts with a spoon of Diwali Lehiyam followed by piping hot Idli Sambar , Bajji and Coconut Chutney . This is more like a Diwali Day ritual and no one likes to skip on this delicious fare :-) 


There may be minor differences in the way the fritters are prepared but the base remains the same , gramflour batter , cut vegetables and oil for deep frying .

Potatoes ,raw banana,onions and special type of chilli known as Bajji Mirchi or Bajji Molaga are the preferred and sought after vegetables used for making bajjiya.  We can also make bajji using spinach leaves , brinjal and carrots too .

Today we will relish some piping hot ,crispy and spicy Aloo Bajjiya or Urulaikizhangu Bhajji as it is called in Tamil. 

Another interesting part is bajji and sojji (bhajiya and sheera ) were mandatory snacks served alongside filter coffee by the bride's family during the bride seeing event in Tamil homes.  The bride's culinary skills were judged by these two items served as it was believed that the bride has prepared them to serve her future family . Now.,things have changed and all these just remain funny anecdotes for us to remnisice and smile . 


Preparation Time - 20 mins 

Frying Time - 15 to 20 mins

Complexity - medium 

Serves - 2 to 3

Ingredients 

2 medium sized potatoes 
1/2 cup gram flour /besan /kadalai maav
2 tbsp rice flour 
1 tsp red chilli powder 
1/2 tsp haldi powder
Salt as needed 
Pinch of asafoetida 
Pinch of baking soda (optional)
Oil for deep frying 

Method

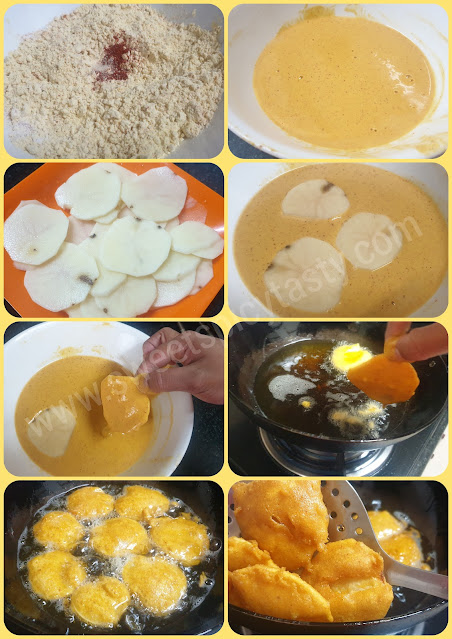
  • Peel the potatoes ,wash and soak them in cold water for 5 mins. This helps remove the starch from the potatoes and tastes good while coating the besan and frying .
  • In a wide mixing bowl sift the gram flour, rice flour ,chilli powder ,asafoetida and salt.  Add water little by little and make a batter of dropping consistency ,keep aside.  If using ,we will add soda just before we are ready to fry the bajjiyas.
  • Using a slicer or knife, cut the potatoes into medium slices and keep the soaked in water for 5 mins .drain the water and spread the potato slices on a kitchen towel or thick tissue to remove excess water .
  • Place a kadai with enough oil for deep frying and heat it up . At the same time add soda (if using) to the batter and mix it well . Leaving the batter for a long time after adding soda will soak up more oil while frying, so ensure you don't rest the batter long after adding soda. 
  • Dip  each potato slice in the batter and drop into hot oil . Donot crowd the kadai .you can  add about 4 or 5 slices of potato depending on the size of your kadai. 
  • Fry on medium flame and occassionally toss the bajjiyas using a ladle . Once the hissing or bubbling of oil stops ,you can carefully drain and remove from the oil . Repeat the same for all slices of potato .
  • Serve hot with green chutney, coconut chutney or even tomato sauce and some piping hot filter coffee or masala chai .

You may also want to try out the other most famous and loved Vazhakkai Bajji / Kela Bajjiya .

Ready to pin me ??? 


January 24, 2022

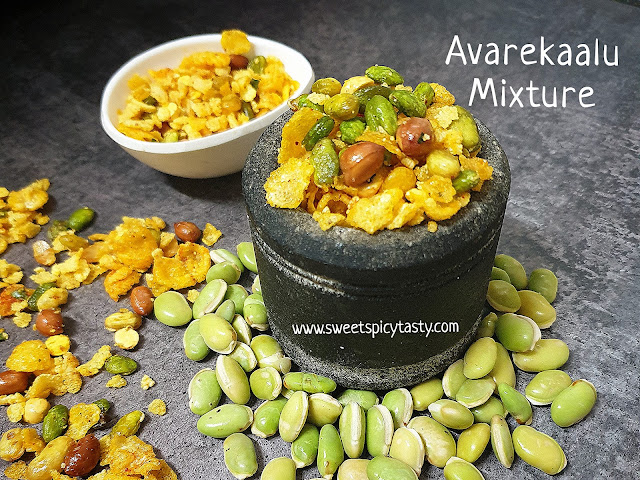
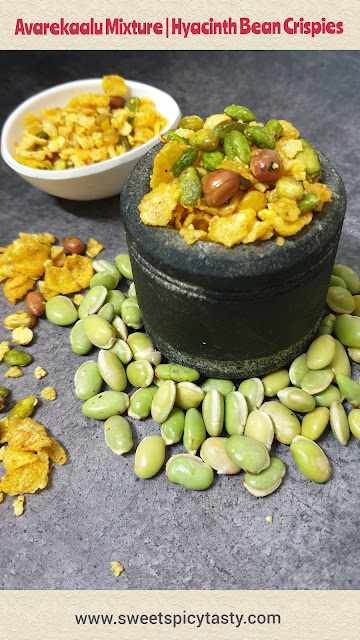
Avarekaalu Mixture | Hyacinth Bean Crispies


Share with friends and family 5 comments:

 Avarekaalu Mixture is a speciality of Karnataka prepared by deep frying fresh hyacinth beans /avarekaalu . This tea time snack is very  very addictive and pairs well with piping hot filter coffee or Masala Tea .  

Fresh Avarekaalu is a delicacy and people's favorite in karnataka and is widely used in many recipes during the winter season.  I have tasted this yummy mixture in many occasions and from then it has been on my mind to try it at home .

Avarekaalu Akki roti , Avarekaalu Uppit are 2 of my favorites made from fresh hyacinth beans which are a must have in the season atleast couple of times .

This time around I got some really fresh and tender hyacinth beans and the weather was also just perfect to prepare and munch on.

There is no particular or hard and fast recipe to prepare this mixture, its purely eye ball measures and ingredients of your choice.  

Only one thing we need to take care is to soak the fresh avarekaalu for about 3 to 4 hrs in water and peel the outer skin before making the mixture. This is called Hithkidha Avarekaalu .


How to prepare Hithkidha Avarekaalu /Hithkidha Avarebele ? 

Soak the freshly peeled avarekaalu from the pods in a wide bowl containing water for 4 t 5 hours. Drain the water and press the beans between your fingers lightly and viola,the skin just comes off . Discard the skin and spread the peeled beans on a wide tray or on a cotton muslin cloth for the moisture to be absorbed before making the mixture. 


Preparation Time - 4 to 5 hrs

Frying time - 20 mins

Complexity - medium 

Ingredients 

1.5 cups hithkidha avarebele
1/4 cup groundnuts
3 to 4 tbsp roasted gram /hurigadle/pottu kadlai
1/2 cup thick poha /avlakki/aval 
1 cup raw corn flakes /makai poha 
Fresh curry leaves 
1/2 tsp turmeric
1 tsp red chilli powder
1/2 tsp powdered sugar 
Salt as needed
Pinch of asafoetida 
Oil to deep fry

Method 


  • Heat oil a deep kadai /wok .
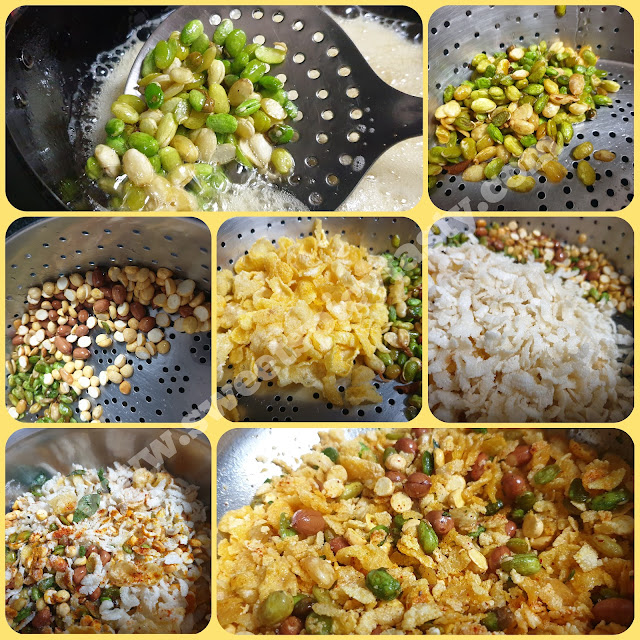
  • First add the hithikdha avarebele and fry until it turns crisp and moisture free. Initially while frying ,it will remain at the bottom of the kadai and as the frying continues the avarebele will start floating on top . Once all the avarebele start floating on top,the oil will stop hissing and sizzling.  This indicates that the avarebele are fried well ..drain the slowly onto a colander .
  • Next fry the peanuts until crisp and golden brown followed by the roasted gram and curry leaves .
  • Fry the makai poha till they turn crisp and fluffy. 
  • Lastly fry the avlakki and drain it out .
  • In a wide mixing bowl,gently toss all these fried ingredients along with turmeric, chilli powder, salt,asafoetida, powdered sugar .
  • Delicious avarebele mixture is ready to be enjoyed !

Some more mixture varieties on my blog 

Cornflakes chiwda

Poha Chiwda

Sabudana Faraaali Chiwda

Diwali Spl Mixture (Madras Mixture)


Pinned me yet ? 


December 20, 2021

Methi na Gota | Methi Pakora | Fenugreek Fritters - Gujurati cuisine


Share with friends and family 14 comments:

 Methi na Gota / Methi Bajjiya or methi na pakora is a classic winter delicacy and a popular Street food in Gujurat and Bombay. Even though fresh fenugreek is now available all round the year, there is always a special place for the tender and fresh methi available during winters.

Methi na gota doesn't require any fancy ingredients or preparations as we will invariably have the ingredients in our pantry supply . The main ingredients are gram flour/besan and sooji/semolina with added spices and fresh fenugreek leaves .

I have had these amazingly tasty and delicious pakoras many a times since my childhood.  Come winters,  these methi gotas are always a part of the meal or as tea time snack in most gujju homes .  Carrot halwa and methi na gota are inseparable delicacies during winter. 

Crispy from outside and spongy from inside,these fenugreek Fritters are a perfect treat  on chill evenings and makes it an awesome appetiser or party pleaser option for all kinds of parties and holiday get togethers .

You may serve them with Dates Tamarind Chutney and Green chutney or even a cup of piping hot masala tea makes it an enjoyable experience with friends and family .


Preparation Time -15 mins
Frying Time- 20 mins
Complexity - Simple 
Serves - 3 to 4

Ingredients 
1 cup gram flour/ besan
1/4 cup semolina/rava
1/2 cup finely chopped methi Leaves
1/4 cup finely chopped corriander 
1 tsp grated ginger
1/2 tsp turmeric 
1 tsp red chilli powder 
1 tsp white sesame seeds 
1/4 tsp jeera/cumin
1/2 tsp sugar
Juice of 1/2 lemon
Salt as needed 
1/4 tsp cooking soda 
Water to make the batter 
Oil to deep fry 

Method 


  • In a wide mixing bowl,mix the gram flour,salt,semolina, turmeric and red chilli powder. 
  • To this add the freshly chopped corriander, methi ,ginger and sesame seeds .
  • Mix it well with a spoon and make a batter of dropping consistency by adding water little by little .whisk it well to form a lump free batter.
  • Let the batter rest for 10 mins while you heat up the oil for frying.
  • Just before frying add the lemon juice,  soda and sugar . Whisk the batter quickly and drop small balls of batter in the hot oil . Donot over crowd the frying pan.  Fry on medium flame until they turn crispy and golden brown.
  • Drain the pakoras carefully and serve hot with chutney and tea.  

Some more must have winter delicacies 

Gajar Halwa / Carrot Halwa 

Doodhi (bottle gourd) Halwa 

Doodhi Muthiyas (steamed)

Cabbage Methi Pakoras 

Methi Pooris 

Methi Dal 

November 01, 2021

Sev | सेव - Diwali Snack


Share with friends and family 10 comments:

 Sev and Ghatiya are two quintessential traditional snack made during Diwali in North India . 

Sev is a versatile savory snack made from besan /gram flour.  It can be served as is during tea time, added to Chivdas or used on various chats  like BhelpuriMasala PapadSev Puri for garnish.  I prefer making this thin sev at home and keep a batch ready most of the days so that it is easy when I plan to make chaat for dinner or evening snack.

In Tamil Nadu,we make Omapudi which is same as this sev but flavored with the essence of Ajwain/ Omam/Carom water . 

Requires just the basic ingredients from the pantry and the sev press of murukku maker with the correct mould to press the dough out of the sev press.   If you like you may flavor it with pudina extract , spinach extract or even garlic extract to get the desired flavor sev .

The only tricky part is kneading the dough to the perfect consistency so that it easily slips out of the mould and you can shape the sev very comfortably.  

I donot use cooking soda as many recipes call for it to get the crunchiness ,but my sev turns out crunchy as I use hot melted butter and a tsp of rice flour while kneading the dough.  You can skip butter if you are Following Vegan diet and use hot oil instead


Ingredients
2 cups of gram flour/besan/kadalamaav
2 tbsp rice flour
Salt as needed
1 tsp red chilli powder
1tsp haldi powder 
Asafoetida a pinch
2 tablespoon butter or 2 tbsp hot oil 
Oil to fry


Method


  • In a wide mixing bowl, add the flours, salt, asafoetida, red chilli powder and mix it well.
  • Now add the melted butter or hot oil and rub it well into the flour to form a crumbly mixture .
  • Knead the dough by adding water slowly . In case you feel the dough needs more water , you can sprinkle water to complete kneading.
  • The dough has to be soft and pliable . Too hard a dough will make it difficult to press from the sev maker mould. 
  • Heat oil in a kadai and same time grease the sev press and plate well with oil.
  • Take a small portion of the dough and put into the mould and carefully press it over the hot oil .
  •  Flip it over after 2 mins and fry for just 1 more min. Take it off the oil as soon as the hissing sound of the oil stops. Drain it on an absorbent paper or in a colander . 
  • Prepare sev from all the dough and keep the dough covered with a moist cloth while you are making the sev.
  • Crush the sev/omapudi with your hands and store in an airtight container. 
  •  Enjoy with a cup of hot tea or coffee!! 

Have you pinned me ??


October 30, 2021

Thikkat Shankarpali | Spicy Shankarpaali | तिखट जीरा शंकरपाली


Share with friends and family 13 comments:

 Shankarpali , Shakkarpare is a very special snack made during Diwali in most households in India . Known by many names according to region, this is a must have in Maharashtra and Gujarat .  There is  sweet  and  savory version of this yummy and crunchy snack.

Traditionally shankarpali is made using maida / APF ,but these days whole wheat flour is also used owing to health reasons . I for one have grown up eating the spicy Shankarpali made using maida and atleast during Diwali I make this  unfailingly using maida . 

My paati a.k.a grand mom would always keep this stocked round the year and she would say no one can fail with this recipe.  She was an expert in making all types of sweets and savories.

To prepare Thikkat / Spicy Shankarpaali is actually a breeze and the measurements are totally eye ball / random . Unlike other sweets or savories we need not worry about any particular consistency, perfect roasting etc.  

Just 5 basic ingredients viz ; maida ,salt, red chilli powder,  turmeric powder ,cumin seeds and oil to fry from our usual kitchen pantry and we are ready to make this crunchy munchy shankarpaali . This is also known as Thukkadi or Khaara Diamond cuts in the south .

The sweet shakkarpare is very tasty and flaky with subtle sweetness making it delectable and gentle on our palate . I am yet to make the sweet version and you can watch out this space for the recipe when I upload it soon.

Some special and Traditional Diwali Savories for you to impress and surprise your family 

South Indian Mixture 

Cornflakes Chiwda 

Poha Chiwda 

Sabudana Chiwda 

Thikha Ghatiya 

Omapudi / Sev 

Ribbon Pakoda 

Khara Boondi


Preparation Time - 15 mins
Frying Time - 8 mins per batch 
Serves - 3 to 4 
Complexity - Simple 

Ingredients 
1.5  cups maida / APF 
2 tsp red chilli powder 
1 tsp turmeric powder 
1 tsp cumin seeds /jeera 
Salt as needed 
2 tbsp hot oil 
Oil to deep fry 

Method 

  • In a wide mixing bowl ,add the maida ,red chilli,turmeric, salt and jeera and roughly mix with your fingers .
  • Pour 2 tbsp of hot oil over this dry ingredients and rub it well with both your hands to form a crumbly mixture . This is very important to get crunchy and crisp shankarpaali.
  • Add water little by little and knead to a smooth but tight dough.
  • Keep the dough covered to rest for 5 to 10 mins .
  • Pinch out a big lemon sized dough ,dust your working platform with little maida and roll out the dough into a medium thick roti .
  • Take a knife or pizza cutter and mark cuts to form diamonds or small squares .
  • Take these cut pieces and keep them on a plate while you heat the oil. 
  • Once the oil is heated properly reduce to medium and drop these pieces into hot oil carefully and fry them with occasional flipping until it turns crisp and golden brown. The oil must stop sizzling before you can remove it .
  • Drain it carefully and let it rest for a while before you transfer to a container. 
  • The shankar pali may look soft initially after frying but it will get crisp in about 20 mins.
  • Transfer to an airtight box and keep covered. 

Pin me to your board !! 


February 01, 2021

Bread Bhajiya | Bread Pakoras


Share with friends and family 7 comments:

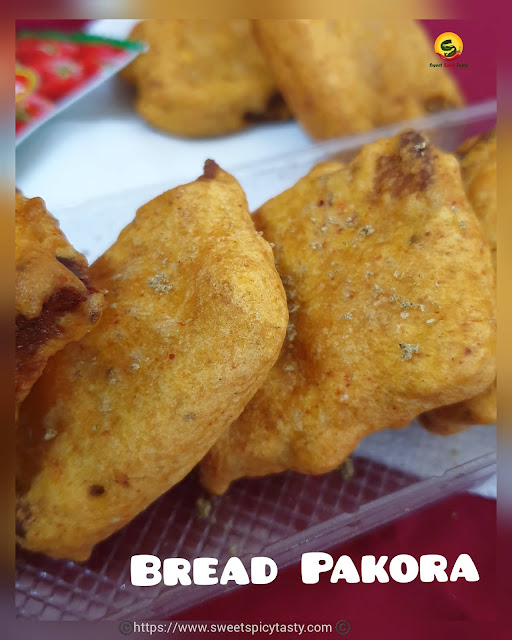
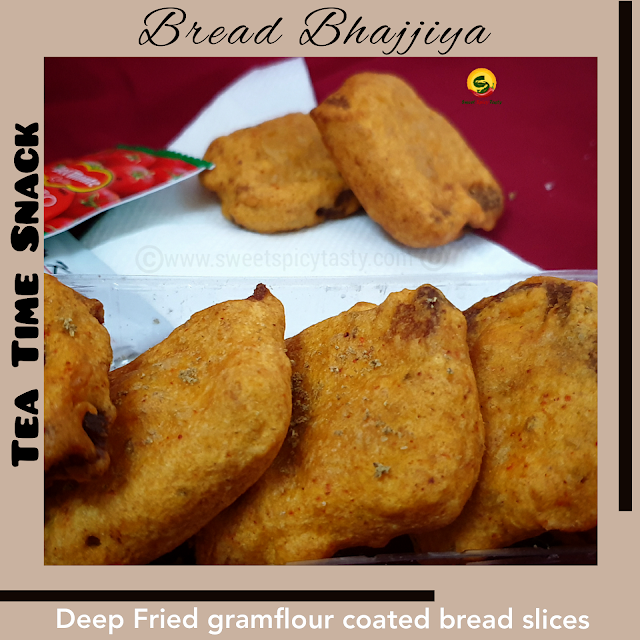
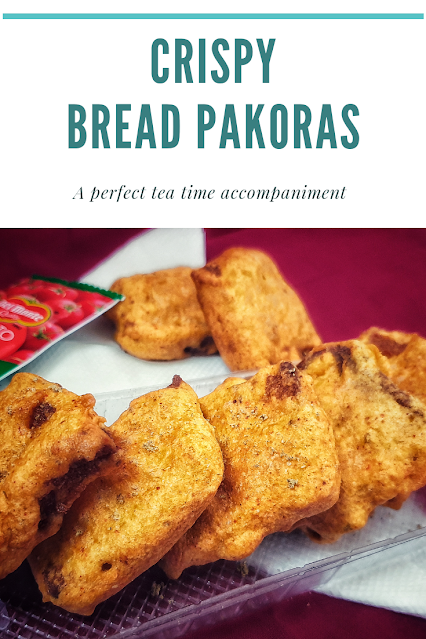
 Bread Pakoras or bread bhajiyas are very famous as street food special across the northern part of India. The snack is filling all by itself that many people have it even as a lunch option if they are pressed for time or have no restaurants close by. 

Bread slices are dipped in gramflour batter which is spiced using red chilli powder , finely chopped chillies and the slices are deep fried in oil.  

Apart from the simple variant, there are many variations like stuffing two slices with potato filling and then deep frying the gram flour coated bread or at times slices are layered with green chutney and sauce and then deep fried

Bread Pakoras or bread bhajiyas are very famous as street food special across the northern part of India.  Bread slices are dipped in gramflour batter which is spiced using red chilli powder , finely chopped chillies and the slices are deep fried in oil.  Bread bhajji, bread pakora , ब्रेड भजिया   ,bread pakoda, how to make crisp bread bhajiya at home

Street food culture basically came into existence to help people especially laborers have some food which can be affordable and they can easily grab a meal as they keep working..but over the time it so happened that Street food became everyone's choice due to various varities , options and tasty choices being made right in front of your eyes and at a pocket friendly price too. 

Bread Pakoras or bread bhajiyas are very famous as street food special across the northern part of India.  Bread slices are dipped in gramflour batter which is spiced using red chilli powder , finely chopped chillies and the slices are deep fried in oil.  Bread bhajji, bread pakora , ब्रेड भजिया   ,bread pakoda, how to make crisp bread bhajiya at home

If you are wondering why am I talking of street food , then let me tell you this week my namesake who blogs at Photowali, suggested we share popular Street food recipes for the 283rd week of FMBH . Priya has shared everyone's favorite Pav Bhaji as part of the theme posting.

Bread or paav is widely used in street foods all over India. Children as well as adults both love to munch on delicacies made using Bread. 

If you are a bread lover like me, then you must definitely check out these special street foods of Bombay which are too hard to resist. 

Mumbai Special Toast sandwich 

Vegetable Cheese Grill Sandwich 

Buttery Paav Bhaji 


The other famous street food delicacies from Mumbai is also on my blog , do try them and I  promise you will be spoilt for choices 😉  . The links are added below here 


At home we  like our bread pakoras plain and spicy without any stuffing . I generally make the batter a little spicy by adding some extra chilli powder . The bread slices are either cut into triangles or small squares  , both of them taste equally delicious.  I retain the bread crust and don't cut the edges . These edges when deep fried in oil gives a very nice crunch while we take a bite of the pakora . Sprinkle some chat masala over the bajjiya and serve it with hot masala tea.

Bread Pakoras or bread bhajiyas are very famous as street food special across the northern part of India.  Bread slices are dipped in gramflour batter which is spiced using red chilli powder , finely chopped chillies and the slices are deep fried in oil.  Bread bhajji, bread pakora , ब्रेड भजिया   ,bread pakoda, how to make crisp bread bhajiya at home

Preparation Time- 10 mins

Frying Time - 20 mins

Complexity - simple

Serves - 3 to 4 

Ingredients 

6-7 bread slices 

1 cup gram flour/besan

2 tbsp rice flour

2 tsp red chilli powder 

Salt as needed

1/2 tsp ajwain/carom seeds 

Pinch of asafoetida 

Chat masala to sprinkle.

Oil to deep fry

Method 

  • Cut the bread slices in to triangles or small squares the way you like .
  • In a wide mixing bowl , add the gram flour , rice flour , salt, chilli powder ,carom seeds and asafoetida with water and make a batter . The batter should be off dropping consistency like that of dosa batter .
  • Heat the oil in a deep kadai. 
  • Dip these bread slices in the gram flour batter and drop them into the oil carefully. 
  • Fry them on medium flame until the oil ceases to sizzle and the bhajiyas are fried to golden brown color and look crisp .
  • Drain them on an absorbent paper and serve hot with some green chignrybor tomato sauce with a dash of chat masala sprinkled over .
⬇️ Show some love by pinning this recipe ⬇️

Bread Pakoras or bread bhajiyas are very famous as street food special across the northern part of India.  Bread slices are dipped in gramflour batter which is spiced using red chilli powder , finely chopped chillies and the slices are deep fried in oil.