Showing posts with label Fenugreek/Methi. Show all posts

August 02, 2022

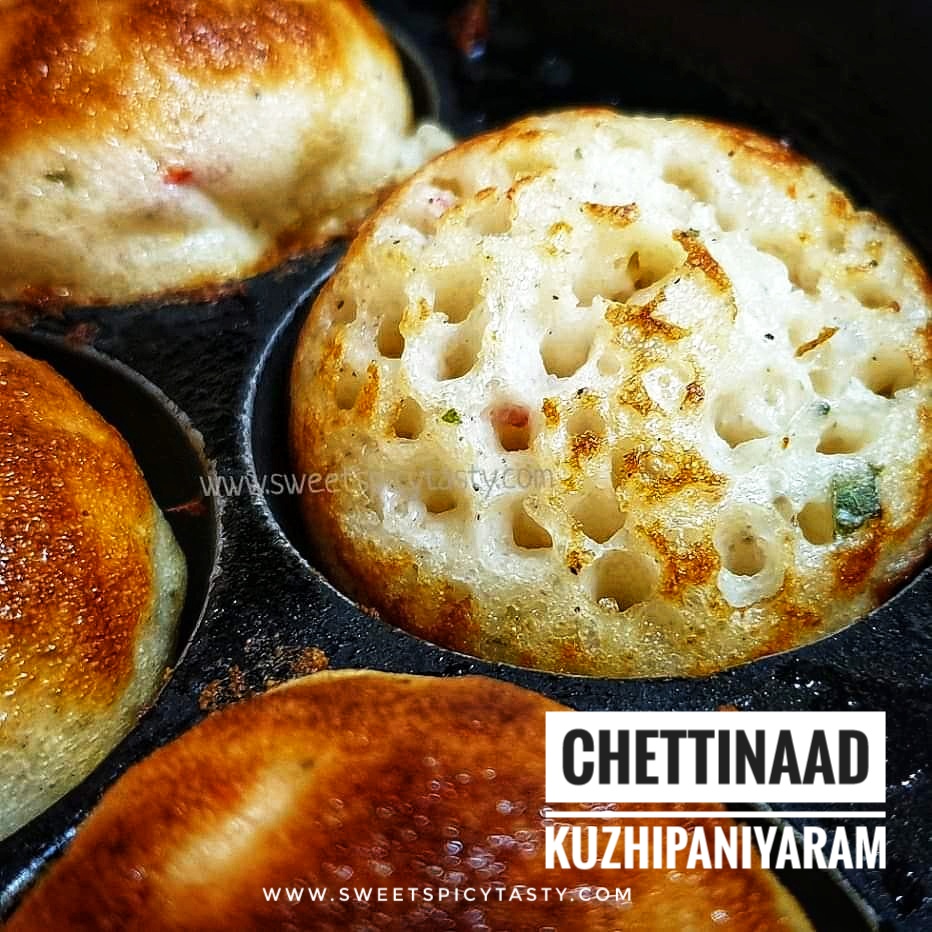
Chettinaad Kuzhipaniyaram - savory snack


Share with friends and family 10 comments:

 Kuzhipaniyaram is a very tasty and delightful savory snack which takes a very important place either for breakfast or evening snacks  in Tamil Nadu.

Kuzhi in Tamil means cavity/depression and paniyaram means snack in general . So Kuzhi paniyaram means a snack with a depression..sounds funny right ? Basically kuzhi refers to the cavity in the mould of the pan which is used to prepare this snack. 

Kuzhipaniyaram is made in a special vessel called as paniyarakal . It is the same pan which is used to make Sweet Appams ,paddu or gunthaponganalu .

I have already shared the other variant of Paniyaram made from regular Idli batter ,but this chettinaad Kuzhipaniyaram is a special recipe where the batter is ground solely for the purpose of making paniyarams.

Some classic recipes using the Paniyaram Kal / Aebelskeiwer Pan 
Jackfruit Nei Appam

Watermelon Nei Appam

Paddu/Gunthaponganalu

Kunukku Paniyaram

Chettinaad is a region in the Sivagangai district in Tamil Nadu (Southern India) . Chettinaad is known for amazing cotton sarees,Athangudi tiles and lipsmacking food with bold flavor profile especially non veg .

Chettinaad cuisine is known for its pungent and spicy flavor and variety of food ranging from main course , snacks to sweets and savories . As much as they are famous for non veg ,there are a lot of vegetarian options as well .

 Kuzhi paniyaram is served with coconut chutney and /or thakali(Tomato) chutney and some piping hot filter coffee. 

Kuzhipaniyaram also known as uppu appam should not be confused with the other chettinaad special known as Vellayappam .

Vellayappam is a totally different recipe and it has been very well explained by my co blogger Radha on her blog who is my partner this month for the Shh secretly cooking challenge ..we are celebrating Chettinaad cuisine suggested by Kalyani of Sizzling Tastebuds. Kalyani has shared a classic recipe Kaigari Mandi which is very delicious and a perfect accompaniment for main course or idli/dosas .


Soaking Time - 6 to 7 hrs
Fermentation Time - 8 hrs
Preparation Time - 30 mins
Cooking Time - 20 mins
Serves - 5 to 6

Ingredients 

1 cup raw rice (strictly no basmati rice)
1 cup idli rice 
1/4 cup whole udad dal (udad gota)
1 tsp fenugreek seeds 
Salt as needed 

For tempering 
1 tsp mustard seeds
2 to 3 green chillies finely  chopped 
Handful of curry leaves
2 tbsp grated coconut
1/4 cup oil
Fresh chopped corriander 
1/2 onion finely chopped (optional - I haven't used )

Method

  • Wash multiple times until the water is clear. Soak the rice and lentils with fenugreek in water for 5 to 6 hrs.
  • Grind the soaked rice and lentils in a blender or grinder to a fine smooth paste .Batter should be of idli batter consistency not a very runny batter . Let the batter ferment overnight or for 8 hrs . 
  • Before making the kuzhi paniyarams , we need to prepare a tempering that will be added to the batter. 
  • To prepare the tempering, heat about 2 tbsp oil in a pan and splutter the mustard seeds, followed by the green chillies,  curry leaves and fry the onions if using until they turn pink and soft . Lastly add in the coconut and give a quick stir .Add this tempering along with finely chopped corriander to the batter and mix well . 
  • Heat the paniyaram pan and add a few drops of oil in each cavity . 


  • Once the pan is well heated ,add the batter to each cavity and remember to fill only 3/4th of the cavity . The batter on cooking will raise and it needs space to swell . So if you fill it to the brim,the batter will overflow making it a mess .
  • The paniyarams will develop lot of pores as they are cooking, these pores are perfect indicator of a well fermented batter . Once the batter appears cooked on top ,carefully flip it over and cook the underside until it turns brown and crisp .Cooking has to be on medium flame throughout. 
  • Remove the appams /paniyarams from the pan and serve hot with chutney of your choice. 

Pin me up


January 10, 2022

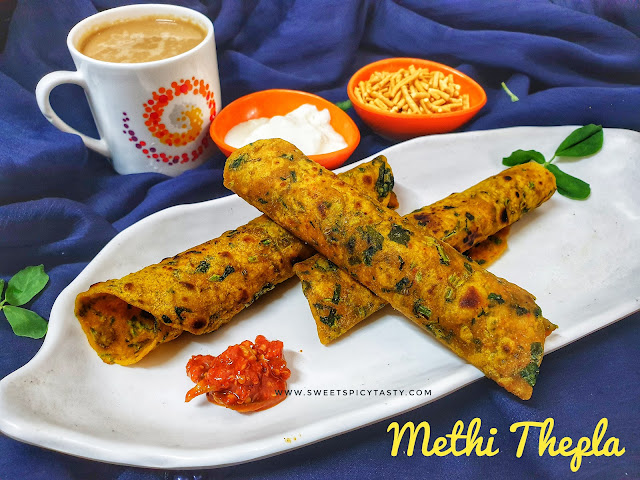
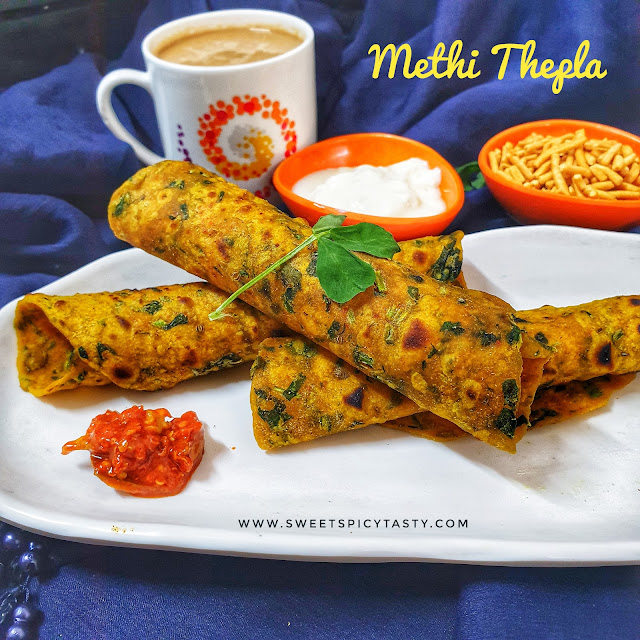
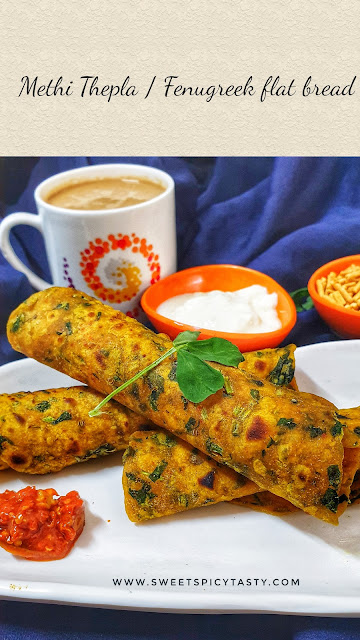
Methi Thepla | Fresh fenugreek flat bread


Share with friends and family 7 comments:

A typical gujurati breakfast on a winter morning will comprise of piping hot thin methi theplas served with spicy mango pickle, curd and aromatic steaming hot masala chaai .

I am sure this description is making you drool right away ! I had already posted a recipe of Kasuri Methi theplas which are made from sun dried fenugreek leaves during off season when fresh fenugreek isn't available. Today we shall see how to make the tastiest and perfect methi theplas using fresh fenugreek leaves .

Methi theplas make a very frequent appearance in my home during winters.We love to have hot hot theplas for dinner alongside some simple gravy or even plain dal but the best combo for theplas is potato curry if you are having it for dinner or packing it for a picnic lunch .

Separating the tender methi leaves from the stem is the only time taking part which we need to do very patiently.  If the stem is tender and thin,then I chop that also finely along with the leaves but make sure you discard the stem of they are too thick . Thick stems will make it difficult while rolling out the theplas and the theplas will tear which we don't want.  


Preparation Time : 10 -15 mins
Resting Time : 15 mins
Cooking Time : 2 mins per thepla
Makes : 13-14 theplas
Complexity  : Medium

Ingredients
2 cups whole wheat flour
2 tbsp curd
2 tbsp besan / gram flour
1/2 tsp ajwain/carom seeds 
1 tsp haldi / turmeric
1 tsp red chilli powder
1 cup packed - finely chopped fresh methi 
Salt as needed
Oil to fry the theplas

Method


  • In a wide mixing bowl add in the haldi powder , red chilli powder ,ajwain and salt to the chopped methi and mix it well with your fingers to release the flavor and essence of methi .
  • Add  wheat flour,gramflour, 1 tablespoon oil,curd to the methi and knead a soft but pliable dough by adding water at intervals . 
  • Methi when mixed with salt and spices will release some water ,so be careful while you add water to knead the dough. Just sprinkle water little by little and knead.
  • Coat it with some oil and knead again and keep covered with a tight lid or a muslin cloth and set aside for 15 mins. 

  • Pinch out small balls from the dough , dust it with some dry wheat flour and roll it into thin rotis using a rolling pin.
  • Heat a tawa or griddle and put the rolled out thepla on the hot tawa .
  • Cook on one side with a little oil and flip over.  Do it on low flame. 
  • Drizzle some more oil and cook the under side until it is well cooked.
  • Use oil little generously if you want to keep the theplas for 3 or 4 days . The oil will ensure the theplas won't get spoilt. 
  • Take it off the pan and store it in a dry container or wrap in aluminum foil .

Some more lipsmacking delicacies using Fresh Methi 

Methi na Gota (pakoras)

Cabbage Methi Pakoras 

Methi Puri 

Methi Dal 

Aloo Methi Sabji


Donot forget to pin me up :-) 


December 20, 2021

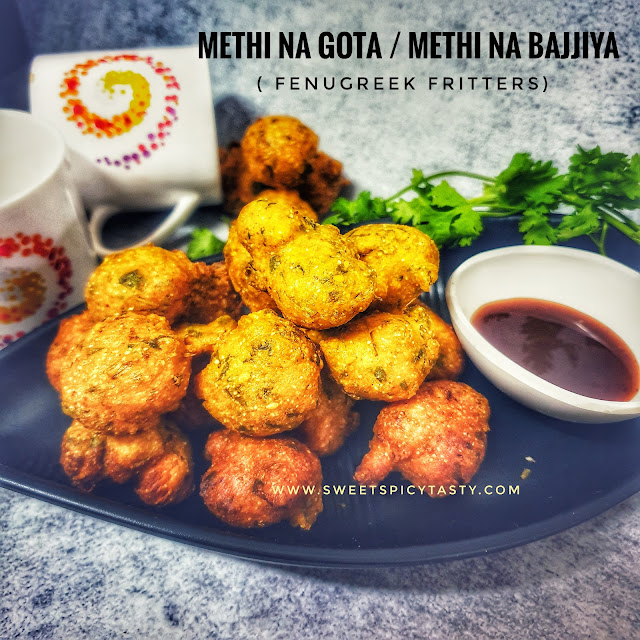
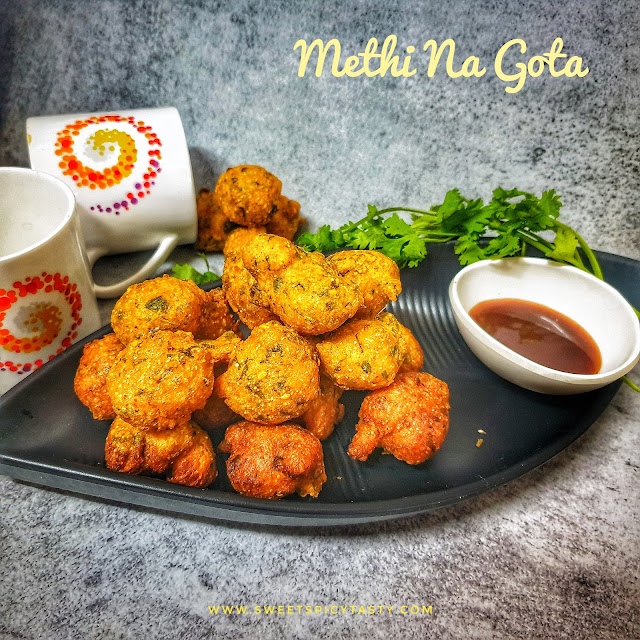
Methi na Gota | Methi Pakora | Fenugreek Fritters - Gujurati cuisine


Share with friends and family 14 comments:

 Methi na Gota / Methi Bajjiya or methi na pakora is a classic winter delicacy and a popular Street food in Gujurat and Bombay. Even though fresh fenugreek is now available all round the year, there is always a special place for the tender and fresh methi available during winters.

Methi na gota doesn't require any fancy ingredients or preparations as we will invariably have the ingredients in our pantry supply . The main ingredients are gram flour/besan and sooji/semolina with added spices and fresh fenugreek leaves .

I have had these amazingly tasty and delicious pakoras many a times since my childhood.  Come winters,  these methi gotas are always a part of the meal or as tea time snack in most gujju homes .  Carrot halwa and methi na gota are inseparable delicacies during winter. 

Crispy from outside and spongy from inside,these fenugreek Fritters are a perfect treat  on chill evenings and makes it an awesome appetiser or party pleaser option for all kinds of parties and holiday get togethers .

You may serve them with Dates Tamarind Chutney and Green chutney or even a cup of piping hot masala tea makes it an enjoyable experience with friends and family .


Preparation Time -15 mins
Frying Time- 20 mins
Complexity - Simple 
Serves - 3 to 4

Ingredients 
1 cup gram flour/ besan
1/4 cup semolina/rava
1/2 cup finely chopped methi Leaves
1/4 cup finely chopped corriander 
1 tsp grated ginger
1/2 tsp turmeric 
1 tsp red chilli powder 
1 tsp white sesame seeds 
1/4 tsp jeera/cumin
1/2 tsp sugar
Juice of 1/2 lemon
Salt as needed 
1/4 tsp cooking soda 
Water to make the batter 
Oil to deep fry 

Method 


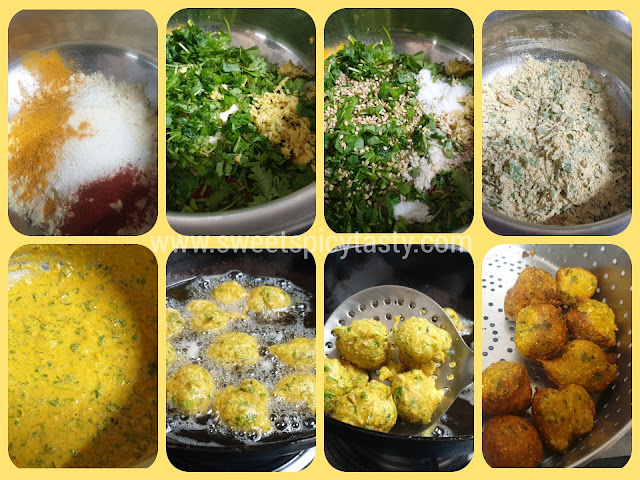
  • In a wide mixing bowl,mix the gram flour,salt,semolina, turmeric and red chilli powder. 
  • To this add the freshly chopped corriander, methi ,ginger and sesame seeds .
  • Mix it well with a spoon and make a batter of dropping consistency by adding water little by little .whisk it well to form a lump free batter.
  • Let the batter rest for 10 mins while you heat up the oil for frying.
  • Just before frying add the lemon juice,  soda and sugar . Whisk the batter quickly and drop small balls of batter in the hot oil . Donot over crowd the frying pan.  Fry on medium flame until they turn crispy and golden brown.
  • Drain the pakoras carefully and serve hot with chutney and tea.  

Some more must have winter delicacies 

Gajar Halwa / Carrot Halwa 

Doodhi (bottle gourd) Halwa 

Doodhi Muthiyas (steamed)

Cabbage Methi Pakoras 

Methi Pooris 

Methi Dal 

November 30, 2020

Cabbage Methi Pakoras | Cabbage fenugreek fritters - Vegan


Share with friends and family 9 comments:

 Winters and fresh vegetables are always a treat to eyes and taste buds . Last few days have been pretty cold in my city and we also experienced mild showers owing to a cyclonic depression.  Cold weather coupled with rains definitely calls for some crispy bites and is it not a pleasure to indulge into some fried snacks keeping the guilt aside for a day?

Deep fried snack prepared by mixing fenugreek, cabbage with gram flour and spices.  Pakoras are a winter or rainy special snack loved by all.

I had some fresh cabbage and methi /fenugreek leaves in my fridge and this time I prepared pakoras or Fritters using them . This was the first time, I combined the two veggies and made pakoras . Generally I make either only cabbage pakoras or methi pakoras, but this mix veg pakoras were just out of the world and it just flew out of the pan soon after I made them. You can add some chopped capsicum also to this .

By now you all must be aware about our weekly themes in Foodie Monday Bloghop and this time we are celebrating Winter vegetables as suggested by Sasmita for the 274th week.  The next soup on my mind is Beetroot Carrot Soup which Sas has on her blog "First timer cook" .


Preparation Time- 15 mins

Frying time - 20 mins

Serves- 3 to 4

Complexity- medium


Video recipe of Pakoras on my channel 


Ingredients 

1 cup finely chopped cabbage 
1/2 cup finely chopped methi /fenugreek leaves
2 to 3 green chillies finely chopped 
2 cups besan/gram flour 
1/2 cup rice flour 
2 tsp red chilli powder
1 tsp ajwain /carom seeds 
Finely chopped corriander 
Salt as needed 
Asafoetida as needed  
Oil for frying 

Method 

  • In a wide mixing bowl, take the cabbage , methi Leaves , corriander, salt , red chilli powder , ajwain,chillies ,asafoetida and mix it well with your fingers . Let it sit for 5 to 10 mins for the veggies and spices release their flavor. 
  • Add the gram flour and rice flour and mix it with the vegetable mixture.  Rub it well with your fingers such that you get a crumbly texture.  The salt and spices would have released water which will be enough to mix the dough for pakora . Incase you find it dry , sprinkle water little by little and make a tight but moist dough. 
  • Heat oil and drop little bits of the dough into hot oil and fry them on medium flame until the hissing sound of the oil stops and the pakoras feel crispy and golden brown .
  • Repeat this step until the dough is over . Always fry in small batches so that the pakoras are evenly fried and turn crisp .

Pin it for future 

Deep fried snack prepared by mixing fenugreek, cabbage with gram flour and spices.  Pakoras are a winter or rainy special snack loved by all.

Some more deep fried nibbles  on my blog which will interest you 


August 31, 2020

Vendhaya Kuzhambu | Fenugreek flavored tamarind gravy


Share with friends and family 20 comments:

Its Monday again and time for our Foodie Monday Bloghop posting . This week is our 262nd week and we are going the healthy way by posting recipes made using ingredients that taste Bitter. Well, bitterness is something most of us detest and want to keep it away from our taste buds but that bitterness is needed once in a while for our stomach to keep the gut clean and detox the digestive system.

So going by our theme name "Bitter,but good" as suggested by Sasmita of "First Timer Cook" let us treat our taste buds with some Bitter Sweet recipes.  I plan to try her Magaja Ladoo which is special bhog for Lord Jagannath as part of the 56 bhog offering. 

Today's recipe is a tribute to my mom who used to make this wonderful "vendhaya kuzhambu" once a month and that is how I developed a liking to this slightly bitter tasting gravy . Coincidentally today is her birthday and I feel it definitely is a fitting tribute in her remembrance. I am sure she must be happy and looking over me and my family from wherever she is. 

A tamarind based gravy with subtle flavor of fenugreek powder, this is a very traditional Tamil recipe and prepared in most homes atleast once a month . Each house has their own recipe of preparing this kuzhambu.  I am going to share the recipe which I have seen from my childhood.  If you all have a different recipe of preparing this in your homes please do share the same with me , I would like to try them as well.

Health benefits of Fenugreek/Methi seeds/Vendhayam

  • Helps reduce blood sugar levels
  • Very good for lactating mothers in production of milk.
  • Application of soaked fenugreek seeds paste on the scalp and then washing the hair helps fight dandruff.
  • Fenugreek powder mixed in buttermilk aids in digestion and relieves stomach cramps. 
  • There are theories that consuming fenugreek regularly helps fight cholesterol but there is no proven evidence so far.

Preparation Time - 10 mins
Cooking Time - 30 mins
Complexity - easy 
Serves - 3 to 4


Ingredients 

2 tsp fenugreek powder 
200ml tamarind extract
Few curry leaves 
1 tablespoon sambar powder 
1 tablespoon gingelly oil/til oil
1 tsp haldi / turmeric 
2 tablespoon fresh grated coconut 
1 tsp jaggery powder
1 tsp mustard seeds 
Salt as needed 
 
Method 
  • Dry roast about 2 to 3 tablespoons of fenugreek in a pan until it turns golden brown and you get a nice aroma.Let it cool and then grind it into a fine powder in a blender . This recipe calls for only 2 tsp of fenugreek powder ,so the rest can be stored in an airtight container . It is difficult to get a fine powder if we grind very less quantity of fenugreek hence we roast some extra seeds.
  • Grind the coconut with a little water to a fine paste and keep aside .
  • Soak a medium lemon sized tamarind in hot water and keep the extract ready. 
  • In a pan heat the gingelly oil and splutter the mustard seeds and curry leaves.
  • After the seeds crackle add the sambar powder and methi seeds powder and fry on low flame for 5 to 10 seconds . 
  • Add the tamarind extract , haldi powder and required salt and boil till the raw flavor of tamarind is lost.
  • Once the raw flavor of tamarind is lost, add the coconut paste and jaggery powder and continue cooking for a few minutes. If  the kuzhambu appears too thick adjust by adding a little water.
  •  You can see the oil float on top , at this stage turn off the stove. Coconut paste and jaggery helps in cutting the bitterness of the fenugreek powder and gives a nice taste to the kuzhambu. 
  • Serve this kuzhambu with piping hot rice ,ghee and some roasted papads.

Some more tamarind based gravies on my blog 


Linking this to FMBH week 262 - Bitter, but Good 


June 28, 2019

Kasuri Methi Theplas / Parathas


Share with friends and family 3 comments:

Theplas are an integral part of a gujurati cuisine . Theplas due to their long shelf life are good to carry for picnics, long journey spanning 2 or 3 days and even as a stand by at home during hectic and busy days .
For working women,theplas are really a boon as they can be made over the weekend and used during the weekdays.  The dough is already kneaded with spices which makes it flavorful and doesn't really need a side dish to go with . Any spicy pickle and a cup of yogurt are commonly served, else a spicy potato curry is the best combination.

During winters fresh chopped Methi (fenugreek) and grated Bottle gourd (Doodhi) are added to the dough to make Methi Thepla or Doodhi Thepla.

Today, we shall see how to prepare theplas using Kasuri Methi I.e dried methi leaves which are stored for use during off season.

Preparation Time : 10 -15 mins
Resting Time : 15 mins
Cooking Time : 2 mins per thepla
Makes : 13-14 theplas
Complexity  : Medium


Ingredients
2 cups whole wheat flour
2 tbsp curd
2 tbsp besan / gram flour
1 tsp haldi / turmeric
2 tsp red chilli powder
2 tablespoons  kasuri methi
Salt as needed
Oil to fry the theplas

Method


  • Soak the kasuri methi in warm water for about 5 mins.
  • Squeeze the water from the methi and put in a wide mixing bowl.
  • Add in the haldi powder , red chilli powder and salt to the kasuri methi and mix it well with your fingers to release the flavor and essence of methi .
  • Add the wheat flour, 1 tablespoon oil,curd to this kasuri methi and knead a soft but pliable dough by adding water at intervals .
  • Coat it with some oil and knead again and keep covered with a tight lid or a muslin cloth and set aside for 15 mins. 

  • Pinch out small balls from the dough , dust it with some dry wheat flour and roll it into thin rotis using a rolling pin.
  • Heat a tawa or griddle and put the rolled out thepla on the hot tawa .
  • Cook on one side with a little oil and flip over.  Do it on low flame. 
  • Drizzle some more oil and cook the under side until it is well cooked.
  • Use oil little generously if you want to keep the theplas for 3 or 4 days . The oil will ensure the theplas won't get spoilt. 
  • Take it off the pan and store it in a container or wrap in aluminum foil .


March 25, 2017

Healthy Methi Dal - One shot cooker recipe - No Onion No garlic


Share with friends and family No comments:

A very simple but healthy dal made using fresh methi leaves and moong dhall. You just have to put all the ingredients in the pressure cooker with enough water and pressure cook for 3-4 whistles and you are done with a flavourful healthy dal. This is perfect for those days when we are not in the mood for an elaborate cooking and just want to wind up for the day.
Serve this dal with rotis or plain steamed rice with some roasted papads ,achaar and curd .
You may also like to try other dal/sambar variants like


Preparation Time : 10 mins
Cooking Time : 15-20 mins
Serves : 2-3
Complexity : simple


February 24, 2017

Aloo Methi Sabji | Alu Methi | आलू मेथी की सब्जी (No Onion No Garlic Version)


Share with friends and family 5 comments:

Fresh methi and peas are inseparable in winter and it shows itself in various recipes until the stocks last.

Growing up, aloo methi was one of my favorite curries and this was one which I learnt to make during my early days of cooking.

As I have mentioned in many of my posts, amma would dish out hot fulkas and serve me and dad this delicious aloo methi ,fulkas and thick yogurt /dahi .

Aloo Methi Sabji | Alu Methi | आलू मेथी की सब्जी  (No Onion No Garlic Version), winter special methi potato curry , fenugreek and potato curry ,methi alu , methi aloo , menthya aloo gadde palya , aloo gadde menthya palya

This aloo methi recipe is very very simple and even beginners can easily make it with just the basic spices available in the pantry.
There are just a few tips and tricks to keep in mind so that the curry doesn't turn very bitter. Cooking the methi for a long times steeps in the bitterness into the curry. So the key is we cook the potatoes ,tomatoes,peas along with the spices and once they are well cooked ,add in these chopped methi leaves to the curry and cook for just a few minutes till the raw flavor is lost and there you are with a lip smacking Aloo Methi Mutter .
The wonderful taste and aroma of sauteed methi leaves with cumin seeds takes the entire dish to a whole new level. People who dislike methi for its bitterness will start loving methi if you prepare it this way.

Aloo Methi Sabji | Alu Methi | आलू मेथी की सब्जी  (No Onion No Garlic Version), winter special methi potato curry , fenugreek and potato curry ,methi alu , methi aloo , menthya aloo gadde palya , aloo gadde menthya palya

As the recipe does not use any over powering masalas ,even the elderly who refrain from masala based gravies due to age and digestion issues can enjoy this simple and humble sabji with hot fulkas. You can also pair it with Methi Theplas or Jeera Rice or the ever loved Dal Rice .If making for a diabetic patient, you can skip the potatoes and use only peas, tomatoes and fenugreek leaves .

This is a No Onion No Garlic recipe, so you can even make it for lunch/dinner get togethers during any kind of Pooja or Satsang.

If you like this fresh fenugreek /methi recipe ,here is a list of some delicious winter recipes with methi

Originally ,I had posted this recipe in 2017 ,now after almost 8 years (June 2025) ,I have given the Alu methi recipe a makeover with some new recipe links ,photos and some minor changes to the recipe which I mastered over the years. 

Pin it up 


Preparation Time : 10 mins
Cooking Time : 20-25 mins
Serves : 2-3
Complexity : Medium

Ingredients

2 medium sized potatoes
2 cups packed finely chopped methi leaves
2 medium tomatoes chopped
1/2 cup peas ( frozen / fresh)
1 tsp jeera
2 cloves
1 small stick cinnamon
1 tsp finely chopped ginger
1 tsp red chilli powder
2 tsp dhania/coriander powder
1/2 tsp haldi / turmeric  powder
1 tsp garam masala powder
2 tsp oil
salt to taste


Method

  • Peel the potatoes and cut them into medium sized cubes soak in water for 10 mins. Drain and keep aside.
  • In a kadai ,pressure pan or IP ,heat the oil, splutter the jeera, cinnamon and cloves.
  • Add  the tomatoes and sauté it with some salt.
  • Add the haldi ,red chili and dhania powders to the tomatoes and cook until tomatoes turn soft and mushy .
  • Add the chopped potatoes, peas & half cup water ,mix well. Cook until the potatoes turn soft and tender , alternatively you can pressure cook for 2 whistles if using pressure pan/cooker or IP.
  • Once the potatoes are cooked add the chopped methi leaves and mix it with the garam masala.
  • Adjust the salt if needed , add 1 tsp of sugar cook for a few minutes till the raw flavor of methi is lost.
  • Turn off and garnish with fresh coriander and a small blob of butter . The butter adds a lot of taste and flavor to the gravy.
  • Serve hot with your choice of roti , fulkas ,jeera rice .


February 13, 2017

Methi Puri | Methi Poori


Share with friends and family No comments:

Poori /Puri is a deep fried  Indian flat Bread made from whole wheat flour. Methi Puri is made by kneading the whole wheat flour with finely chopped methi/fenugreek leaves with some spices and salt.
Winter is a very good time to consume fenugreek /methi because it is available abundantly and helps increase immunity and produces body heat naturally to combat the harsh winters.

Preparation Time : 15-20 min
Cooking Time : 30 mins
Serves : 3-4 (Makes about 20 puris)
Complexity : Medium High

©Sweet Spicy Tasty©