Showing posts with label Maida/All Purpose Flour (APF). Show all posts

October 30, 2021

Thikkat Shankarpali | Spicy Shankarpaali | तिखट जीरा शंकरपाली


Share with friends and family 13 comments:

 Shankarpali , Shakkarpare is a very special snack made during Diwali in most households in India . Known by many names according to region, this is a must have in Maharashtra and Gujarat .  There is  sweet  and  savory version of this yummy and crunchy snack.

Traditionally shankarpali is made using maida / APF ,but these days whole wheat flour is also used owing to health reasons . I for one have grown up eating the spicy Shankarpali made using maida and atleast during Diwali I make this  unfailingly using maida . 

My paati a.k.a grand mom would always keep this stocked round the year and she would say no one can fail with this recipe.  She was an expert in making all types of sweets and savories.

To prepare Thikkat / Spicy Shankarpaali is actually a breeze and the measurements are totally eye ball / random . Unlike other sweets or savories we need not worry about any particular consistency, perfect roasting etc.  

Just 5 basic ingredients viz ; maida ,salt, red chilli powder,  turmeric powder ,cumin seeds and oil to fry from our usual kitchen pantry and we are ready to make this crunchy munchy shankarpaali . This is also known as Thukkadi or Khaara Diamond cuts in the south .

The sweet shakkarpare is very tasty and flaky with subtle sweetness making it delectable and gentle on our palate . I am yet to make the sweet version and you can watch out this space for the recipe when I upload it soon.

Some special and Traditional Diwali Savories for you to impress and surprise your family 

South Indian Mixture 

Cornflakes Chiwda 

Poha Chiwda 

Sabudana Chiwda 

Thikha Ghatiya 

Omapudi / Sev 

Ribbon Pakoda 

Khara Boondi


Preparation Time - 15 mins
Frying Time - 8 mins per batch 
Serves - 3 to 4 
Complexity - Simple 

Ingredients 
1.5  cups maida / APF 
2 tsp red chilli powder 
1 tsp turmeric powder 
1 tsp cumin seeds /jeera 
Salt as needed 
2 tbsp hot oil 
Oil to deep fry 

Method 

  • In a wide mixing bowl ,add the maida ,red chilli,turmeric, salt and jeera and roughly mix with your fingers .
  • Pour 2 tbsp of hot oil over this dry ingredients and rub it well with both your hands to form a crumbly mixture . This is very important to get crunchy and crisp shankarpaali.
  • Add water little by little and knead to a smooth but tight dough.
  • Keep the dough covered to rest for 5 to 10 mins .
  • Pinch out a big lemon sized dough ,dust your working platform with little maida and roll out the dough into a medium thick roti .
  • Take a knife or pizza cutter and mark cuts to form diamonds or small squares .
  • Take these cut pieces and keep them on a plate while you heat the oil. 
  • Once the oil is heated properly reduce to medium and drop these pieces into hot oil carefully and fry them with occasional flipping until it turns crisp and golden brown. The oil must stop sizzling before you can remove it .
  • Drain it carefully and let it rest for a while before you transfer to a container. 
  • The shankar pali may look soft initially after frying but it will get crisp in about 20 mins.
  • Transfer to an airtight box and keep covered. 

Pin me to your board !! 


August 12, 2021

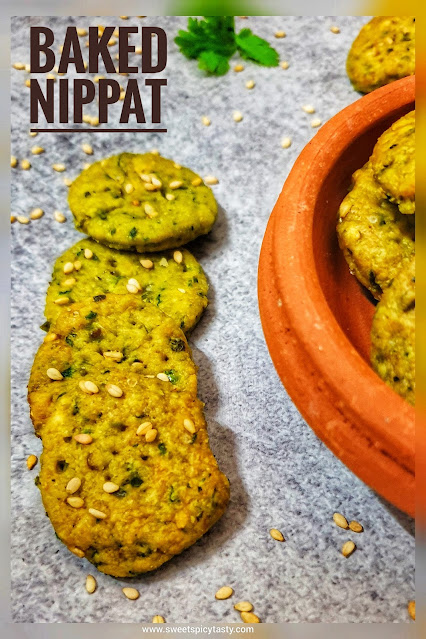
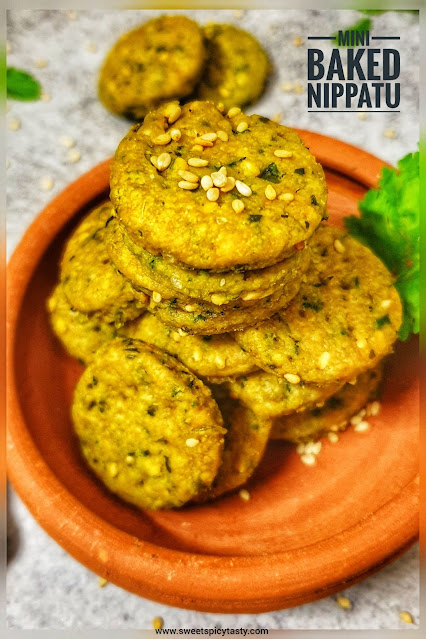
Baked Nippatu (crispy crackers) - Mini Bites


Share with friends and family 10 comments:

 Nippatu is a traditional delicacy from Karnataka and is very similar to Thattai of Tamil Nadu. 

Nippats are mostly deep fried and prepared unfailingly for Ganesh Chaturthi and Diwali . I shall post the fried version of nippat sometime soon .

I say it is similar because there is a difference in the set of ingredients that go into the making of Nippat and Thattais . 

If you have lived in Bangalore even for a few days, you surely could not have missed enjoying some baked treats at the Iyengar Bakery outlets spread across the length and breadth of the city.

Nippatu is a perfect accompaniment for evening tea time snack . A traditional savory snack from karnataka,baked nippats have become popular now a days , baked nippat, mini nippat,baked mini nippatu, small nippatu , how to bake nippats, oil free nippat , no deep fry nippat ,karnataka special nippat

Iyengar Bakeries are known for their melt in mouth Khara Biscuits,  Veg Puffs, Dilpasand,khara buns and my all time favorite Baked Nippats . 

Baked Nippats are ideal for weight watchers since we skip the deep frying but my 2 cents is do not compromise on the quantity of butter and hot oil that needs to be added to the Nippat dough to achieve the perfect crunch and crackling effect .

The crispy and crunchy baked cracker is a burst of flavors with each bite.  Nippats are a perfect treat for evening snacks with tea or coffee . The ones we get at the bakeries are big in size ,but I have tried to make mini Nippats  for the ease of serving as well as eating . If you want to make the Nippats big in size just as we get in the Bakeries, then use a bigger cookie cutter to get the desired shape. 

Nippatu is a perfect accompaniment for evening tea time snack . A traditional savory snack from karnataka,baked nippats have become popular now a days , baked nippat, mini nippat,baked mini nippatu, small nippatu , how to bake nippats, oil free nippat , no deep fry nippat ,karnataka special nippat


Preparation Time - 10 mins
Resting Time - 10 mins
Baking Time - 20 -25 mins 
Makes - 18 to 20 nippatus
Complexity - medium 

Ingredients 

1cup maida / APF 
1.5 tbsp salted butter (room temperature)
2 tbsp cooking oil
2 tsp powdered sugar 
1/2 tsp baking powder 
2 green chillies 
Handful of fresh corriander
Few mint leaves (optional)
Few curry leaves 
2 tsp white sesame seeds /til / ellu (skip if allergic)
1/2 tsp cumin seeds/jeera
Salt if needed 
Pinch of asafoetida 

Method

Nippatu is a perfect accompaniment for evening tea time snack . A traditional savory snack from karnataka,baked nippats have become popular now a days , baked nippat, mini nippat,baked mini nippatu, small nippatu , how to bake nippats, oil free nippat , no deep fry nippat ,karnataka special nippat


  • In a small mixie jar , pulse the green chillies ,mint leaves, curry leaves and corriander to a coarse paste .Alternatively ,you can finely chopped all these if you donot want to pulse them . I like the light green yellow color of the nippats after baking ,hence I prefer to add the chilli paste.
  • Sieve the maida, baking powder, Asafoetida and powder sugar into a wide mixing bowl.
  • Add the softened butter,chilli paste,jeera and sesame seeds to the sifted flour and mix gently with your fingers to form a crumbly mixture. 
  • Heat the oil in a small pan until it gets really hot and the pour the oil over the crumbly mixture . The mixture will begin to sizzle . Use a fork and incorporate the hot oil into the flour . Donot use your fingers as the oil will be really hot . 
  • At this stage check for salt and if you feel salt is less,add as required and mix it well .
  • Gradually add water little by little and form a stiff dough.  Cover the dough and let it rest for 10 mins.
  • Meanwhile preheat the oven to 180 degree celsius .
  • Arrange a baking tray with parchment paper and keep ready .
  • Take a small portion of the nippat dough and roll it into a thick roti . Take a cookie cutter or a small lid and mark deep cuts . Prick each nippat with a fork and make holes .
  • Arrange these cut nippatus on the baking tray and put it in the oven at 180deg for 15 min .
  • The base of the Nippatu would have become nice and crisp, if it is not browned continue to bake for another 2 or 3 mins at 180 degrees again .
  • Remove the Nippats and let it cool until it reaches room temperature. They will become crisp and crunchy . 
  • Repeat the same step for all the dough that is remaining and carefully store the baked Nippats in an airtight container. 

Tips to remember 

  • I have used the convection mode of my microwave oven to bake these nippats .
  • If you are baking for the first time on your convection microwave oven ,pls read the user manual to make sure how your oven works .
  • You may use 1/2 cup maida and 1/2 cup whole wheat flour if you donot want to use maida .
  • Half way through baking keep an eye on the nippats so that it doesn't burn.  Heat settings at times differ from oven to oven.
Pin it up 

Nippatu is a perfect accompaniment for evening tea time snack . A traditional savory snack from karnataka,baked nippats have become popular now a days , baked nippat, mini nippat,baked mini nippatu, small nippatu , how to bake nippats, oil free nippat , no deep fry nippat ,karnataka special nippat


Nippatu is a perfect accompaniment for evening tea time snack . A traditional savory snack from karnataka,baked nippats have become popular now a days , baked nippat, mini nippat,baked mini nippatu, small nippatu , how to bake nippats, oil free nippat , no deep fry nippat ,karnataka special nippat


November 02, 2020

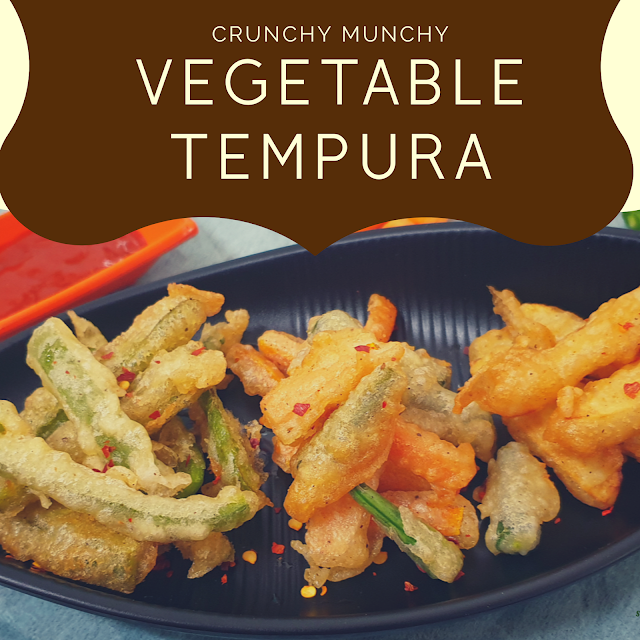
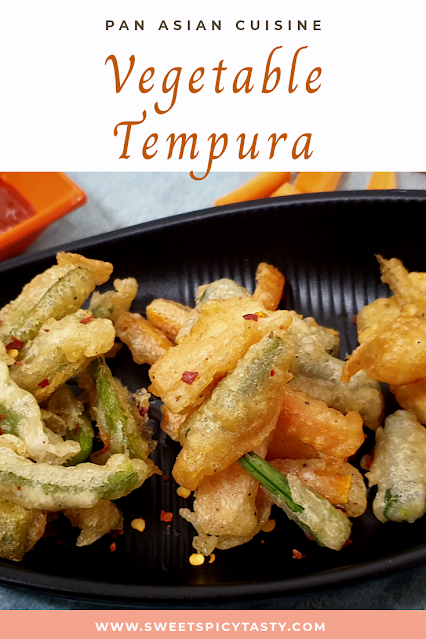
Vegetable Tempura - Japanese fritters


Share with friends and family 15 comments:

 I was craving for some crunchy vegetarian starter on a cold winter night and that is when the waitress at a Thai Restaurant suggested I try the tempura as that is the only thing they could customize to a vegetarian option . She got the chef to make it with the veggies of my choice and I really loved it . My  reaction after taking the first bite was "Hey they taste almost like our veg bajjiya/pakora " - hubby and me had a hearty laugh over the tempura platter. 

That is how I was introduced to the crunchy munchy Japanese spl Tempura at a Thai Restaurant in the USA ... Global Spirit in the true sense . 😃😃. I am told this is a popular street food in many East Asian countries like Japan,Philippines,  Thailand and likewise . 

Perfect tempura batter at home , is tempura vegetarian? , can we make tempura at home ? , what are the vegetables to be used in tempura , jain tempura, tempuras, japanese special tempuras


  • Tempura is a classic Japanese dish that dates back to 16th century.  Yes , you read it right... it is a recipe that is almost 500yrs old approximately.  (Source : Wikipedia) 
  • It is also mentioned in Wiki that it was the Portuguese residing in Nagasaki who introduced this recipe to the Japanese. 
  • Tempura is made using meat, vegetables and sea food which have been coated in a batter and deep fried . 
  • There are certain techniques to be followed in preparation of the batter which will give us crispy tempuras.
  • The batter uses all purpose flour,eggs , baking soda and cold water which helps retain the fluffiness , also the most important point is to mix the batter in small batches so that the gluten from the flour doesn't over react and turn into a lumpy mass which will make the tempura soggy and over coated with batter . Eggs can be easily omitted for the vegan/vegetarian variant as I have done in my recipe today. 
  • The batter can be mildly spiced using pepper powder or chilli flakes . 
  • Traditionally sesame oil (til oil/nalla ennai) was used to fry the tempuras but now any cooking oil like canola or vegetable oil which can withstand good heating point are used to fry. 
  • Almost all vegetables like okra, green beans, carrots, yam, potato, bell peppers, sweet potato,onion, broccoli,egg plant ,bamboo shoots can be used in the preparation of tempuras . Mushrooms and tofu are also used in the vegetarian version of tempura. 

Some fun facts

  • What we call as Choora while frying our Bajjiya, pakodas or bonda, the bits of tempura batter dropped in oil is called Tenkasu. Interesting name isn't it ?
  • These tenkasu bits are used as topping over some other recipes for the crunchy bite just as we use the choora to make a spicy chutney to go with the vada pav .

Perfect tempura batter at home , is tempura vegetarian? , can we make tempura at home ? , what are the vegetables to be used in tempura , jain tempura, tempuras, japanese special tempuras

This week Priya suggested we explore the Asian Cuisine for the 271st Foodie Monday bloghop weekly theme challenge. It indeed was a nice theme where she wanted us to explore something beyond the Indian, Chinese & Indo Chinese range of recipes which are most popular in Asian Cuisine . Priya's love for Pan Asian Cuisine is reflected in her recent recipe of Nasi Kuning- an Indonesian special.

Week 271  - #AsianFoodDelights 

Preparation Time - 15 mins
Frying Time - 20 mins
Complexity - Medium 
Serves - 2 to 3

Ingredients 

1/4 cup APF / maida 
1/4 cup rice flour 
1 cup chilled water 
Pinch of baking soda 
Salt as needed 
1/2 tsp pepper powder 
1/2  tsp chilli powder / chilli flakes 
Oil to deep fry
Assorted vegetables of your choice .

(**refer the tips below for the vegetables to use in jain version)

Method 
Cut the vegetables length wise . Don't make them as thin stripes . They need to be a little thick so that the batter coats them and they retain the crunch after frying.  If using cauliflower or broccoli ,parboil them in hot water and then use . I have used green bell pepper , potato, carrots & French beans.  


To prepare the tempura batter, sift the APF , rice flour ,baking soda and salt into a mixing bowl . 
Take a small batch of this flour mix and add chilled water to make a batter of dropping consistency just thick enough to lightly coat the vegetables when dipped .  Watch the video below to know the consistency.  
It shouldn't be very thick like the Pakoda or bonda batter . )


Dip the chopped vegetables one by one into the tempura batter , lightly coat it and deep fry them in hot oil until they appear crisp and golden brown . Fry them on medium flame once the oil has been heated well else the batter will get cooked first and the vegetable will remain uncooked . We do not want that . So adjust the oil temperature as you keep frying .


 Tips to help 

  •  Donot make a huge batch of tempura batter in the first instance, make small batches as and when needed else the tempuras will turn out soggy and lumpy when dipped in batter .
  • Use only chilled water to prepare the batter .
  • Keep the chopped vegetables also in the fridge until you make the tempuras. This helps it turn out crispier.
  • In one batch of batter I mixed pepper powder for spice while in the next batch I used red chilli flakes .You can see the difference in the fried tempuras.
  • For the jain version  - use bell peppers , cauliflower,brinjal/egg plant , French beans , tofu/paneer,okra /bhindi ,broccoli,cucumber , any squash variety 


⬇️ Pin 📌 it up for future ⬇️ 

https://pin.it/1VcrvnBkW


Perfect tempura batter at home , is tempura vegetarian? , can we make tempura at home ? , what are the vegetables to be used in tempura , jain tempura, tempuras, japanese special tempuras


September 01, 2020

Choco Orange Cake - 300th post :-)


Share with friends and family 24 comments:

Whoa today happens to be my 300th post and what best to suit the occasion than sharing my favorite Choco Orange Mug Cake . I would like to thank each and everyone who has been a part of my journey in this world of blogging.

A special thanks to my hubby Vj and Kalyani for having constantly motivated and boosted me for 3 long years to get back to blogging when I had taken a break due to personal reasons. If not for them, I wouldn't have been able to restart. 

I am happy to have been introduced to so many wonderful bloggers through these two lovely groups (FMBH and Shh cooking secretly) and it is so nice to keep interacting with all on a regular basis and  feels more like an extended family.

Orange and Chocolate are a match made in heaven and we i.e. hubby and me love this bitter and tangy combination a lot .

This month for our Shhh cooking secretly challenge Mayuri ji of Mayuri's Jikoni suggested Chocolate as the main theme and who can say No to such a classic theme . Mayuri ji's latest recipe Chocolate Truffles is on my to do list .Those cute truffles are an absolute treat to the eyes and am sure they are as delectable as they look . 

I was paired with Seema who blogs on Mildly Indian which is a treasure of classic recipes and there are some really unique recipes like the Sugarcane juice Poha Pongal (Karumbu chaar Aval pongal) which I would like to try . She gave me Baking soda and sugar as my secret ingredients while I gave her milk powder and dryfruits with which she has dished out Cocoa Nibs & Lime bliss balls  which look absolutely delicious. 

 Now coming to the recipe, though this is ideally mug cake, I tried to make it in cups because I just wanted to try something fancy and different :-) Who says mug cakes can't be baked in cups ? 

I am not a pro baker so I took the easy route of making it in the microwave and satisfy my craving for a nice chocolate cake which I was missing from my favorite bakery . So for all those who are skeptical about baking , go ahead and try this easy peasy cake in microwave and satisfy your cravings. 

Preparation Time - 10 mins
Baking Time - 90 seconds 
Complexity - simple 


Ingredients 

1/2 cup maida / APF
1/2 cup chilled orange juice 
3 tbsp oil ( sunflower/ rice bran oil works well)
1/3 cup powdered sugar 
1 tsp vanilla essence
2tbsp cocoa powder 
1/4  tsp baking soda
1/2 tsp baking powder
Pinch of salt
1/2 chocolate bar 

**donot use eyeball measurements. Use measuring cups and spoons and follow the recipe exactly if you want to get the perfect cake .
Method 

  • Take 3 microwave safe porcelain cups or ramekins and grease them with some butter and keep it in fridge until use .
  • Take 2 mixing bowls, one for wet ingredients and other for dry ingredients .
  • In one bowl add the chilled orange juice, oil , powdered sugar and vanilla essence . Mix it well until the sugar dissolves completely.  The chilled orange juice helps to emulsify the oil .
  • Take the dry ingredients maida, cocoa powder, salt, baking soda, baking powder in a seive/chalni and sieve it into another dry bowl.
  • Now slowly add the dry ingredients into the wet ingredients and simultaneously keep mixing using the cut and fold method  till the mixture appears lump free and of a dropping  consistency.  Donot beat or mix it too hard .
  • Now bring out the greased cups and pour the cake mixture until half the cup , place a few chocolate bits in center of the cake mix and cover it with some more cake mixture . Fill only 3/4th of the cup  leaving space for the cake to raise.
  • Place the cups in the microwave and set it for 90sec . Take it out and let it cool for a few minutes before you can savor it. 
  • The chocolate bits would have melted inside and you can get a nice gooey feel when you cut into the cake . 

Notes

I have used bournville chocolate bits but you can use any brand of chocolate or even compound chocolate works good .

The orange juice can be replaced with chilled water if you don't like the chocolate and orange combination. 

Linking it to Shhhh cooking secretly challenge - Chocolate theme for August 2020


June 10, 2020

Vegetable Kofta - No Onion No Garlic


Share with friends and family 5 comments:

Vegetable kofta curry is a very rich and exotic preparation in North Indian cooking.  A delicacy which is relished by one and all . It is neither too spicy nor bland ,making it a perfect accompaniment for all sorts of Indian Breads and even Jeera Rice or Veg Pulao

Vegetable Kofta curry has 2 parts 

1. A rich gravy made using tomatoes and cashew nuts .

2. Koftas are fried dumplings using mixed vegetables and some spices .


The preparation and cooking time is a little elaborate for this particular recipe , but the final product is worth all the time that goes into the making of this Kofta Curry . Amma would make amazing kofta curry . The koftas would just melt in mouth as I would take a bite with my favorite fulka lathered with home made ghee .

Please don't try to rush into making this recipe .prepare it only when you have good amount of time on hand . The tomato gravy needs to be cooked well to make sure all the flavors come out really well. 

There are various ways in which the Kofta can be prepared , but I am going to give you a  very very simple method with easily available ingredients in the pantry. 

Preparation Time - 40 mins
Cooking time- 30 mins
Frying Time - 20 mins
Serves- 2 to 3 


Preparation of Curry 

Ingredients
3 medium sized tomatoes - roughly chopped
8-10 cashews soaked in warm water
1 tsp ginger finely chopped
2 tsp garam masala powder
1 tsp red chilli powder
1/2 tsp haldi powder
2 tsp dhaniya powder / coriander powder
Salt
Pinch of sugar
1 green chilli finely chopped .
1/2 tsp jeera

Method
  • In a wok/kadai add some 2 tsp of oil and splutter the jeera . 
  • Now sauté the tomatoes and green chilli with 1/2 tsp ginger until the tomatoes turn soft and mushy . 
  • Blend into a fine paste once the tomatoes cool down.
  • In another mixie jar , blend the cashews into a fine paste and keep aside . 
  • To prepare the gravy, heat a little 1 tablespoon oil or ghee or butter in a frying pan . 
  • Add turmeric , red chilli powder and dhaniya powder and fry it well , do it on low flame
  • and donot burn the spices .
  • Quickly pour in the tomato paste and mix it well , you will get a bright color . Allow the tomatoes paste to cook well until the oil begins to separate from the gravy . Sprinkle some water , if you feel the gravy has become dry .
  • Add the cashew paste and 1/4 cup water ; mix well . Add salt , garam masala and a pinch of sugar and cook till the raw flavor of cashews is lost . The gravy will look bright orangish and the aroma will be wafting through your kitchen . 
  • You may adjust some water and spices if you feel it is too dry or spices are less . 
  • The gravy is ready when you can see the oil has separated well and is floating on top . 
  • For the Kofta curry , the gravy has to be little watery because when we put in the koftas into the gravy , the koftas will absorb the gravy and the gravy will thicken. So adjust water accordingly while cooking .
Preparation of Koftas 

Ingredients 

2 medium sized potatoes boiled  and peeled
1 medium carrot grated 
1 cup grated paneer 
2 to 3 finely chopped green chillies
1/2 tsp red chilli powder 
Salt as needed
Freshly chopped corriander 
1 tsp chat masala
Pinch of kala namak 
Half a lime 
1 tablespoon  maida /APF
1 tablespoon besan /gram flour 

Method
  • Grate the boiled potatoes and set aside. 
  • In a mixing bowl, add the chopped chillies , salt , coriander, red chilli powder, chat masala,lime juice and kala namak and mix it well such that all the flavors are released nicely. 
  • Now , add the grated potatoes, carrots, paneer to the spice mixture along with maida and gram flour and mix it well and knead to a soft ball.
  • No need to add any water while kneading . The dough should not be sticky or watery..if it is a little watery add some rice flour or corn flour to absorb the moisture. 
  • Grease your palm and make small balls and refrigerate these balls for about 20 mins. 
  • Fry them on medium heat until they turn golden brown and crisp. 
  • Alternatively, you can fry them in the appe pan /paniyaram pan/aebelskeiwer pan .
  • Drain in an absorbent paper and keep aside .

Serving the Kofta Curry 
In a bowl, pour the warm curry and add 2 to 3 koftas to the gravy and pour some gravy on top of it and serve hot with naan , roti , jeera rice or pulao. 

Pin it up


May 23, 2018

Kodubale | Kodbale - Karnataka Delicacy


Share with friends and family No comments:

Kodubale / Kodbale - Spicy rings is a very famous Karnataka deep fried snack which is made during Diwali , Gokulashtami etc . This can also be made as a normal tea time snack on regular days.
"Bale" in kannada means " Bangle", and since this snack are shaped like rings and resemble Bangle , hence the name.
These can be made as big rings as well as tiny ones depending on our liking and taste. I prefer making small rings, since they look cute and are easy to pop into the mouth.
There could be various recipes for making Kodubale as each family may have their secret and traditional recipe. This one is what my mom used to follow and I have recorded that.

Preparation Time : 20 min
Cooking Time : 30 mins
Complexity : Medium


May 18, 2018

Golli Bajje | Mangalore Bonda


Share with friends and family 1 comment:

Golli Bajje ,Mangalore Bonda,Mangalore bajji are the various names for this yummy deep fried snack which is a famous Street food from the Mangalore Region / Tulu Naad region of Karnataka in India.
It is a snack made using All purpose flour and sour curd and few mild spices . I first tasted this dish at MTR's oulet MTR 1924 in one of the malls in Bangalore. Ever since I ate this I wanted to make it at home and it just kept on getting postponed due to one reason or the other. The recent summer showers in Bangalore triggered the spark in me and I immediately made these crispy yet soft from inside golden beauties for an evening snack.
I am presenting the No Onion No Garlic version but those of you who like ,may add some chopped onions to the batter along with the other ingredients.

Preparation time : 2-3 hrs
Cooking Time : 20 mins
Serves : 3-4
Complexity : Medium


October 12, 2017

Coffee Butterscotch Burfi


Share with friends and family 4 comments:

My love for coffee just does not seem to end .  The slightly bitter flavor of coffee with the subtle taste of sugar to keep me energised and going through the day.

This is yet another experiment in my kitchen with instant coffee and butterscotch essence.

My other experiments with coffee are :

Coffee flavored Thenga burfi

Coffee Biscuit Pudding


A very simple and delicious melt in mouth maida burfi with the added flavor of coffee and butterscotch makes you feel as if you are taking a bite of world's finest chocolates.


Preparation Time : 5 mins
Cooking Time : 20-25 mins
Complexity : Medium High


Ingredients

 maida / All purpose flour : 1 cup / 100gms
 sugar : 1 or 3/4 cup / 75 -100gms
 ghee : 2 tablespoon
 butterscotch essence : 1 tsp
 instant coffee powder : 3 tsp mixed in warm water


March 29, 2013

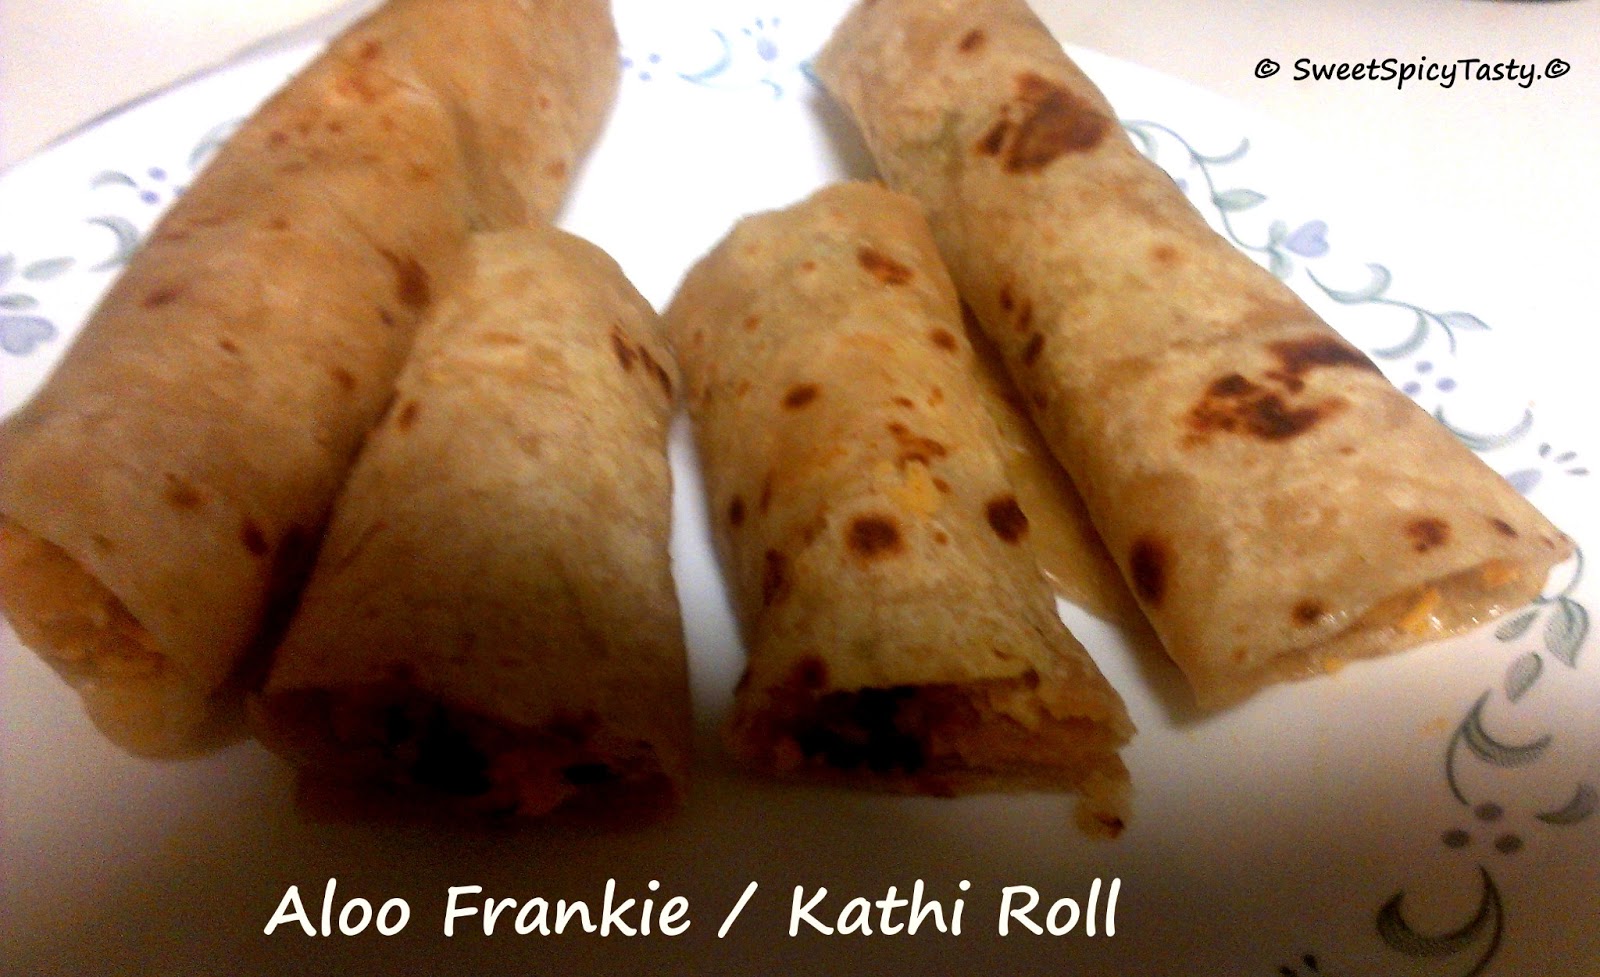
Aloo Frankie / Kati Roll


Share with friends and family No comments:

People from Bombay need no introduction to Frankie. For others with a little question mark on the face,Frankie most commonly known as Kati Roll is a very popular street side food.

Its a  roti/paratha filled in with spicy yummy tasty fillings.Vegetarian fillings consists of mashed potatoes or paneer  as the main ingredient with a garnish of grated cheese,onions ,cilantro and chat masala.For non vegetarians,potato filling can be substituted with minced meat,chicken etc.

Having grown up in Mumbai,I used to have frankie with my friends when we used to go out during our college days.Later in Bangalore,after marriage me and hubby used to have yummy kati rolls at a joint near our home .But after coming here to US ,I just missed frankie and kati roll very badly.So decided to make it from scratch.

I had read this recipe in one of Tarla Dalal's cook book.I made a little changes to suit our taste. 

Preparation Time : 1 hr
Cooking Time : 30 mins
Makes about 6-7 frankies

Aloo Frankie / Kathi Roll

March 22, 2013

Maida Dosa / Flour Crepes


Share with friends and family No comments:

Dosa is a very healthy breakfast in most south indian homes.There are various varieties of Dosas that can be prepared. Some of them need the traditional soaking and grinding of ingredients while some are just a mixture of various flours such as Ragi /Nachni(Finger Millet) , Wheat flour,Maida / APF.
These flours are mixed in certain proportion with rice flour and some other spices to make yummy dosas. Can be served with chutney,sambar or the traditional Idli / Dosa Molagapudi.


Preparation Time : 30 mins
Cooking Time : 7-8 mins
Serves : 2-3
Maida Dosa / Flour Crepes

March 19, 2013

Elaichi Nankhatai / Cardamom Cookies


Share with friends and family 1 comment:

Nankhatais are Indian Style cookies which are crisp but just crumble in the mouth and melts down.
A perfect tea time snack.There are various flavours like Kesar Pista(Pistachio-Saffron),Badam(Almonds) or simple plain nankhatais which taste heavenly.
This is my first try at nankhatais/cookies.


Preparation Time : 20 mins
Baking Time : 20-25 mins
Makes around 20 cookies

Elaichi Nan Khatai / Cardamom Cookies
 

February 09, 2013

Instant Microwave Eggless Cake


Share with friends and family 2 comments:

I have baked cocoa based cakes and also vanilla sponge cakes,but trying this kind of a fresh fruit cake was a new experience for me. I had a lot of fresh strawberries lying in my fridge,not sure of how to consume the entire lot,I tried to bake a normal vanilla sponge cake and gave it a nice strawberry fresh cream icing.
 
Preparation time - 15 mins
Cooking time - 10 mins
Strawberry cake
Strawberry Cake