Showing posts with label starters. Show all posts

April 12, 2022

Fresh Pineapple Salsa - Vegan Salsa


Share with friends and family 4 comments:

 This fresh pineapple salsa will be a super hit at the next summer party that you will be hosting. 

Pineapple salsa is colorful , crisp and most important very very delicious to say No. Even those who are not very fond of pineapples will want to snack on this. 

Kids ,adults alike;everyone would love to have this crunchy salsa with a big bowl of nachos or chips . Pineapple salsa goes well with any Mexican main course meal like Quesedilla or Mexican Bean Rice .

Pineapple salsa was on my mind ever since I made the Mango Salsa but somehow I could never put together the pineapple salsa ,but luckily I found some fresh salsa which was extremely tasty and sweet and quickly it made its way to this delicious salsa today.  I enjoyed eating this salsa as a salad which was absolutely filling and refreshing on a hot and sultry day that we are facing now. 

Pineapple salsa can be made in no time and there are hardly any fancy ingredients used . Please try to use fresh pineapple as canned pineapples are too sweet for the salsa also the crunch is missing as the canned pineapples are soaked in sugar syrup .


Preparation Time - 10 mins
Cooking Time - nil
Complexity - simple

Ingredients 

1.5 cups chopped fresh pineapple 
1/4 cup chopped red bell pepper
1/4 cup chopped green capsicum 
Lot of fresh corriander chopped
1 tsp sugar 
2 tbsp lime juice 
Pinch of salt 
1 tsp red chilli flakes 
1/4 tsp roasted cumin powder
1 small green chilli finely chopped

Method 

  • Take all of the above ingredients in a wide salad bowl and toss it lightly. 
  • Serve immediately else the veggies and fruits will go limp and lose the crispness. 
  • Keep the salad bowl on an ice bath to retain the freshness when serving in summer for barbecue parties. 

Notes

  • You can adjust the measurements of lime juice ,salt and sugar depending on your taste buds . 
  • Chopped onions and tomatoes can also be added to the salsa for added crunch and taste .


Pin up 


September 03, 2021

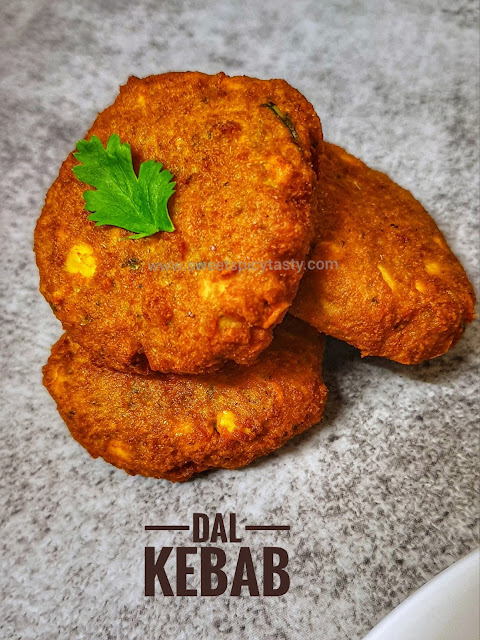
Dal Kebab | Dal Kababs


Share with friends and family 16 comments:

Kebabs are native of Mughalai cuisine a wonderful culinary gift from the Moguls to us
 .Originally, Kababs were made out of minced meat mixed along with a whole lot of aromatic and exotic spices and then either grilled or deep fried . As always, recipes and cuisines  undergo various innovations and changes over time to suit to the native taste buds and thus evolved the various vegetarian version of Kababs . 

Kababs are one starter which I unfailingly order everytime we dine out . Seekh kababs,hara bhara kebabs ,dal kebabs ,dahi kababs are some of my all time favorites.  Kababs if made well ,are soft ,juicy ,succulent and melt in mouth often paired with a delicious Imli chutney or Spicy Hara Dhaniya Chutney .

Dal kababs are rich in protein and easy to make for a beginner . Dal kebabs are perfect for parties .how to make kebabs at home , vegetarian kabab, mughalai kabab, kebab, mughalai cuisine , dal kabab,channa dal kebab, channa dal kabab

 My blogger friend Sujata ji's blog was an inspiration for me to try my hands on making Kababs at home . Her Rajma Spinach Kabab was my inspiration post which gave me the confidence to prepare kababs at home.  You must also definitely try out the innovative Ivygourd Channa Kabab / Tendli Channa Kabab by Preethi . 

We are celebrating Kabab Special in our food group Shh cooking secretly challenge for the month of August  and am linking these Delicious Dal Kebabs to this month's event. 


Dal kababs are rich in protein and easy to make for a beginner . Dal kebabs are perfect for parties .how to make kebabs at home , vegetarian kabab, mughalai kabab, kebab, mughalai cuisine , dal kabab,channa dal kebab, channa dal kabab

Dal kababs are rich in protein and easy to make for a beginner . Dal kabab is more or less a close cousin of the Masala Vada except for a few extra ingredients like whole spices and masalas that go into the making of the kabab batter . Kids will definitely love these mildly spiced kabab and these will be a super hit at any kind off get togethers. With a little pre planning and preparation you can make delicious melt in mouth Dal Kababs at home and your family cannot stop with one .


Soaking Time - 2 hrs
Preparation Time - 30 mins
Frying Time - 20 mins 
Makes about 10 to 12 kababs 

Ingredients 
1 cup channa dhall 
2 medium potatoes 
2 green chillies 
1/2 tsp saunf/fennel seeds 
Handful of fresh corriander 
Few mint leaves 
2 tsp lemon juice
2 tbsp bread crumbs 
1/2 tsp haldi powder
1/2 tsp red chilli powder
1 tsp garam masala 
1/2 tsp amchur powder/ chat masala
Small piece of ginger 
Oil for deep frying
Salt to taste 

Method 

Dal kababs are rich in protein and easy to make for a beginner . Dal kebabs are perfect for parties .how to make kebabs at home , vegetarian kabab, mughalai kabab, kebab, mughalai cuisine , dal kabab,channa dal kebab, channa dal kabab

  • Wash and soak the channa dhall in enough water for 2 hrs. 
  • Boil and peel the potatoes . 
  • Drain the water and add the dhall to a blender along with green chillies, corriander ,saunf and mint leaves and grind to a fine paste . Donot add too much water while grinding else the batter will become runny .If need be , sprinkle water while grinding .
  • Transfer the ground paste to a mixing bowl , add salt , grated potatoes,  bread crumbs,  haldi powder ,red chilli powder ,garam masala , amchur powder,  lemon juice and mix it all well .
  • Rest this batter in the fridge for 20 to 25 mins . This step ensures that there is no extra water and the salt also coagulates well into the kabab mix. The kababs will hold good shape if the dough is refrigerated.
  • Heat the oil in a deep frying pan .
  • Take the kabab batter out of fridge and pinch out small roundels and shape them into Tikkis or flat cookie like and deep fry in the oil on medium flame until the kababs turn crisp and golden brown .
  • Serve it hot with chutney of your choice. 

Pin it up for future 

Dal kababs are rich in protein and easy to make for a beginner . Dal kebabs are perfect for parties .how to make kebabs at home , vegetarian kabab, mughalai kabab, kebab, mughalai cuisine , dal kabab,channa dal kebab, channa dal kabab


June 15, 2021

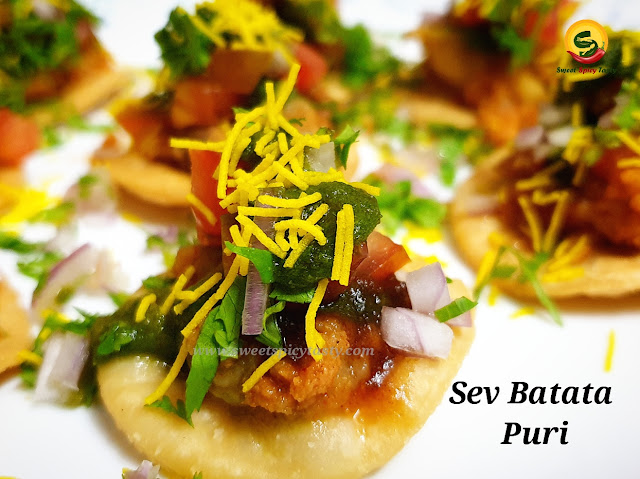
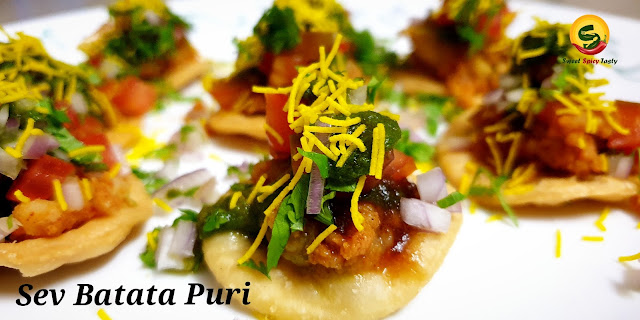
Sev Batata Puri | Paapri Chat | Papdi Chat


Share with friends and family 6 comments:

Sev Batata puri is one of the famous and sought after street food items from Bombay alongside BhelpuriPaani Puri and Pavbhaji .

 Sev (सेव) is deep fried string hoppers made using gram flour, Batata (बटाटा) in Marathi is potatoes and Puri or paapdi (पूरी / पापडी) are small deep fried discs made using All purpose flour / maida . . 

Well,not only is this famous in Bombay,it is also famous all over the Northern India popularly know as Paapri Chaat or Paapdi Chaat .  Though there is a slight difference in the chutneys used,  the end result is always too good to be put in words . With each bite you can feel an explosion of flavors and various tastes in your mouth which needs to be experienced and enjoyed :-) 

Sev Batata puri is one of the famous and sought after street food items from Bombay alongside Bhelpuri,  Paani Puri and Pavbhaji ,sev puri, sev batata puri, papdi chat , papri chat , vegan street food , tasty sev batata puri , सेव बटाटा पूरी, सेव पूरी, पापरी चाट,पापड़ी चाट

 We can also make these discs using whole wheat flour .  For this recipe today,  I have used store bought puris which were made out of maida .

You can look up my video link  below to prepare whole wheat puris at home . I generally prefer to use a slightly spicy version of the puris as it adds up to the taste of the chaat .

If we have all the ingredients ready ,it hardly takes 15 mins to put this snack together else you will need about 1-  2 hrs to prepare the potato filling , chutneys, chopping of onions , tomatoes ,corriander etc. 

Sev Batata puri is one of the famous and sought after street food items from Bombay alongside Bhelpuri,  Paani Puri and Pavbhaji ,sev puri, sev batata puri, papdi chat , papri chat , vegan street food , tasty sev batata puri , सेव बटाटा पूरी, सेव पूरी, पापरी चाट,पापड़ी चाट

Preparation Time - 1hr
Assembling Time - 5 mins
Serves - 2 
Complexity - Simple 

Ingredients 

14 puris / paapdi
2 medium sized potatoes boiled and mashed 
1/2 cup onion finely chopped  (skip for the No Onion No garlic version)
1/2 cup tomato finely chopped 
1/2 cup nylon sev 
Chat masala to sprinkle 
Finely chopped corriander for garnish 

Method 
  • Arrange 7 papdis each on 2 set of plates.
  • Season the boiled and mashed potatoes with some salt and red chilli powder and mix them well.
  • Place about 1/2 tsp of potato filling on each puri.
  • Place some onions and tomatoes over the potato filling.
  • Top the puris with 1/2 tsp each of dates tamarind chutney and green chutney. 
  • Sprinkle some chat masala and garnish with a lot of sev and finely chopped corriander. 
  • Delicious sev Batata puri is ready to be served.
Serving Suggestions/ Tips 
  • Keep all the ingredients ready before you start assembling the sev puri .
  • Serve it soon after assembling, else the puris will lose the crunch due to the chutney and the charm of biting into the crunch will be lost. 
  • You may also add some boiled whole moong beans or black channa (black chickpeas) to the potato mixture. 
  • You may add or reduce the amount of chutney you top up on the potato mixture depending on how spicy or mild you like the chaat to be .


Donot forget to Pin & Share 

Sev Batata puri is one of the famous and sought after street food items from Bombay alongside Bhelpuri,  Paani Puri and Pavbhaji .


February 01, 2021

Bread Bhajiya | Bread Pakoras


Share with friends and family 7 comments:

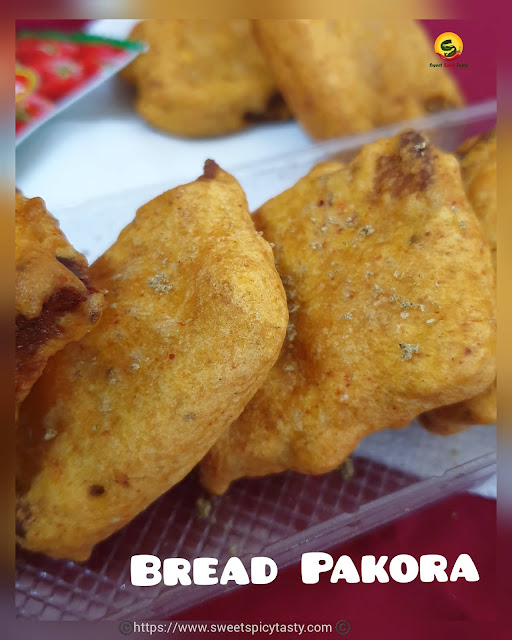
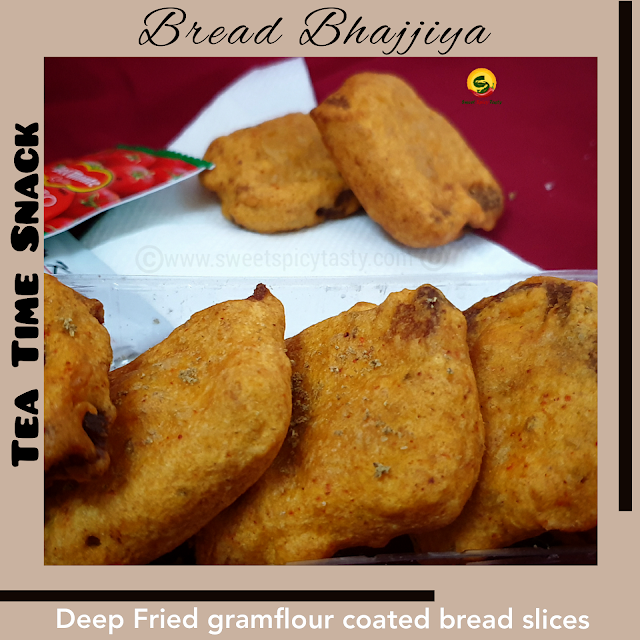
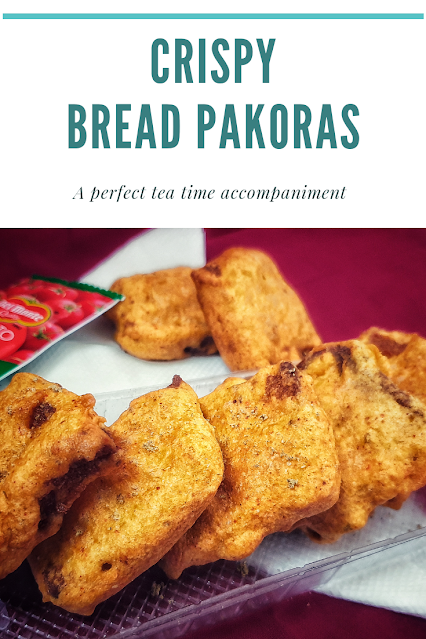
 Bread Pakoras or bread bhajiyas are very famous as street food special across the northern part of India. The snack is filling all by itself that many people have it even as a lunch option if they are pressed for time or have no restaurants close by. 

Bread slices are dipped in gramflour batter which is spiced using red chilli powder , finely chopped chillies and the slices are deep fried in oil.  

Apart from the simple variant, there are many variations like stuffing two slices with potato filling and then deep frying the gram flour coated bread or at times slices are layered with green chutney and sauce and then deep fried

Bread Pakoras or bread bhajiyas are very famous as street food special across the northern part of India.  Bread slices are dipped in gramflour batter which is spiced using red chilli powder , finely chopped chillies and the slices are deep fried in oil.  Bread bhajji, bread pakora , ब्रेड भजिया   ,bread pakoda, how to make crisp bread bhajiya at home

Street food culture basically came into existence to help people especially laborers have some food which can be affordable and they can easily grab a meal as they keep working..but over the time it so happened that Street food became everyone's choice due to various varities , options and tasty choices being made right in front of your eyes and at a pocket friendly price too. 

Bread Pakoras or bread bhajiyas are very famous as street food special across the northern part of India.  Bread slices are dipped in gramflour batter which is spiced using red chilli powder , finely chopped chillies and the slices are deep fried in oil.  Bread bhajji, bread pakora , ब्रेड भजिया   ,bread pakoda, how to make crisp bread bhajiya at home

If you are wondering why am I talking of street food , then let me tell you this week my namesake who blogs at Photowali, suggested we share popular Street food recipes for the 283rd week of FMBH . Priya has shared everyone's favorite Pav Bhaji as part of the theme posting.

Bread or paav is widely used in street foods all over India. Children as well as adults both love to munch on delicacies made using Bread. 

If you are a bread lover like me, then you must definitely check out these special street foods of Bombay which are too hard to resist. 

Mumbai Special Toast sandwich 

Vegetable Cheese Grill Sandwich 

Buttery Paav Bhaji 


The other famous street food delicacies from Mumbai is also on my blog , do try them and I  promise you will be spoilt for choices 😉  . The links are added below here 


At home we  like our bread pakoras plain and spicy without any stuffing . I generally make the batter a little spicy by adding some extra chilli powder . The bread slices are either cut into triangles or small squares  , both of them taste equally delicious.  I retain the bread crust and don't cut the edges . These edges when deep fried in oil gives a very nice crunch while we take a bite of the pakora . Sprinkle some chat masala over the bajjiya and serve it with hot masala tea.

Bread Pakoras or bread bhajiyas are very famous as street food special across the northern part of India.  Bread slices are dipped in gramflour batter which is spiced using red chilli powder , finely chopped chillies and the slices are deep fried in oil.  Bread bhajji, bread pakora , ब्रेड भजिया   ,bread pakoda, how to make crisp bread bhajiya at home

Preparation Time- 10 mins

Frying Time - 20 mins

Complexity - simple

Serves - 3 to 4 

Ingredients 

6-7 bread slices 

1 cup gram flour/besan

2 tbsp rice flour

2 tsp red chilli powder 

Salt as needed

1/2 tsp ajwain/carom seeds 

Pinch of asafoetida 

Chat masala to sprinkle.

Oil to deep fry

Method 

  • Cut the bread slices in to triangles or small squares the way you like .
  • In a wide mixing bowl , add the gram flour , rice flour , salt, chilli powder ,carom seeds and asafoetida with water and make a batter . The batter should be off dropping consistency like that of dosa batter .
  • Heat the oil in a deep kadai. 
  • Dip these bread slices in the gram flour batter and drop them into the oil carefully. 
  • Fry them on medium flame until the oil ceases to sizzle and the bhajiyas are fried to golden brown color and look crisp .
  • Drain them on an absorbent paper and serve hot with some green chignrybor tomato sauce with a dash of chat masala sprinkled over .
⬇️ Show some love by pinning this recipe ⬇️

Bread Pakoras or bread bhajiyas are very famous as street food special across the northern part of India.  Bread slices are dipped in gramflour batter which is spiced using red chilli powder , finely chopped chillies and the slices are deep fried in oil.


July 22, 2020

Masala Khichiya Papad - Satvik & Vegan


Share with friends and family 4 comments:

Masala papad needs absolutely no special introduction as it is now one of the most ordered starter or rather filler at any Indian restaurant.  
Today , we shall see a different variant of Masala papad using khichiya papad . This papad is a speciality of Gujarat region and Masala Khichiya papad has gained popularity as a delectable street food .


What is Khichiya Papad ?
Papads made out of rice flour as main ingredient is known as Khichiya in gujarati . Papad khar a special type of salt is used in the making of these papads ..papad khar has salt and some amount of soda bi carb and baking soda which help in making of papads.

These papads are rolled into medium thick rotis and dried under the sun until crisp and moisture free.They are then stored in airtight containers 

How is khichiya papad made?
Traditionally, rice flour along with salt and spices is slowly added to boiling water and using a ladle it is mixed well without lumps till it comes together like a dough.
The dough is kneaded further with hands and then steamed in a steamer for 12 to 15 mins.
Once it is bearable to touch , small balls are pinched out of this dough and the rolled into medium thick rotis and sun dried until crisp.

Do we have different flavors in Khichiya papad? 

There are many variants . Some of which I  have tasted are listed below.

Saadha (plain) Khichiya papad
No extra added flavors except salt .

Spicy khichiya 
 It is spiced up using red chili powder or green chillies .  The red chilli variants looks slightly reddish in color due to the chilli powder being added where as the green chilli variant has just a paste of green chillies added to the basic dough before rolling it out .

 Pudina khichiya 
 Paste of mint leaves and green chillies is added to the dough while kneading and then rolled out. This variety will have a mild greenish color after frying.

Garlic khichiya
Flavored with some garlic paste to the dough .

Jeera / Ajwain khichiya
Either jeera (cumin) or ajwain(carom) seeds are added to the dough as flavoring agents or at times a combination of both are added. 

How to eat khichiya papad ?
The sundried papads are either roasted on open flame or deep fried and served as a snack or an accompaniment with lunch or dinner .
Traditionally they were roasted on burning charcoal and topped with some ghee and red chilli powder .


Today's recipe is all about how to make a tasty , crunchy and lipsmacking masala khichiya papad at home just like the ones served at the street food carts. This can serve as a perfect tea time snack or small hunger pangs for the kids who are now attending online classes from home .

I have used store bought sun dried khichiya papads and today we shall see how to make masala papad using fried khichiya papad.

Preparation Time : 10 mins
Frying time : 30 sec per papad
Serves -1 papad per person
Complexity: simple

Ingredients
Khichiya papad as much as needed 
Finely chopped cucumber 
Finely chopped tomatoes
Finely chopped onions (optional) 
Sev as needed 
Fried channa dhall 
Finely chopped corriander 
Green chutney as needed 
Some chat masala
Some red chilli powder .


Method
  • Fry or roast the khichiya papads and keep ready.
  • Take one papad , place it on a plate .
  • Spread some tomatoes, cucumber, sev , fried channa dhall. 
  • Drizzle some green chutney all over . Don't spread too much chutney as you will lose the crunch quickly .
  • Sprinkle chat masala , red chilli powder and garnish with finely chopped corriander and serve immediately. 
  • You can drizzle some dates tamarind (meetha) chutney if you like .

Linking this to Valli's Kids' Delight event hosted by Kalyani this month for Monsoon Special.


July 10, 2020

Masala Puri | Masal Puri - Karnataka Spl Street Food


Share with friends and family 8 comments:

Masal Puri as it is coloquially called is a street food which originated in Karnataka and famous across the southern states of Tamil Nadu,Kerala , Andhra and slowly gaining popularity with street food Lovers . Masala Puri can be called as a close cousin of Ragda Puri which is another popular street snack served in Bombay where the ragda is prepared using Yellow dried peas. 


The speciality of Masal Puri is the tasty Masala which is prepared  by soaking the dry green peas and the cooking it with a blend of spices.  This piping hot spicy masala is poured over crushed puris and garnished with some sweet and spicy chutneys along with chopped onions , tomatoes, grates carrots and finally and handful of crunchy mixture /farsan is spread over the chaat and served.  
The melange of flavors and the warm masala over the crunchy puris which have become partly soggy is a feast to the taste buds and you must eat it atleast once to know what it feels like .
Doesn't all this description get you drooling and make you want to have a bite right away ?
Well, worry not with a little pre preparation you can prepare this lip-smacking Masal Puri at home and enjoy with your family and friends. 

Some of the famous lip-smacking street food recipes on my blog which you would love to try 


What are the main elements that go into Masal Puri ? 

  • Masala made using soaked green peas . There can be many ways to do this, but I will share the recipe which we all like at home and is closest to what we have had food joints . You can make your permutations and combinations by adjusting the spice levels or even use mixed sprouts instead of just soaked green peas .
  • Pani Puris to be crushed and use while preparing Masal Puri.
  • Chutneys  - Green chutney and Sweet Chutney 
  • Finely chopped onions, tomatoes ,cucumbers and some grated carrots .Skip onion for the satvik version
  • Handful of spicy mixture of farsan and some roasted groundnuts 

Soaking Time - 8 to 10 hrs 
Preparation Time - 20 mins 
Cooking Time - 40 mins
Complexity -  Simple 

Ingredients 
100 gms soaked dry green peas
1 medium size potato  boiled and peeled
2 medium tomatoes chopped 
1 small cucumber chopped 
1 small carrot peeled and grated 
1 medium onion finely chopped (optional)
1 cup spicy mixture or farsan
10 to 15 fried pani puris (or as much as you need)
2 tsp garam masala powder
1/2 tsp red chilli powder 
1 tsp dhaniya powder
Salt as needed
Finely chopped coriander
2 tsp oil 
1/2 tsp jeera 
2 green chillies finely chopped 
Finely chopped ginger 

Method 

How to prepare the Masala ?


  • Pressure cook the soaked green peas with some salt until it is soft and slightly mushy.
  • In a pan , heat oil splutter the jeera and fry the green chillies and ginger . 
  • To this add the dry masalas (garam masala, red chilli powder, dhaniya powder) and fry on low heat for 30 seconds taking care not to burn it.
  • Pour the boiled peas along with the water to this spice mixture along with potato crumbled and mix it well.
  • Add about 2 cups of water and adjust salt if needed and bring it to a nice boil. The masala should have pouring consistency.  
  • Garnish with coriander and keep aside. 
Preparation of Chutneys 


Meetha /Dates Tamarind chutney
8-10 dates - remove the seed or use seedless
lemon sized tamarind
2-3 tablespoon powdered jaggery
1-2 tsp roasted jeera powder
1/2 tsp red chilli powder
pinch of salt.

Method
  • In a big vessel, add the dates and tamarind with 1/2 cup water and bring to a boil for 5 mins. Let it cool well.
  • Put them in a blender and grind it well and sieve it through a strainer.
  • To this thick extract, add the jaggery , red chilli powder,salt,jeera powder and about  1 cup water and bring it to a slight boil .
  • Once it cools down, you can refrigerate this chutney.
Theekha (Spicy Green) Chutney 

half a bunch fresh corriander / cilantro
1/4 bunch of pudina / mint
Few cashew nuts or raw peanuts
3-4 green chillies
1 tbsp lime juice
salt as per taste
pinch of  black salt
Pinch of sugar

Method

  • Blend all the ingredients except salt and black salt in a blender / mixie with minimal water only if needed.The lime juice does the needful.
  • Finally add the black salt and normal salt and mix well.
  • Store and refrigerate in a dry air tight container and use a dry spoon for prolonged shelf life.
How to assemble the Masalpuri /Masala Puri?


  • Crush about 6 or 7 pani puris on a plate. 
  • Pour about 2 to 3 ladles of the warm green peas masala over it and a few spoonful of sweet and spicy chutney.
  • Spread the chopped tomatoes, onions , cucumber, grated carrot and spicy mixture. 
  • Lastly garnish with fresh coriander and roasted peanuts for extra crunch.
  • Enjoy it warm with a cup of Masala Tea .


June 24, 2020

Kunukku | Dal Pakoda | Lentil Fritters - Traditional south Indian snack


Share with friends and family 4 comments:

Kunukku or Kunuku as it is called is a very tasty and delicious snack made using different lentils.  An age old traditional snack of Tamil Nadu which used to be made to satisfy the cravings of some fried snack . Olden days eating out or junk food was something that was not encouraged and the elders at home would prefer to make some healthy yet tasty snack at home for the kids . Most common ones used to be Bajjiyas , medhu vadas or this kunukku. 
With the introduction of various snack options now a days , these traditional ones are slowly being forgotten . 

As 80s kids we never really bothered about eating less calorie food or no fried snack or bothered about something called dieting and losing weight . Running about and playing outdoors would burn all those extra calories and all our parents  bothered about was getting us to sit down to do our homework and studies as we would never like to come home after playtime .

This snack can be prepared using left over adai or idli batter or can even be made fresh by soaking and grinding the lentils.  
Today I will share the recipe of how to soak and grind the batter to make these kunukku .
There is no fixed recipe as such for this snack because it differs from home to home on how their family liking has been.
I shall share the version which has been liked in my place .

Donot forget to try out the Karamani Kunukku (lobia pakoras) on the blog which was my grandmother's specialty and also the traditional Moong Bhajjiyas which are a famous street side delicacy .


Soaking Time - 45 mins
Preparation Time -10 mins
Frying time- 20 mins
Complexity- medium


Ingredients 
3/4 cup channa dhall /bengal gram dhall /kadalai paruppu
1/4 cup thoor dhall /pigeon peas /thuvaram paruppu 
2 tablespoon rice 
2 tablespoon  udad dhall /ulutham paruppu (for softness)
3 to 4 dried red chillies
2 green chillies
1 tablespoon grated fresh coconut 
Salt as needed
Pinch of hing/asafoetida 
10 to 15 curry leaves /kadipatha 
Handful of finely chopped corriander

Method 


  • Wash the dals and rice multiple times and soak it for 45mins to 1 hr . The water used for soaking should be 1 inch above the dhalls and rice after washing. Soak the dried red chillies also along with the dhalls. This will make the chillies soft and will grind easily. 
  • After 45mins, drain the water and add it to a blender along with salt , grated coconut, asafoetida and few curry leaves.  Reserve the balance for adding to the batter .
  • Add water little by little and grind to a semi thick batter . The batter has to be smooth and not very coarse and should not be very runny , else you cannot drop them into the oil for frying .
  • Transfer the batter to a mixing bowl, add in the chopped corriander and curry leaves and mix well . You can some mint leaves or chopped onions also if you like . I have not added. 
  • Heat oil in a kadai and when it is heated well, take some batter in your hands and drop them randomly into the hot oil. Reduce the flame to medium and fry until they turn crisp and golden brown. Donot crowd the kadai with many fritters as they wont get fried evenly.
  • Drain it carefully and repeat another batch until all the batter is over . Serve hot with some chutney or it can be had as is with some piping hot filter coffee or masala tea.


Notes
  1. Incase you are unable to prepare kunukku after soaking, drain the water and keep it in the fridge and you can grind it the next day and make kunukku. 
  2. Never leave the soaked dals outside as it will ferment and give out a foul smell .
  3. You can also grind the batter and keep it in the fridge and use it later for frying . Try to consume within 24hrs as the batter will begin to turn sour and the sour taste may not be liked by all .
  4. Freshly ground adai batter can also be used to prepare this kunukku.


May 20, 2020

Cheesy Masala Papad


Share with friends and family No comments:

Papad is an integral part of any Indian meal . Papads are crunchy sun dried fritters served either fried or roasted along with the meal . 
Papads can even be microwaved or even air fried . 

What is papad or pappadum or appalam ?
Papads are prepared out of rolling a dough made using udad dhall flour , moong dhall flour or rice flour along with some spices . The dough is kneaded tightly and then rolled into thin discs like chapati/rotis and sun dried which are then stored for year around . This is mostly a summer activity undertaken by the ladies of the home. 
Now a days we have ladies wing and many small scale home industries which prepare and sell these papads across stores under various  brands with the  necessary hygiene and safety certifications .

What is masala papad ? 
Masala papad is a quick starter or an appetizer served just before the actual meal . A spicy tangy salad type mixture of finely chopped tomatoes, onions , cucumbers, lots of coriander with right amount of salt, red chilli powder , chat masala is spread over the roasted or fried papad and eaten with soups or cocktails/mocktails. 


Preparation Time - 10 mins
Cooking Time - nil 
Complexity- easy 


Ingredients
3-4 Roasted or fried papads 
2 medium sized tomatoes finely chopped 
1 cucumber peeled and finely chopped
1 onion finely chopped (optional - I haven't used).
2 green chillies finely chopped 
2 cheese cubes grated 
Finely chopped coriander 
Pinch of salt 
1/2 tsp red chilli powder
1/4 tsp black salt 
1/4 tsp chat masala 

Jain version- skip the onions 

Vegan version - skip the cheese 

Method 
  • In a wide mixing bowl , mix the tomatoes, cucumber, onions with salt, red chilli powder , green chillies, black salt and chat masala and toss it well. 
  • Add in the fresh corriander and lightly mix it .
  • Lay the papads on a plate , generously spread this salad mixture on the papads, top it with some grated  cheese and some crunchy sev.
  • You can also add a few drops of khatta meeta chutney or green chutney too for extra flavor and zing. 
  • Yummy masala papad ready. 
Do try the yummy street style Bhelpuri and 
Pani puri also on my blog .


Notes
  1. Spread the mixture on the papads just before serving else they will turn soggy and wont taste good .
  2. If you are preparing the masala papad for some party , prepare the mixture without adding salt , black salt and chaat masala. Add these and mix just before making the masala papad .
  3. Adding salt before hand will tend to release water from the veggies and the salad will be all watery and will be difficult to spread on the papads.
  4. I have used udad dhall pepper flavored papad. You can use moong dhall papad or even rice Pappad called khichiiya.


May 08, 2020

Mango Salsa


Share with friends and family 8 comments:

We all have a love hate relationship with summer dont we ?? I very much love summer and eagerly wait to gorge on the yummy ,sweet and  luscious mangoes while I hate it for the heat and sweat..well there is no gain without pain. 
This year's summer has been totally different for all of us across the globe . Most of us are staying indoors and doing our bit by breaking the chain while the frontline health workers are struggling to fight the pandemic.  Salute and prayers to them and their families to be safe .

Well , now that we have spoken of lockdown , kids are all at home and need to be engaged as they get bored quickly as possible . Also they keep asking for something to munch on to keep the boredom away and parents look for healthy alternatives all the time. 


Salsa is the Spanish word for sauce but in present day cuisine it is mostly used as a dip or an accompaniment to nachos, burritos, grilled veggies etc.  There are lot of varieties of salsa which can be prepared,today we shall prepare the tangy sweet and mildly spiced Mango Salsa as it the season of Mangoes. 

Mango salsa is a very refreshing sauce or dip and is certainly a riot of flavors when we take a mouthful ..have it with nachos or as is , it is too good to resist . Let us quickly get to the recipe now .

Preparation Time - 10 mins
Cooking Time - Nil 
Assembling Time - 2 mins 
Complexity- easy 


Ingredients
1 sweet ripe mango 
1 medium sized tomatoes 
1-2 less spicy green chilly 
1 medium sized salad cucumber 
Lemon juice from 1 lime
Pinch of salt
Pinch of freshly ground pepper 
Lots of fresh corriander 

Method 
  • Peel the skin of the mango and chop it into small cubes .
  • Deseed the tomatoes and cut into small cubes. 
  • Peel the cucumber , cut into small cubes .
  • In a salad bowl , add the chopped mangoes, cucumber, tomatoes and the finely chopped green chillies, pepper , salt and lime juice.
  • Mix all of it gently and lastly add the freshly chopped corriander. 
  •  You may chill it in the fridge for a while or place it on an ice bath and enjoy with your favorite nachos .

April 20, 2020

Bhelpuri - Indian Snack


Share with friends and family No comments:

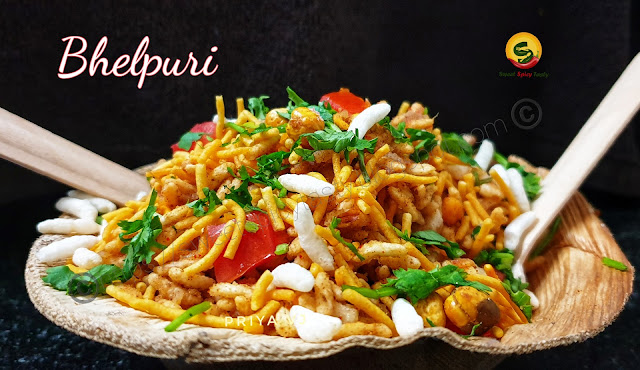
Bhelpuri is one of the most loved and relished street food of India . It is called by different names in various parts of India like Jhalmuri in Kolkatta , Bhel in Maharahstra /Gujarat ,  Masal Pori or Mandakki in Karnataka, Pori Kadle in Tamilnadu .
Names may be different but the main ingredient remains the same - Puffed rice/kurmura/pori  Depending on the regions the various chutneys and flavoring spices added to this impart its regional taste, touch and feel to the snack .
As many of you might know about my love and connection to Mumbai , you just cannot separate the street food flavor as well as the Mumbai out of me .So as you guessed it right , today we shall see how to make Bhelpuri the way it is served in Bombay .
The main flavoring for bhel comes from the Theekha chutney and Meetha chutney which play a very important role .
You can check out how to make the two chutneys and store it in your freezer . If you have the chutney ready then it is absolutely a child's play to assemble Bhelpuri. 

Preparation Time - 10 mins
Cooking Time - Nil
Complexity- easy

Bhel , bhelpuri , street food, chaat bhel , chowpatty style bhel puri, mumbai bhel , bombay bhel puri, bhelpuri, mandakki , puffed rice chaat, indian starter , indian street food


Ingredients
1 big bowl of puffed rice/kurmura/ pori
1 medium sized potato boiled and mashed
2 medium tomatoes chopped finely
1 medium cucumber chopped finely
1 medium onion (optional) chopped finely
3-4 tablespoons meetha chutney
2 tablespoon Theekha chutney
1/2 lemon
Finely chopped coriander
Some fine sev /aloo sev
Handful of Flavored groundnuts /fried channa dhall
Pinch of black salt
1 tsp red chilli powder.

Method

  • In a wide mixing bowl, add the chopped potatoes, tomatoes, onions, cucumber with some meetha chutney and theeka chutney and mix it well with a spoon . This will ensure the flavor is well absorbed by the vegetables. 
  • Add in the puffed rice, remaining chutneys, some flavored groundnuts /channa dhall, red chilli powder , black salt and mix it well until the chutneys coat the puffed rice nicely. Lastly squeeze some lime juice and mix it again .
  • You can adjust the spice as per your taste by adding or reducing the amount of chutneys used .
  • Lastly garnish the bhel with some crisp sev and fresh coriander and serve it with a cup of tea . 
  • I have not used onions as we follow a no onion no garlic diet at home . 
  • Fresh and thinly diced raw mangoes can also be added in the mango season


Meetha chutney
8-10 dates - remove the seed or use seedless
lemon sized tamarind
2-3 tablespoon powdered jaggery
1-2 tsp roasted jeera powder
1/2 tsp red chilli powder
pinch of salt.

Method
  • In a big vessel, add the dates and tamarind with 1/2 cup water and bring to a boil for 5 mins. Let it cool well.
  • Put them in a blender and grind it well and sieve it through a strainer.
  • To this thick extract, add the jaggery , red chilli powder,salt,jeera powder and about  1 cup water and bring it to a slight boil .
  • Once it cools down, you can refrigerate this chutney.
Theekha Chutney 

half a bunch fresh corriander / cilantro
1/4 bunch of pudina / mint
Few cashew nuts or raw peanuts
3-4 green chillies
1 tbsp lime juice
salt as per taste
pinch of  black salt
Pinch of sugar

Method

  • Blend all the ingredients except salt and black salt in a blender / mixie with minimal water only if needed.The lime juice does the needful.
  • Finally add the black salt and normal salt and mix well.
  • Store and refrigerate in a dry air tight container and use a dry spoon for prolonged shelf life.

July 07, 2019

Oats Tikki - Vegan Starter


Share with friends and family 3 comments:

Oats as we all know is a very healthy and fibre rich cereal which can be a part of daily breakfast for a healthy life style . All good things definitely come with a downside , and Oats is no exception . Many people donot like the flavor and texture of Oats and try to avoid it . Especially to include oats in kids' diet becomes very difficult .


Today I have prepared a cutlet / Tikki / Patty ; whatever you may call it using  Oats & healthy vegetables like sweet potato, green peas and carrot . The usual cutlets or patty are potato based but this tikki does not use potato . Trust me , there is hardly any difference in taste . Also, this is shallow fried and a pure vegan starter . Perfect appetiser option for parties, pot lucks ,picnics or any form of get together .

Post updated-  feb 2022

Preparation Time : 30-45 mins
Cooking Time : 15 mins
Makes : 8-10 Tikkis
Complexity : Medium


Ingredients
2 medium sized sweet potatoes boiled
3/4 cup rolled oats (non flavored)
handful of green peas boiled
1 medium size ccarrot grated
2 tsp green chilli paste
chopped fresh corriander leaves
oil to shallow fry
salt as needed

Method


  • Roast the oats in a dry pan until it turns crisp and keep aside.
  • In a wide mixing bowl, mash the sweet potatoes after peeling the skin.
  • Add grated carrots , boiled peas , green chilli paste, corriander leaves, salt and the roasted oats and mix it well to form a smooth dough .
  • Refrigerate this dough in the fridge for about 20-30 mins,(This step ensures the salt is coagulated and the patty dough becomes firm and stiff.)
  • Take it out and pinch out small balls and flatten them in the shape of patty and keep ready.
  • Heat a pan / tava and place the tikkis on the tava and drizzle oil around them and cook on both sides until they turn crisp and golden brown.
  • When you take it off the pan , it make appear a little soft but after 5 mins it will become firm .
  • Serve with green chutney or tomato ketchup .

Other tea time snacks / starters included in my blog are listed below . Click on the names to get the recipes.


March 06, 2017

Kothimbirchi Wadi | Corriander Fritters


Share with friends and family No comments:

Kothimbirchi Wadi is a traditional tasty Maharashtrian Snack which is steamed first and then deep fried.Off late due to health and fitness sake, I have cut down the usage of oil for deep frying and tried to shallow fry it in minimal oil. Trust me there was no compromise on the taste and turned out crispy as well. Also,besan or gram flour is low in glycemic index hence even diabetic people can also indulge into this healthy snack.
In fact,I tasted just the steamed vadis and really liked it as is. That is even more healthier in my opinion as it is just steamed . Serve it with fresh green chutney or even tomato sauce.
Each household may have slight variations in the preparation of this wadi,this one is simple and easy to make with all  ingredients readily available in the pantry.
Without further delay,let us get on to the recipe.


Preparation Time : 5 mins
Cooking Time : 30 min (Steaming : 15-18 mins | Shallow Frying : 8-10 mins)
Serves : Makes about 20 pieces
Complexity : Medium

©Sweet Spicy Tasty©


April 23, 2013

Moong Dal Pakodas / Yellow Split Lentil Fritters


Share with friends and family 1 comment:

Who would not like to treat the taste buds with a palate of crispy,hot snacks and a piping cup of tea?Well,this is an apt snack for tea time,weekend parties or any get together.
Try this very famous street food of Mumbai aka Bombay which is served very very hot from the frying pan to the plate . This is a go to snack for many office goers on their return home as it is filling and tasty .
Requires some 3-4 hrs of preparation time and about 15 mins for grinding and frying you have the best snack with you to please your tummy :-)

Cripsy from the out and soft from inside,serve with tomato sauce or Mint Corriander chutney.

Preparation Time : 3-4 hrs (minimum 1hr soaking is needed)
Cooking Time : 20 mins
Makes about 24-30 pakodas / bhajias/ fritters